





Tips Index
A new era has begun, visual effects are even calibrated on the highest possible quality, invested in the best entertainment there could be, from cinema, music industry, and even to personal use, a competition of both photos and images in motion. High definition has been the highest standard only until the birth of 4K. Vivid, bright, sharp and specific, 4K has been delivering awe to awe in audiences, but the common public can’t wait to have its own, now that 4K is available to everyone more than ever.
Photo slideshows have been a key use for different occasions like meetings, school works, weddings and birthdays. People have been using HD slideshow maker or slideshow software to produce projects or tasks. VideoPower BLUE is a powerful software an amazing slideshow maker that can produce 4k photo slideshow in stunning qualities, more than that, it has multiple functions to stretch your creativity. You can try to use this best slideshow maker software for free by downloading its trial version below.
Step 1: Create Slide Show
1.1 Import Photos
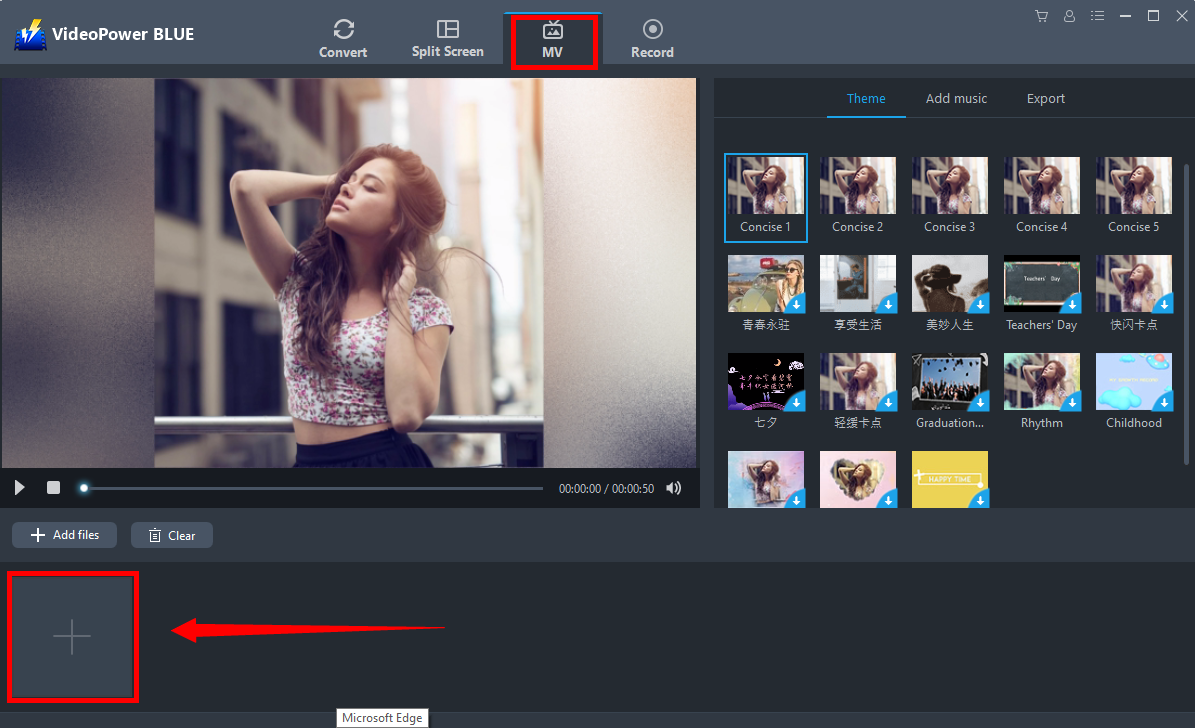
Navigate to the “MV” window through the interface, click on the “+” button at the bottom-left corner of the product to add photos. Make sure that the photos are of the highest quality.
1.2 Add Files Options
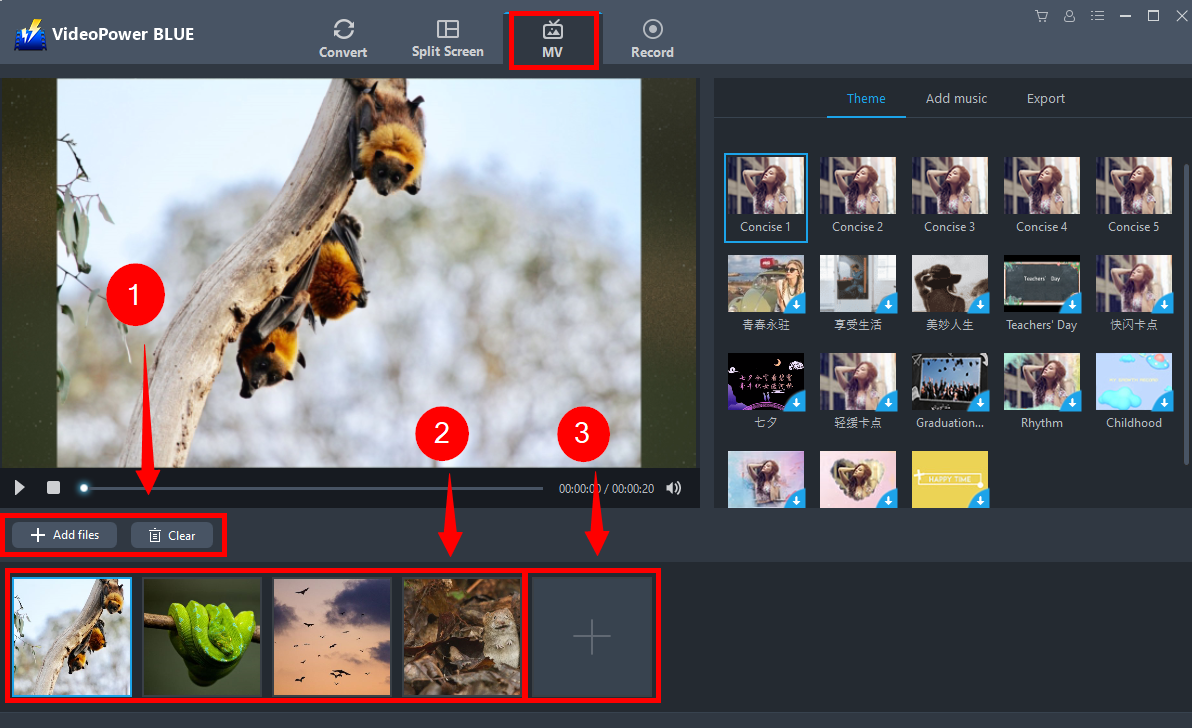
1) “+ Add files” & “Clear” – Users can always import another batch of photos to the system or delete any unnecessary additions.
2) Photos will be displayed on a random order. Rearranging the sequence can also be done by dragging photos on which order users might want.
3) Add files on this button but only on the last part of the sequence.
1.3 Set the Theme
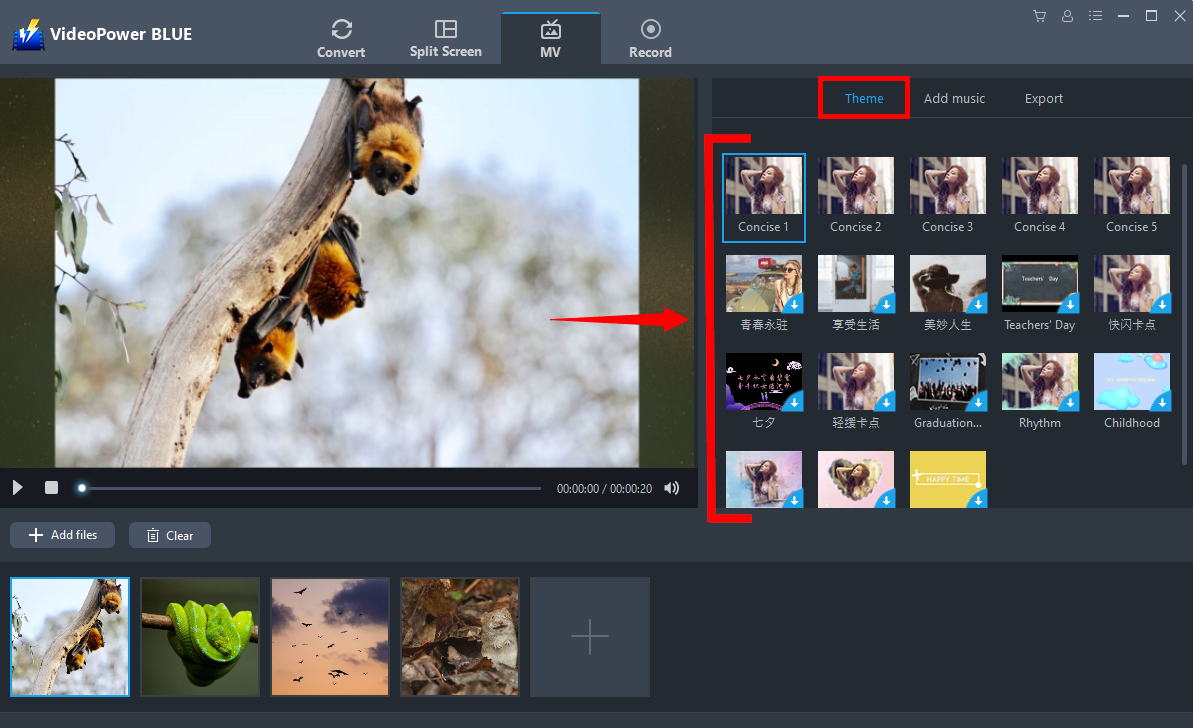
VideoPower RED has an array of creative themes available depending on the mood of the slide show. Select one of the given themes to create a masterful slide show.
1.4 Add Background Music
Reimagine slide shows with the help of creative music.
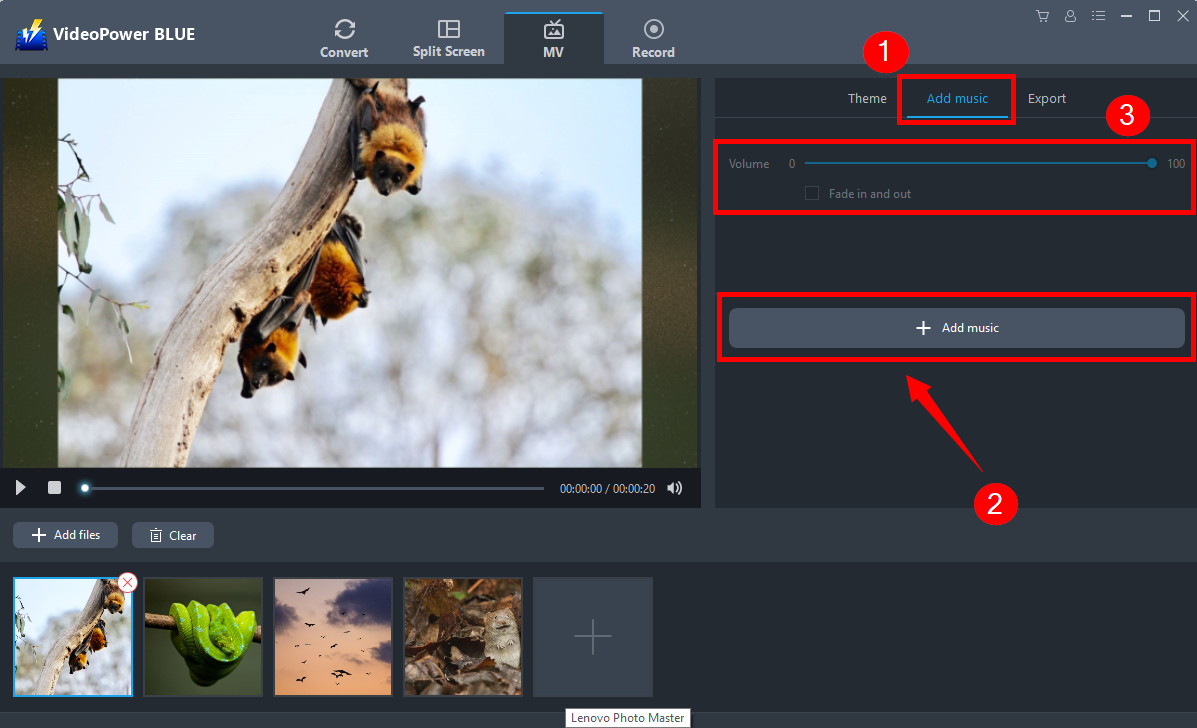
1) Click “Add Music”
2) Click “+ Add Music” and track the location folder of the desired background tune.
3) Adjust the volume of the track in the background. Fade in and fade out options are also available.
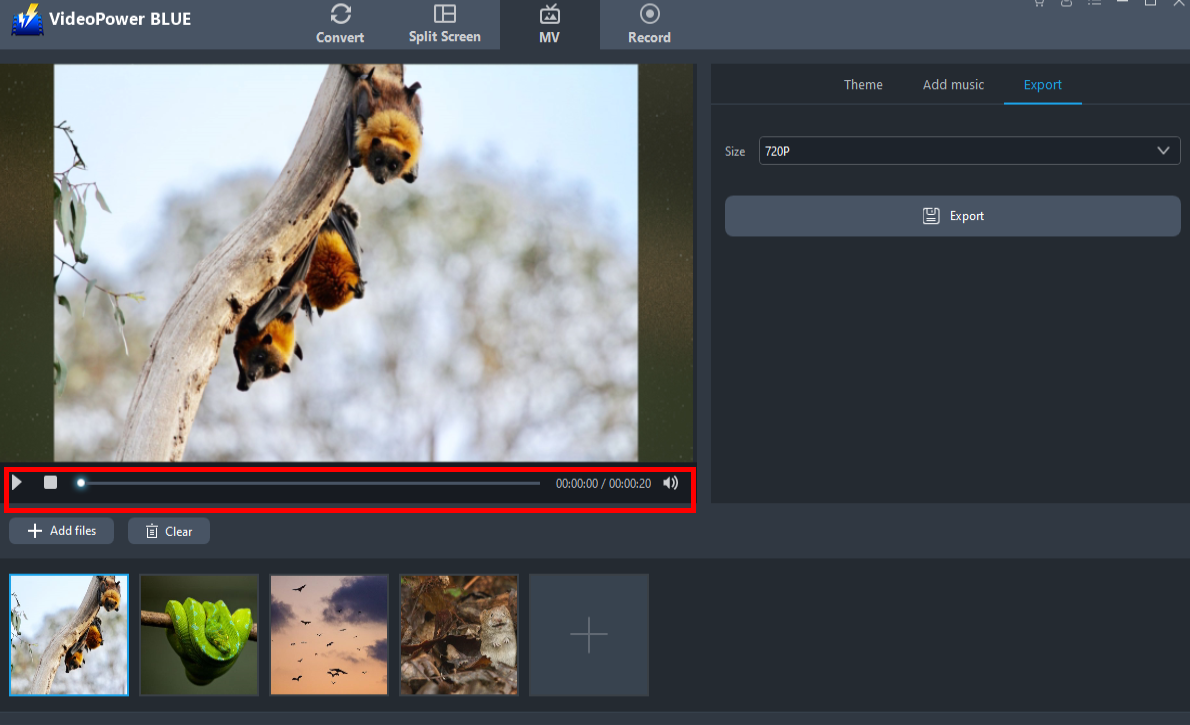
1.5 Preview Slide Show
A built-in player within the editing interface of the system is ready for previewing the slideshow draft. Click the play button to preview.
Step 2: Export Slide Show
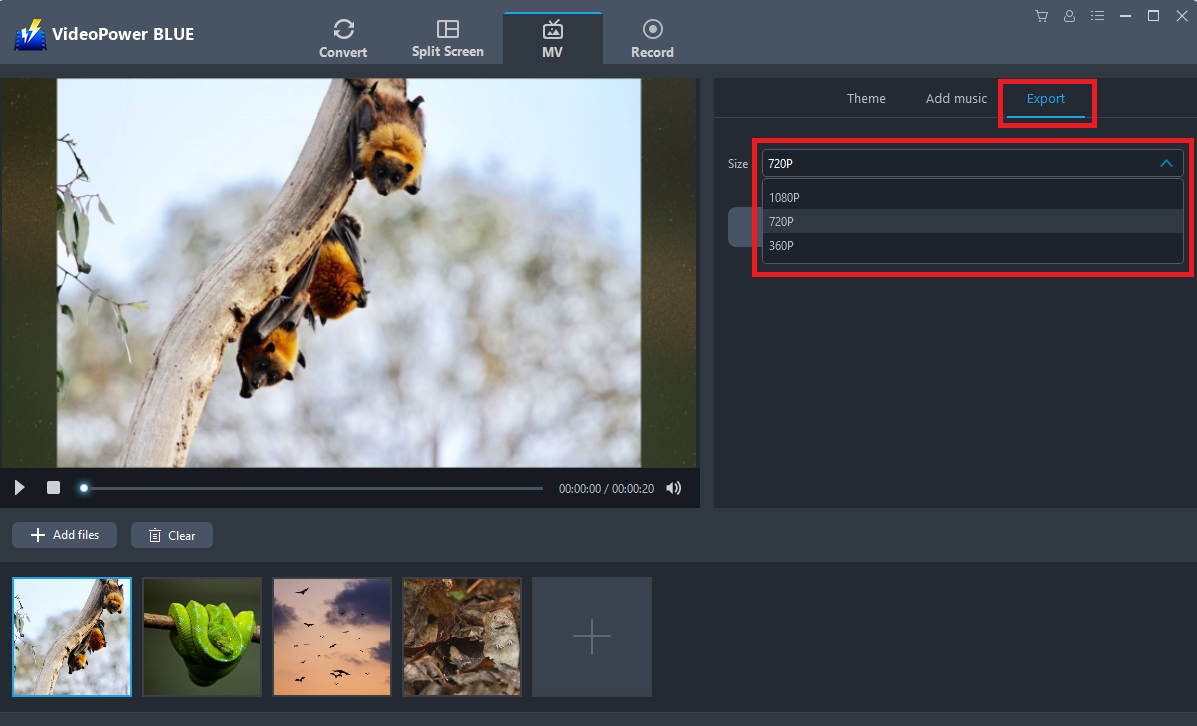
2.1 Set Resolution
Select the highest quality resolution of the slide show to obtain a better 4k render during conversion.
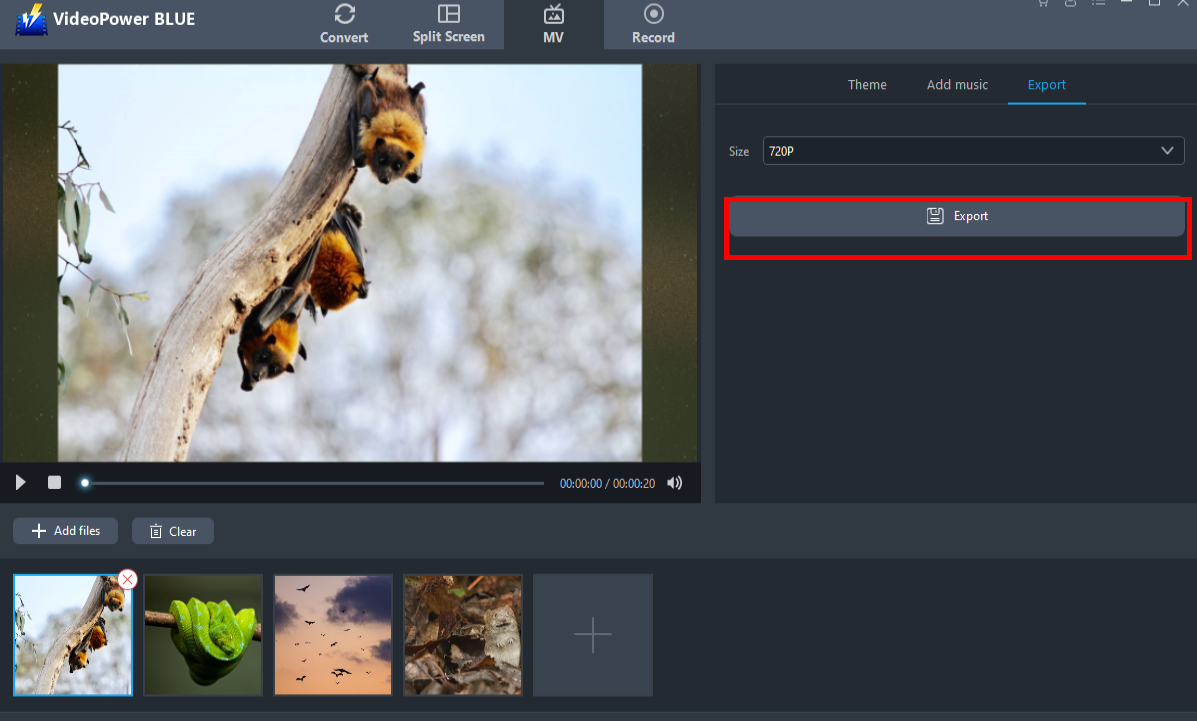
2.2 Start Exporting the Slideshow
Click the “Export” button to start exporting the created slide show file.
Step 3: Convert Export Slide Show
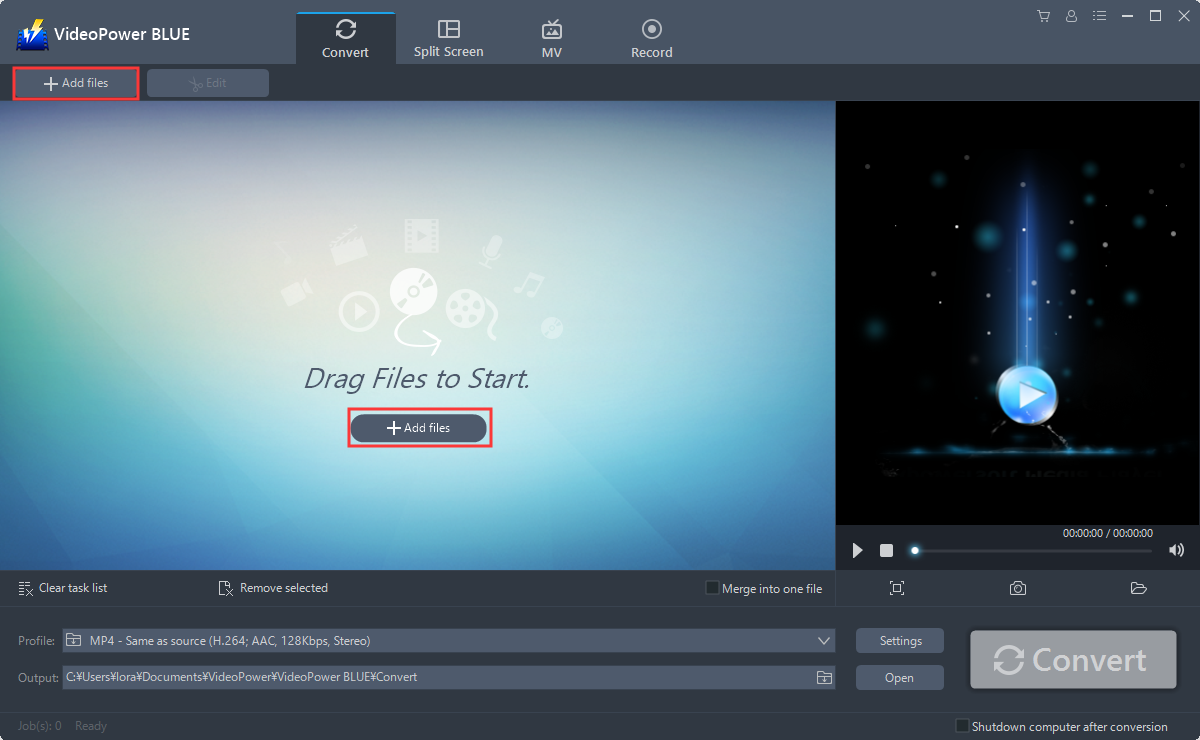
3.1 Add the Exported Slide Show
Navigate to the “Convert” window of the interface, click “+ Add files” to add the exported slide show. Make sure to locate the folder destination of the slide show.
3.2 Set the Output Format
Click on the “Profile” pull-up search bar to change the format of the slide show.
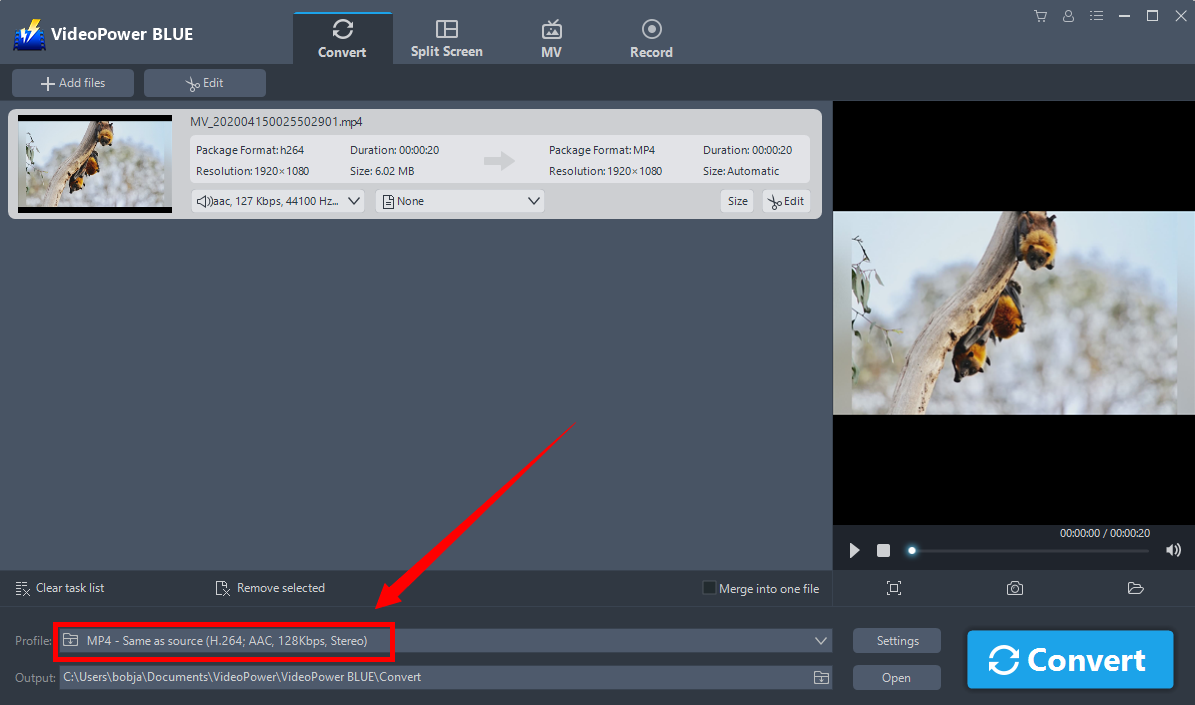
3.3 Convert to 4K Quality Resolution
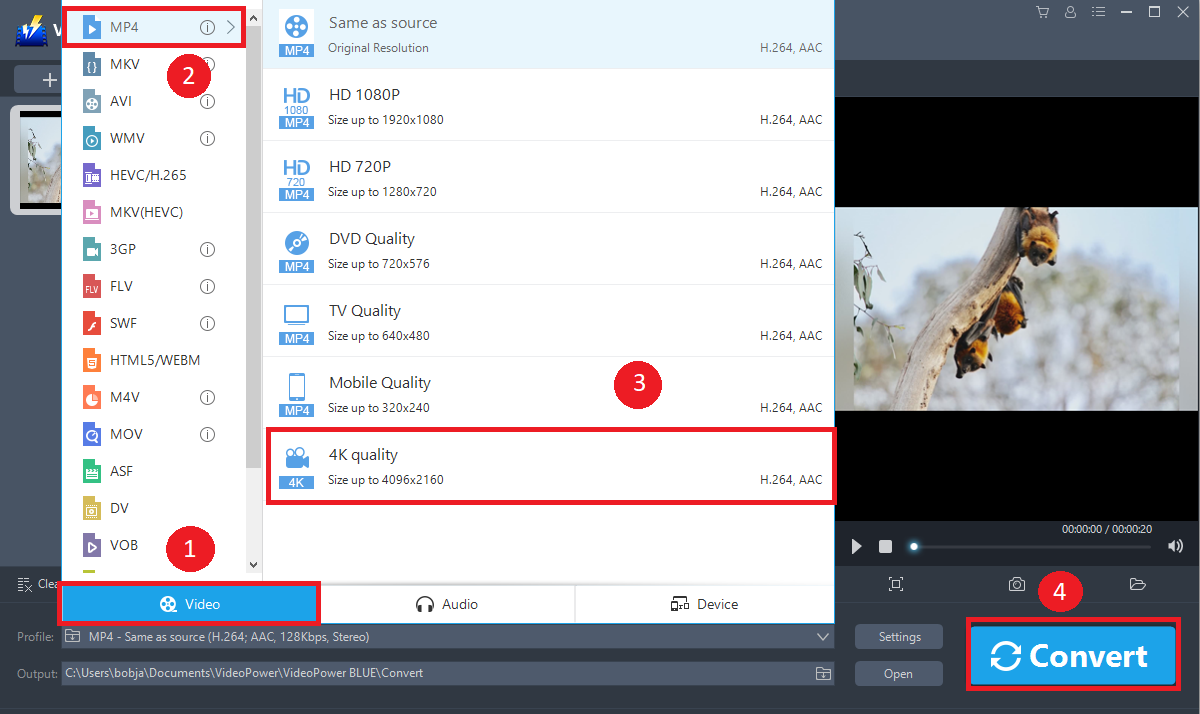
Set the 4k quality resolution format you desired for your slide show. Then click the ” Convert” button to start converting the slide show to a high-quality format you planned.
1) Click “Video”
2) Click “MP4”
3) Click “4K Quality”
4) Click “Convert”
Conclusion:
Whether it is for a report or simply an occasion, taking your slideshow experience into the next level will make your audience go in wow! Powerful as it may seem, VideoPower BLUE brings out ultra-clear 4k photo slideshows without the overly complicated buttons hard to understand, it is as easy as 123. VideoPower BLUE has also some powerful accessory functions like split-screen. Split-screen enables users to have multiple videos played in one show. It also has a screen and audio record function for tasks and projects. It is the best slideshow maker.


