Tips Index
WMV is short for Windows Media Video. It’s a common format used to store video in Windows, which is why some third-party programs use it for things like short animations.
Compared with other video formats, WMV format has many outstanding parts, like a high compression rate and its small size.
However, the WMV video file cannot be played on iOS devices as it must depend on Windows and only can be played with its own player.
MOV is a video container file format used in Apple’s Quicktime program and is mainly played in iOS devices. Users opt to convert their WMV files to MOV so they can play videos on their Apple devices. Here’s how.
VideoPower BLUE is a reliable WMV to MOV file Converter with multiple functions such as recording screen activity, basic video editing, and format conversion, which can help you convert the WMV file to MOV format without hassle.
Download and install the program on your PC by clicking the download button below.
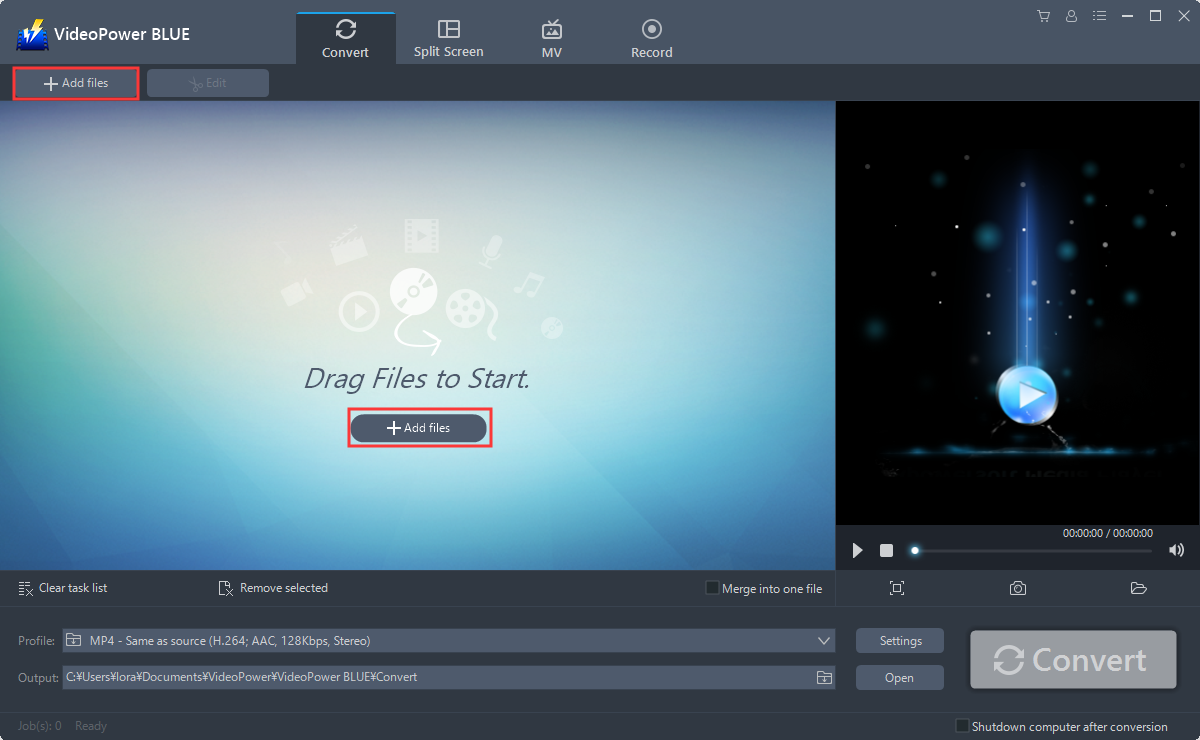
Step 1: Add the WMV file to the program
You can directly import the VOB file to the program by clicking the “Add files” button or by drag-and-drop to the interface.
Step 2: Edit the WMV video
Note: If you wish to convert the file directly, skip this step and proceed to Step 3. If you need to edit the file before converting, just follow the instructions below.
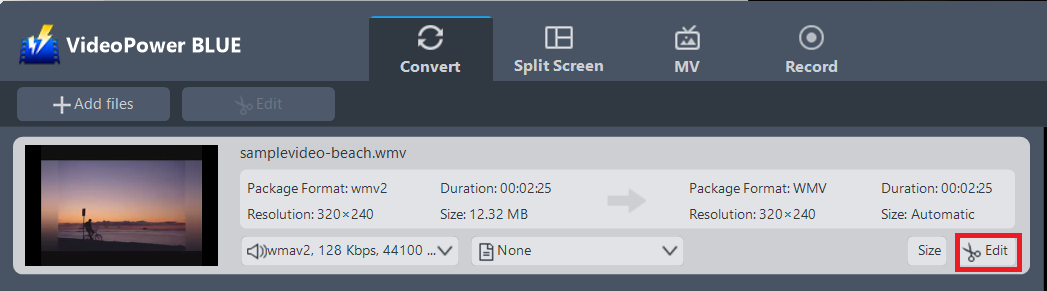
2.1 Open Editor
The imported WMV file is displayed in the list.
Click the “Edit” button on the right side of the file.
2.2 Edit video
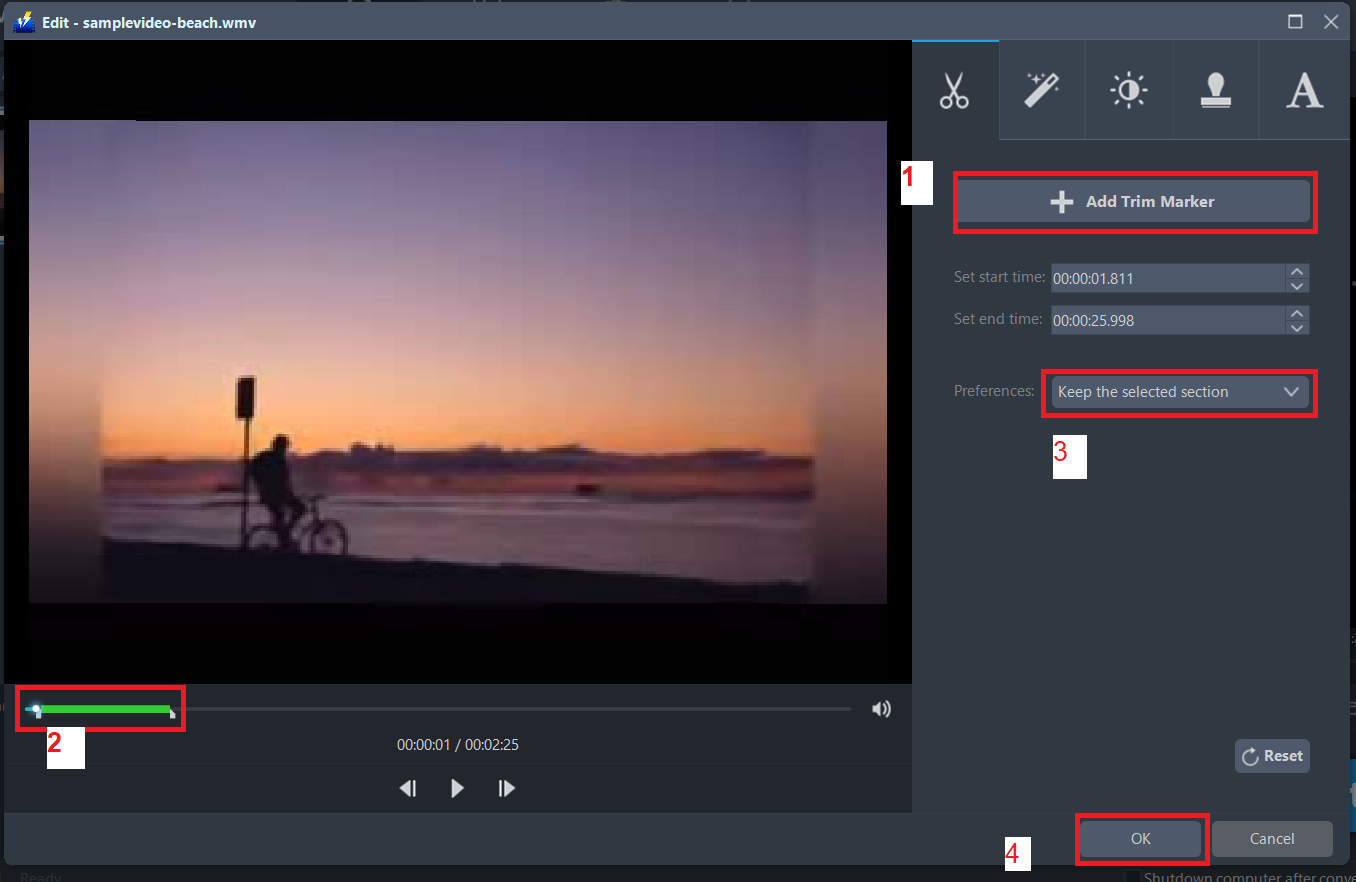
The built-in video editor will pop up, with its help, you can make the perfect movie. Adjust speed and volume, trim, cut, crop, rotate or flip videos. Add effects, subtitles, and watermark while adjusting brightness, contrast, and saturation that will make editing conveniently easier.
For example, you can trim your video as showing below:
1) Click “Add Trim Marker”.
2) Drag the mark as shown below to select the part you want to cut. If you want to select multi-sections, please repeat 1 and 2.
3) Choose “Keep the selected section” or “Delete the selected section” from “Preferences”.
4) Click “OK” to save the setting.
Step 3: WMV to MOV format
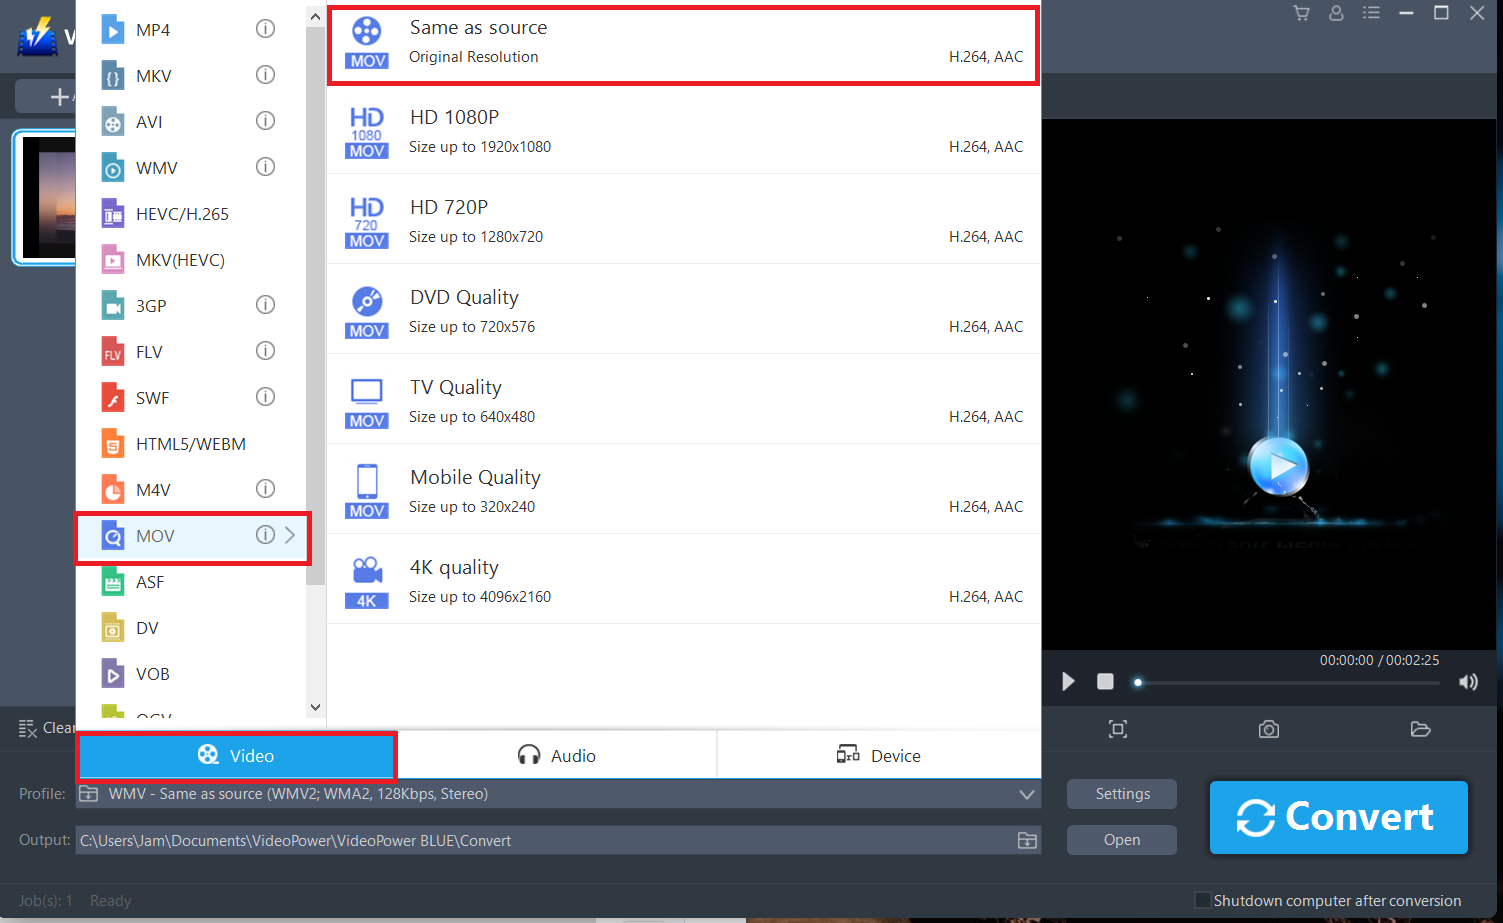
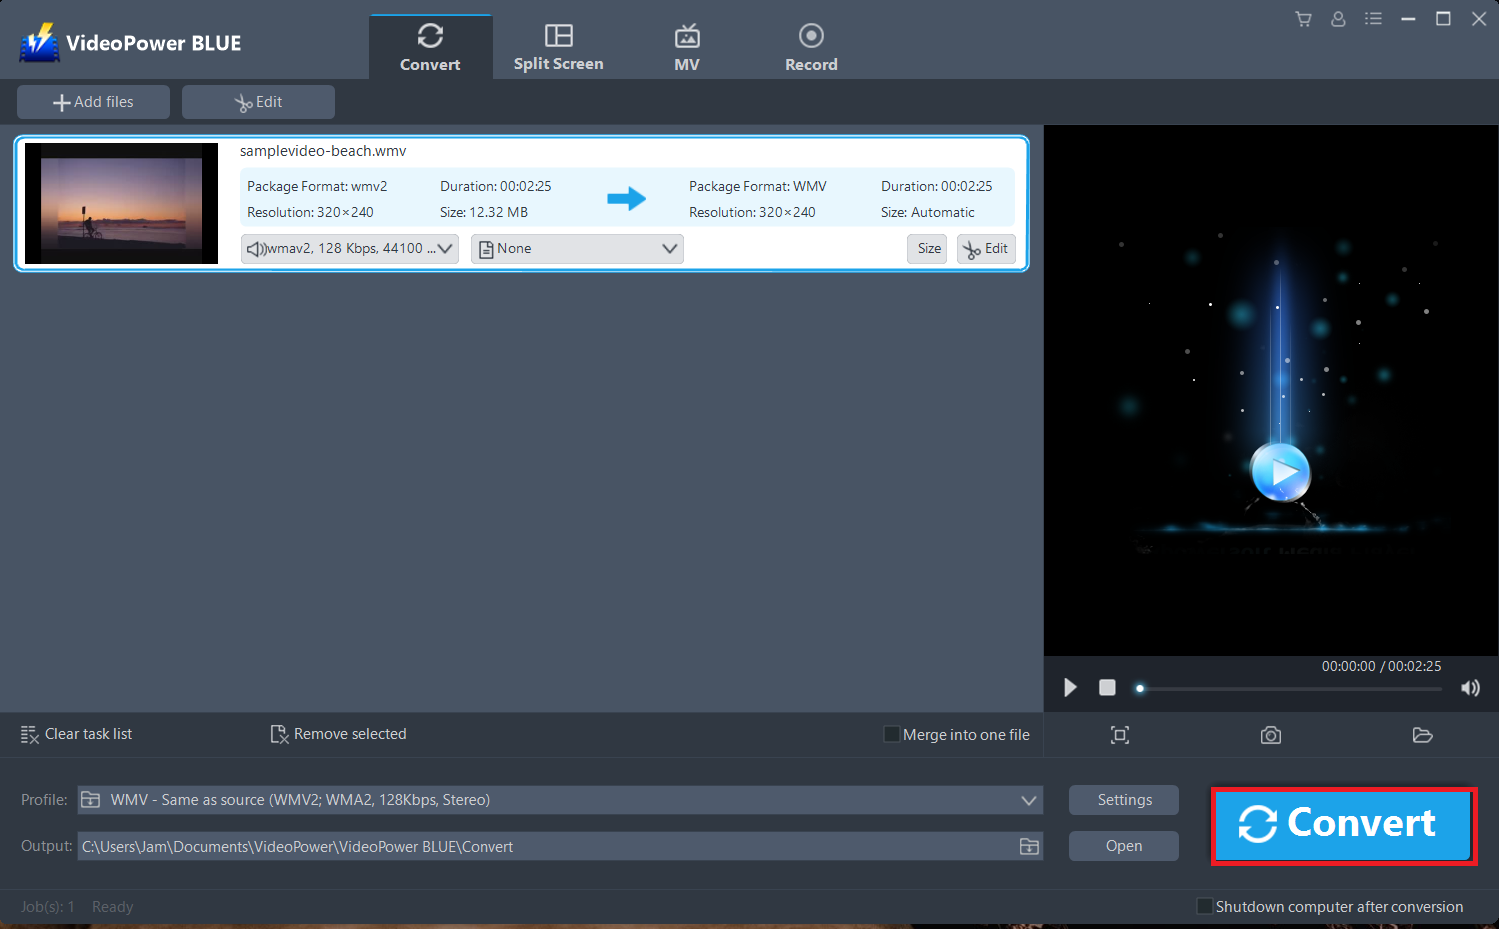
3.1 Set the output format
1) Click to open the “Profile” drop-down menu, then choose the format you want from the profile list.
2) Here you can click “Video” and then “MOV”.
3) You may now choose the quality you prefer.
3.2 Start Conversion
Return to the file list.
Click the “Convert” button, then the converted file will be saved in the default output folder.
3.3 Conversion Complete
The program will pop up a window to inform you once the conversion is completed. Click “OK” to open the folder of your saved converted MOV files.
Conclusion:
Nobody wants incompatibilities issues and technical difficulties in video playbacks. Maybe you are reading this because of that problem, well then the best thing to do is to convert WMV to MOV. MOV is known for its high-quality file format and compression rate with greater versatility, what are you waiting for?
Using VideoPower BLUE will allow you to edit slideshows or videos, apply watermarks, effects, and other basic video editing options such as trimming or cropping. It’s fast and reliable with a speed that no other conversion program can match.