Tips Index
As one of the most frequently downloaded video formats on the Internet, MKV is widely used because it can minimize the size of the video while ensuring the overall audio-visual effect of the video.
However, MKV files are actually packaged formats, including video, audio, subtitles and other data. Editing software such as PR cannot directly use this format file, and many players may also be unable to play due to compatibility issues when identifying these files.
The solution is simple, just change the MKV file to another more compatible video format like AVI.
However, it is worth mentioning that there are some software encoder problems that can affect the clarity of the converted video. This is not the case with VideoPower BLUE.
VideoPower BLUE is a powerful tool that allows users to convert MKV to AVI without quality loss. Besides, it has many other functions like record screen activity, edit audio and video files, and slideshow maker.
Here’s how to quickly and non-destructively convert MKV to AVI format.
Download and install the program on your PC with the below link to start the conversion.
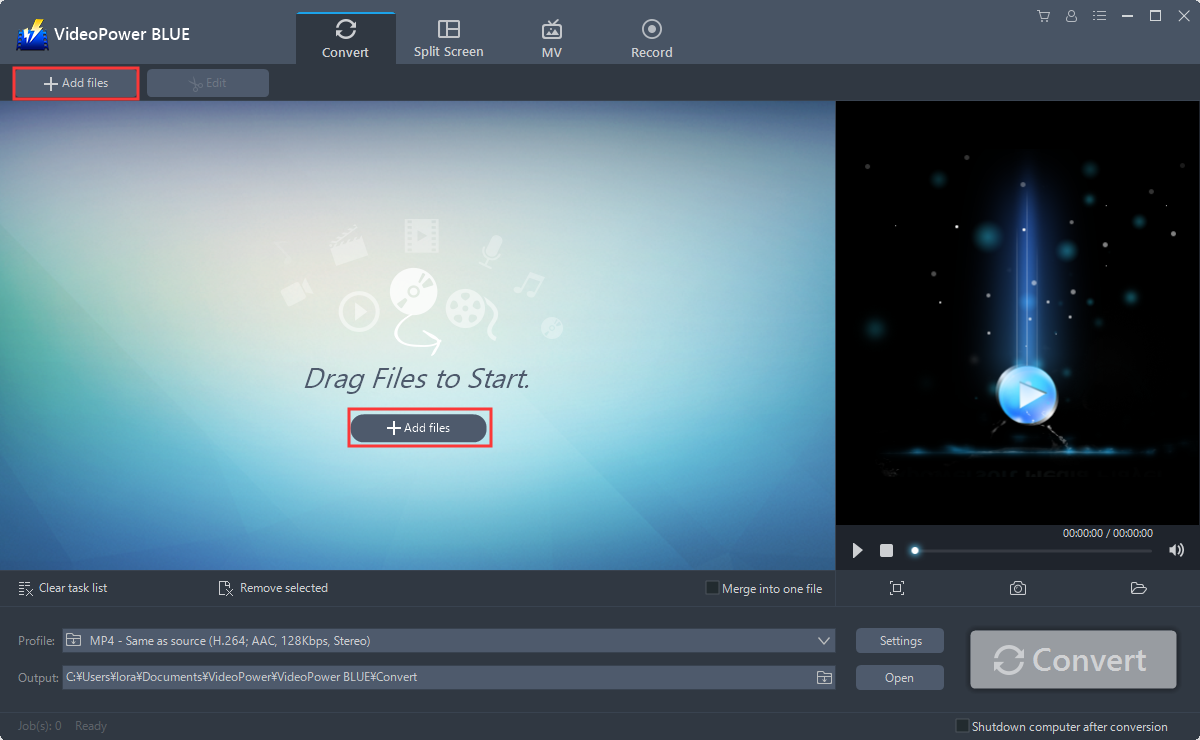
Step 1: Add the MKV file to the program.
Run the program if you have installed the video converter software – VideoPower BLUE successfully on your PC. You can directly import the MKV file to the program by clicking the “Add files” button or by drag-and-drop the file to the interface.
Step 2: Edit the MKV video.
If you need to edit the video before conversion, just follow the instructions below.
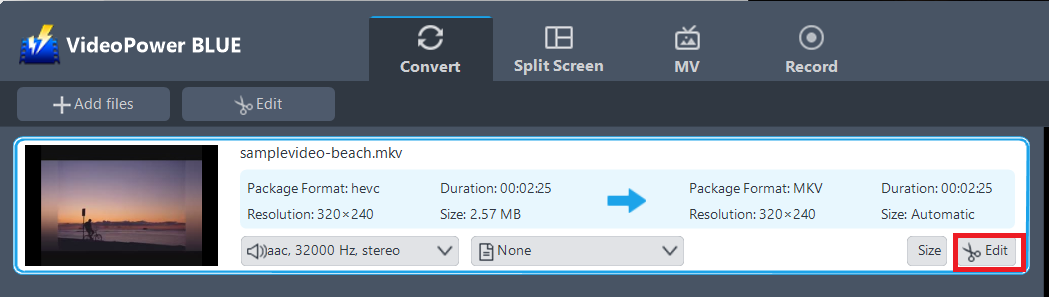
2.1 Open Editing Window
The imported MKV file is displayed in the list. Click the “Edit” button on the right side of the file.
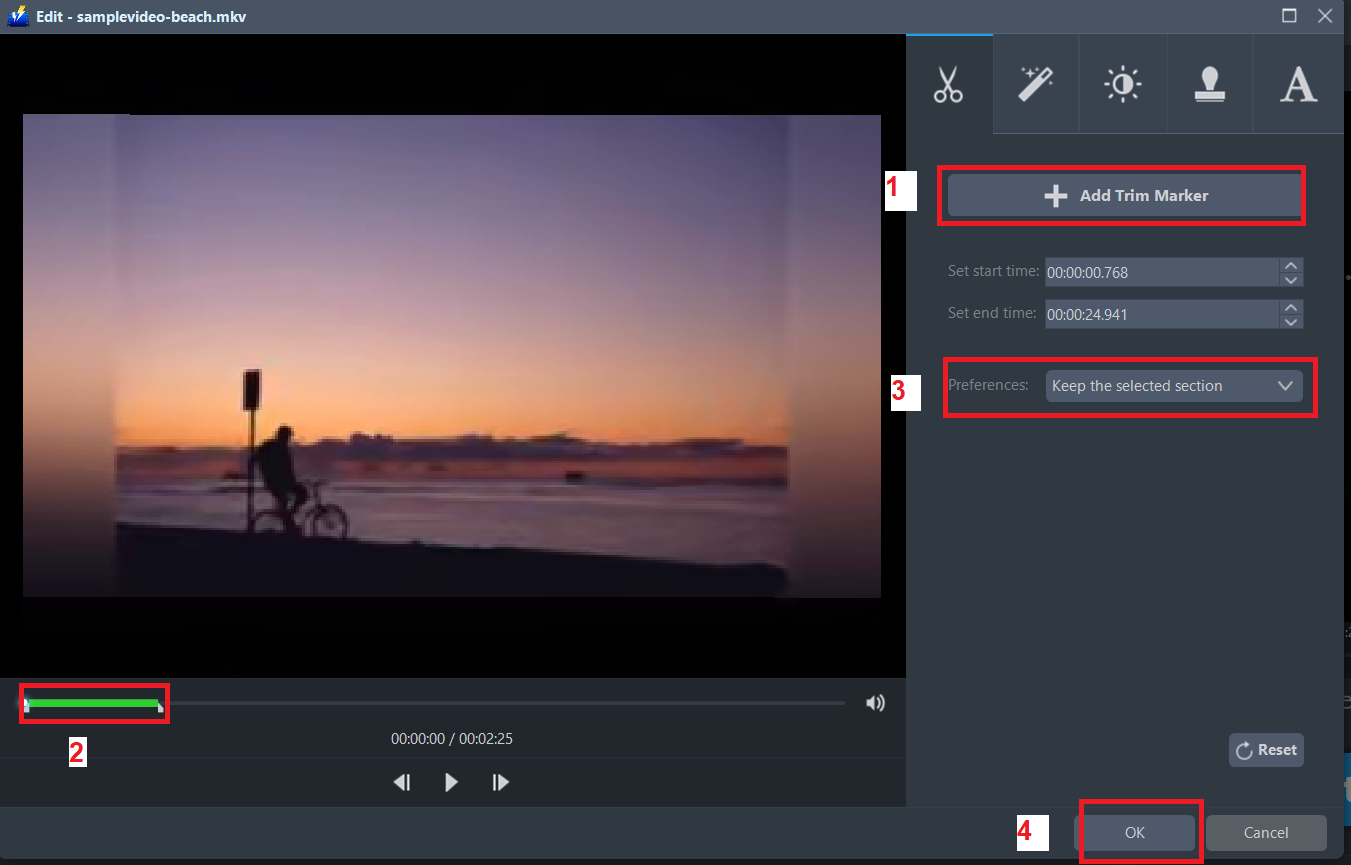
2.2 Start Editing
The built-in video editor will pop up, with its help, you can make the perfect movie. Adjust speed and volume, trim, cut, crop, rotate or flip videos. Add effects, subtitles, and watermark while adjusting brightness, contrast, and saturation that will make editing conveniently easier.
For example, you can trim your video as shown below:
1) Click “Add Trim Marker”.
2) Drag the mark as shown below to select the part you want to cut.
If you want to select multi-sections, please repeat 1 and
3) Choose “Keep the selected section” or “Delete the selected section” from “Preferences”.
4) Click “OK” to save the setting.
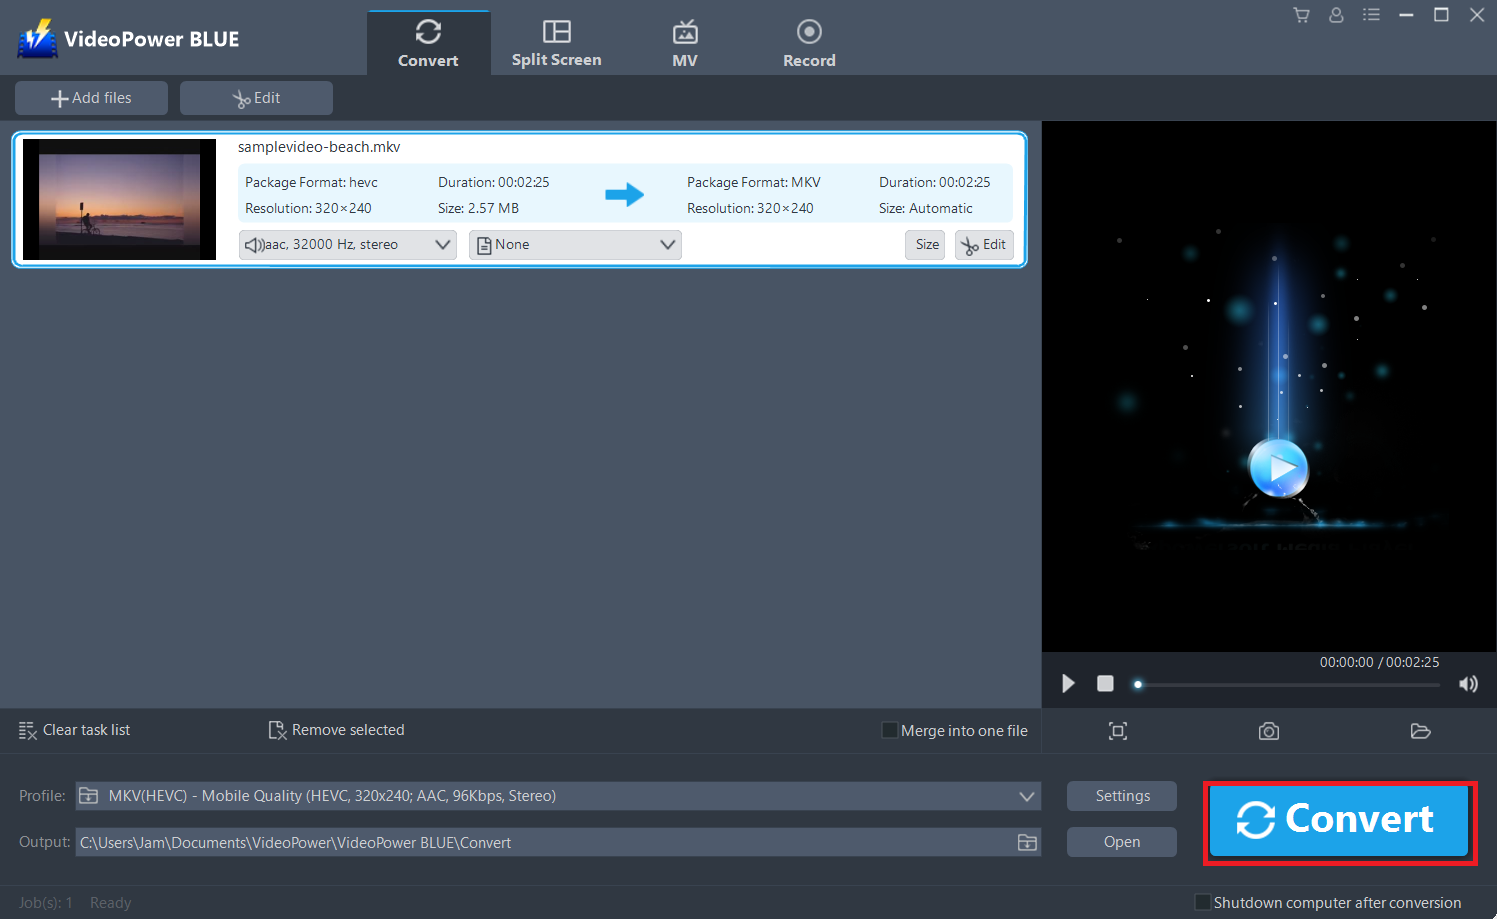
Step 3: Convert MKV to AVI format.
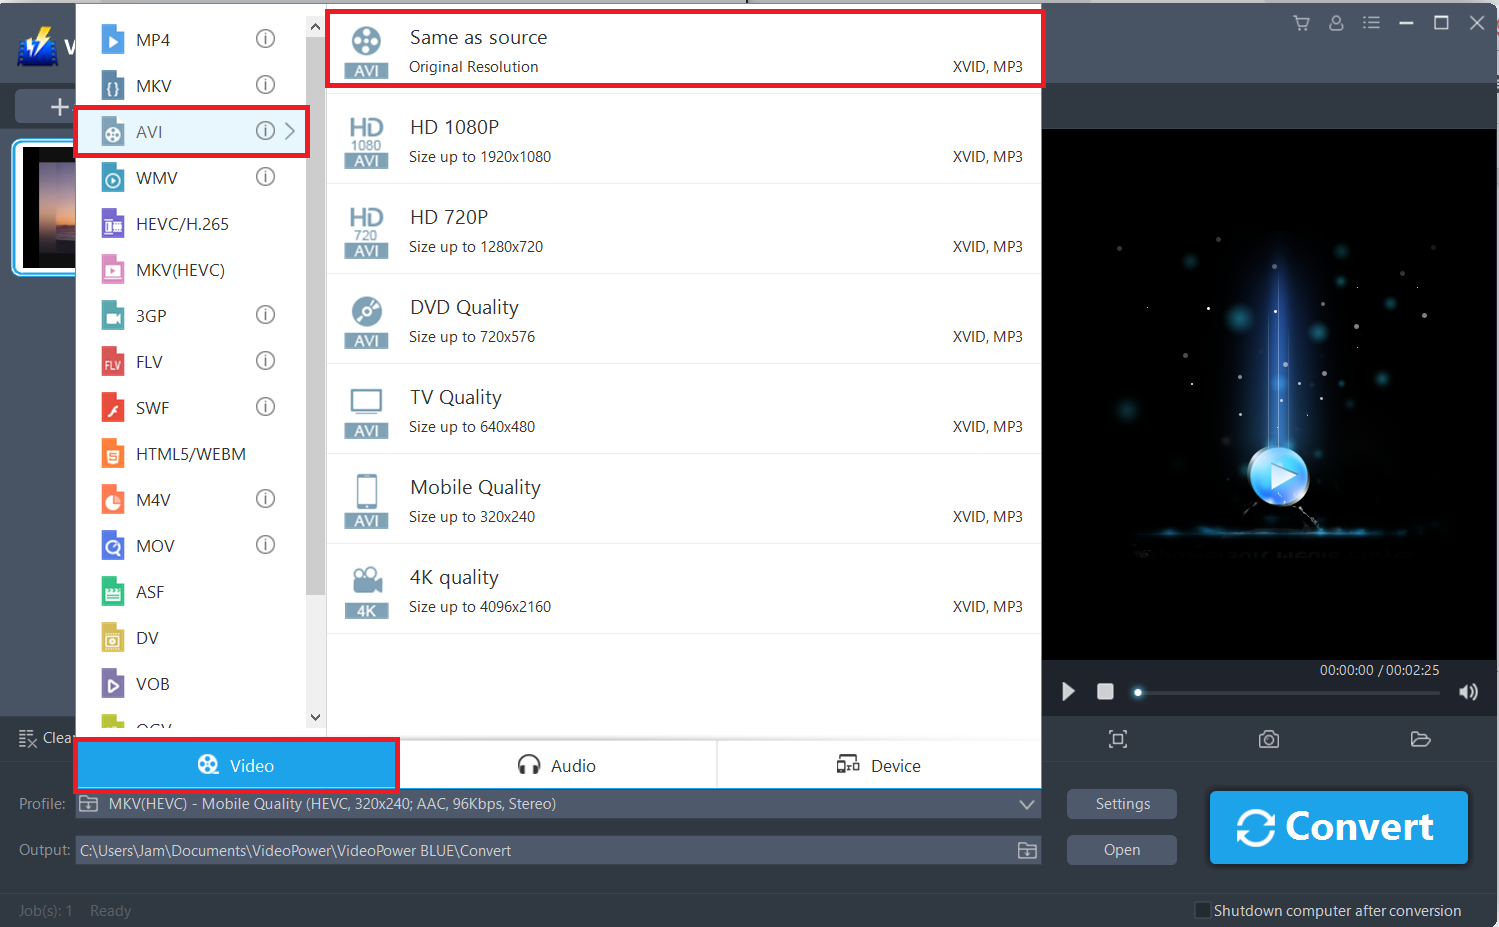
3.1 Set the output format.
Click to open the “Profile” drop-down menu, then choose the format you want from the profile list. Here choose “Video”, “AVI”, and quality “Same as source” or other options like “HD”, “4K quality” as per your need.
3.2 Start Conversion
Return to the file list and click the “Convert” button, then the converted AVI file will be saved in the default output folder.
3.3 Done Conversion
A pop-up window from the program will appear informing you that the conversion is complete. Click “OK” to open the folder of your saved converted MP4 files.

Or, you can click the “Open” button to find the mp4 file.

Conclusion:
Converting MKV to AVI might be a bit of a hassle but with the right program, it’s a piece of cake. VideoPower BLUE has an interface that is very intuitive. Other operations you can try with this software is you can do merging of multiple videos file into one file, split-screen tool and record screen activity on your PC.
Additional functions include, edit slideshows or videos, apply watermarks, effects, and other basic video editing options such as trimming or cropping.