Tips Index
A portion of the corporate and other business-related agencies usually conducts meetings virtually in cases in which important people are overseas such as the CEOs and the owners, so that collaboration is still maintained within the company. Some people also do this, like the random students who would like to discuss school projects but only within online premises. This is also useful in people collaborating abroad. This year, 2020 in the midst of February and March, online meeting has been very useful due to the emerging incidence of a new pandemic. People hold conferences within their computers or devices instead to avoid contact. Since there is a fine line between meetings held in a conference area and a virtual room, it is very important that one must record the meeting for documentation for seasonal review. So how to record every virtual business meeting, and what is the best software to cater to this need.
Join.me is a conference software that connects people divided by circumstances. It enables users to collaborate within reach virtually. It shares the screen, provides annotation, voice sharing, mouse sharing, and finally a video conference with chat. Recording in Join.me is possible but the output is not of good quality.
Record online meetings through VideoPower GREEN is awesome recording software that records both video and audio meetings in Join.me producing higher qualities compared to the sole recorder that is in the latter conference software.
Step 1: Select Audio Source
If audio is needed in recording, choose the desired sound source among “System sound, Microphone or System sound and microphone” on the “Audio Input” menu. In recording online meetings, select “System sound and microphone.

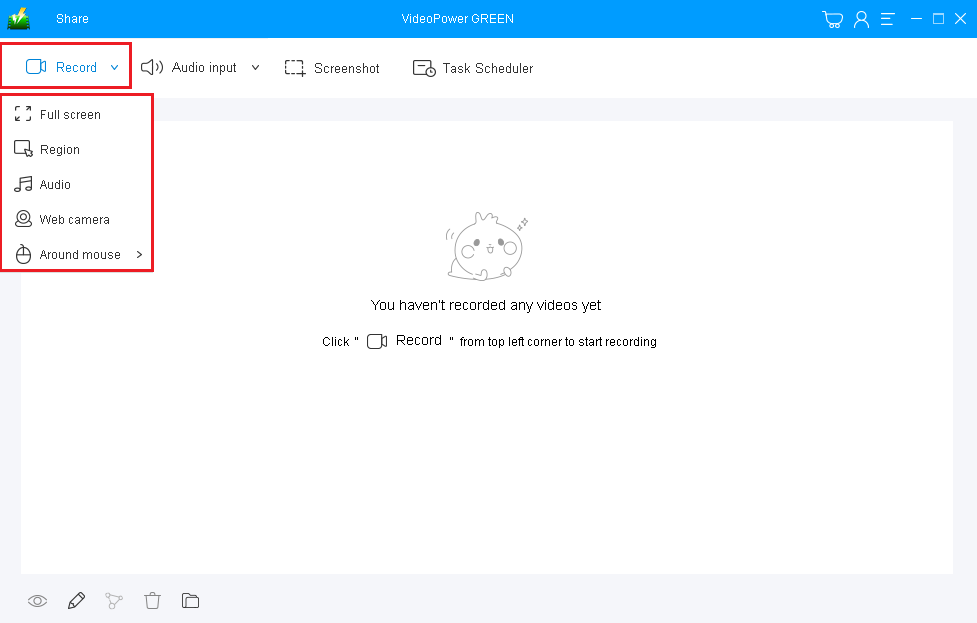
Step 2: Select a recording mode
Click on the “Record” button to choose the recording mode, options are available from “Full Screen”, “Region”, “Audio”, “Web camera”, to “Around mouse” and then select the area in which you desired to record.
Full Screen:
The recording area will be the whole screen of the computer.
Region:
The recording area will only be a specific area of the computer screen.
Audio only:
Select “Only Audio” to record the audio-only.
You can save your files like MP3, AAC, OGG, WMA, WAV, FLAC, and other file formats.
Web camera:
Select this option to record video from an external webcam or a built-in laptop camera.
Around mouse cursor:
The mouse position is the center of the recording range. If you move the mouse during recording, the recording range will follow the movement of the mouse.
Since you are recording an online meeting, suitable recording options are Fullscreen and Region for video interfaced meetings, and Audio only for voice conferences.
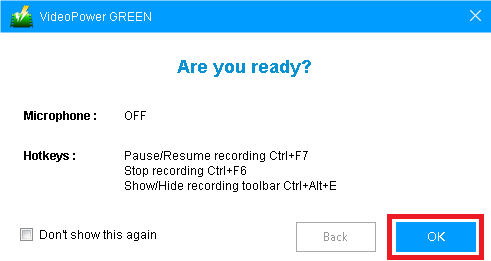
Step 3: Record Screen Activities
A pop-up window will show to confirm whether to start the recording or not. Click “OK” to start the recording.
Step 4: Annotate Recording
While recording, adding lines, arrows, shapes, texts, highlight, blur, etc. is possible. Just click the edit button to show the editing toolbox and lick the pen icon button. It helps to beautify and emphasize the content of the recording.
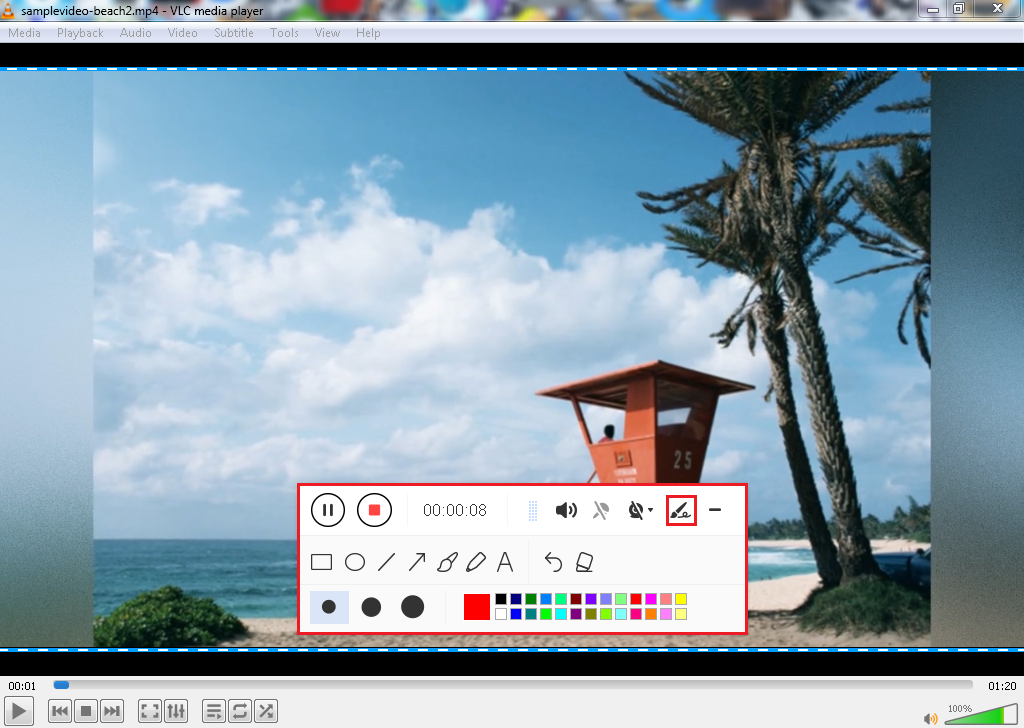
Step 5: End the recording.
Click the “Stop” button to stop or end the recording.

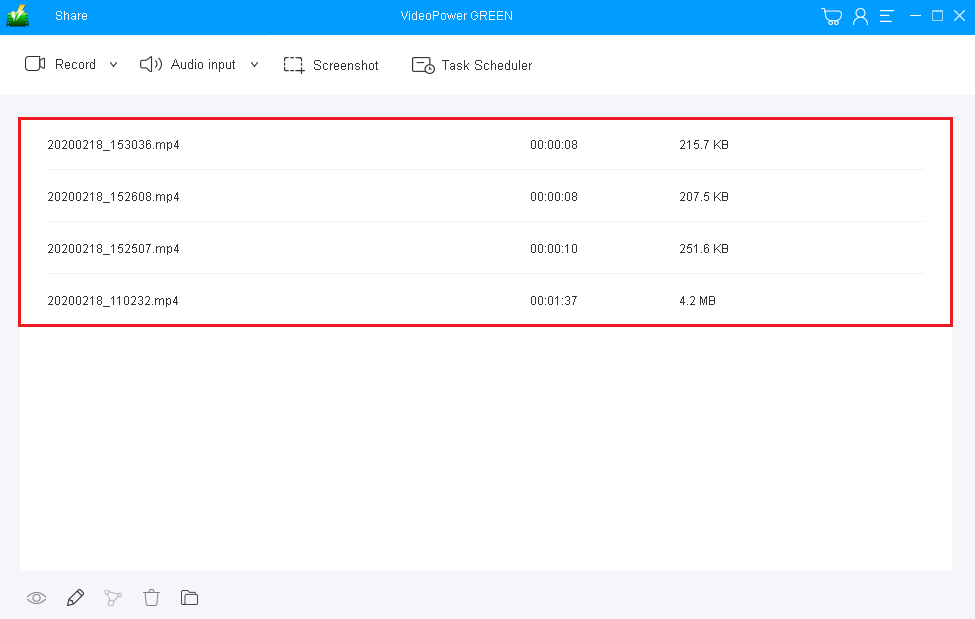
Step 6: Redirect to Recorded Meeting File List
After recording, the screen will automatically redirect to the recorded file list on the main interface window. Right-click the file and do more operations if necessary. Double click the file to play or view it.
Conclusion:
Record online meetings through VideoPower GREEN through whatever the purpose is, this software is able to carry essential tasks from recording in high quality in both audio and video formats, can even convert your output to varying selections of format, can edit your videos, take screenshots and can record through webcam. VideoPower GREEN goes beyond your usual recording. Try it now!