Tips Index
Screen recording software has been very useful nowadays since there are a lot of people who would like to record their displays for educational, business, and tech purposes. We have to admit that there are still a lot of people who can’t manage to learn by themselves so people usually go to websites like youtube or other tech sites to gather information about their queries and questions and to finally find solutions. Screen recording is usually used to walk viewers through the processes and steps that usually involve computers. Some also use screen recording for personal use like recording a video in a website that restricts download, it’s becoming a pretty efficient move if you’re not able to download your favorite videos. Some people also use this as an educational tool because some software contains annotations and highlighters that make a tutorial and learning more efficient and practical.
Camstudio Screen Recorder is one of the vasts options there is when it comes to screen recording but that was a long time ago. It holds pretty basic features. It commonly produces videos in AVI or FLV and even SWF. It was released on October 21 of 2011 and runs and operates in Windows but Camstudio for Windows 10 hasn’t been updated since this is pretty old recording software. But the downgrade to this is that Camstudio has a virus in its installer.
VideoPower GREEN is a powerful screen capturing and recording software that has more efficient features compared to Camstudio, Although they have an almost similar purpose, VideoPower GREEN has no malicious viruses and harmful malware in its installer. It functions more than your usual screen capture software. VideoPower GREEN holds an edge from Camstudio because it runs on Windows 10.
Below is a summary table comparison on both screen recording software.
| Features | Camstudio | VideoPower GREEN |
|---|---|---|
| Video Recording | Yes | Yes |
| HD & Full HD Recording | No | Yes |
| Video Editing (trim, crop, etc) | No | Yes |
| Runs on Windows 10 | No (Latest Version 2008) | Yes |
Step 1: Select Audio Source
If audio is needed in recording, choose the desired sound source among “System sound, Microphone or System sound and microphone” on the “Audio Input” menu. If audio isn’t needed, just choose “None”. In recording streaming videos, select “System sound”.

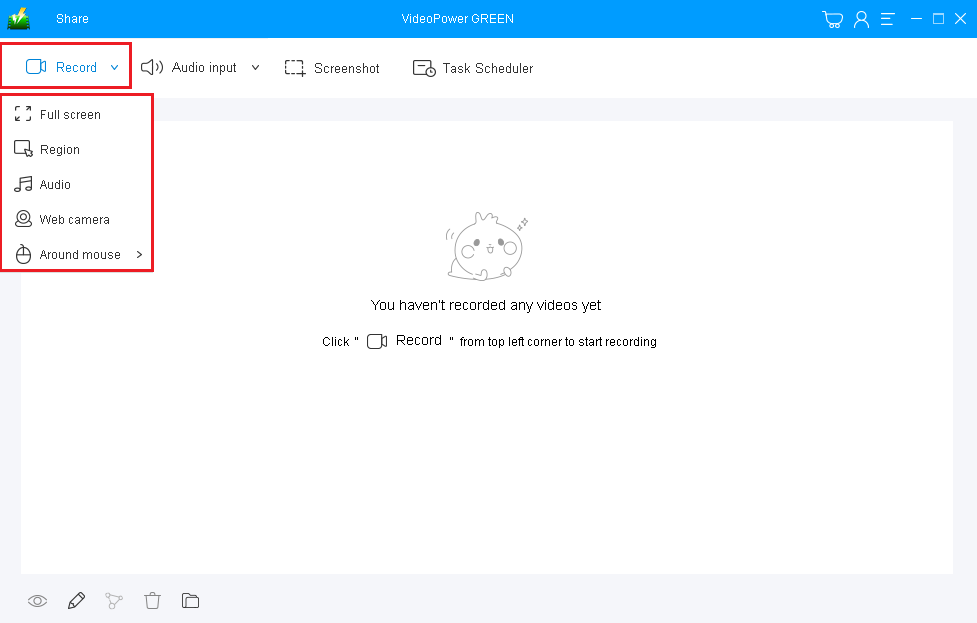
Step 2: Select a recording mode.
Click on the “Record” button to choose the recording mode, options are available from “Full Screen”, “Region”, “Audio”, “Web camera”, to “Around mouse” and then select the area in which you desired to record.
Full Screen:
The recording area will be the whole screen of the computer.
Region:
The recording area will only be a specific area of the computer screen.
Audio only:
Select “Only Audio” to record the audio-only.
You can save your files like MP3, AAC, OGG, WMA, WAV, FLAC, and other file formats.
Web camera:
Select this option to record video from an external webcam or a built-in laptop camera.
Around mouse cursor:
The mouse position is the center of the recording range. If you move the mouse during recording, the recording range will follow the movement of the mouse.
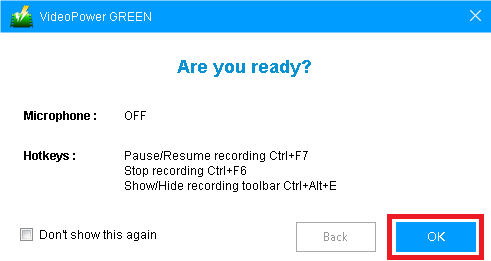
Step 3: Record Screen Activities
A pop-up window will show to confirm whether to start the recording or not. Click “OK” to start the recording.
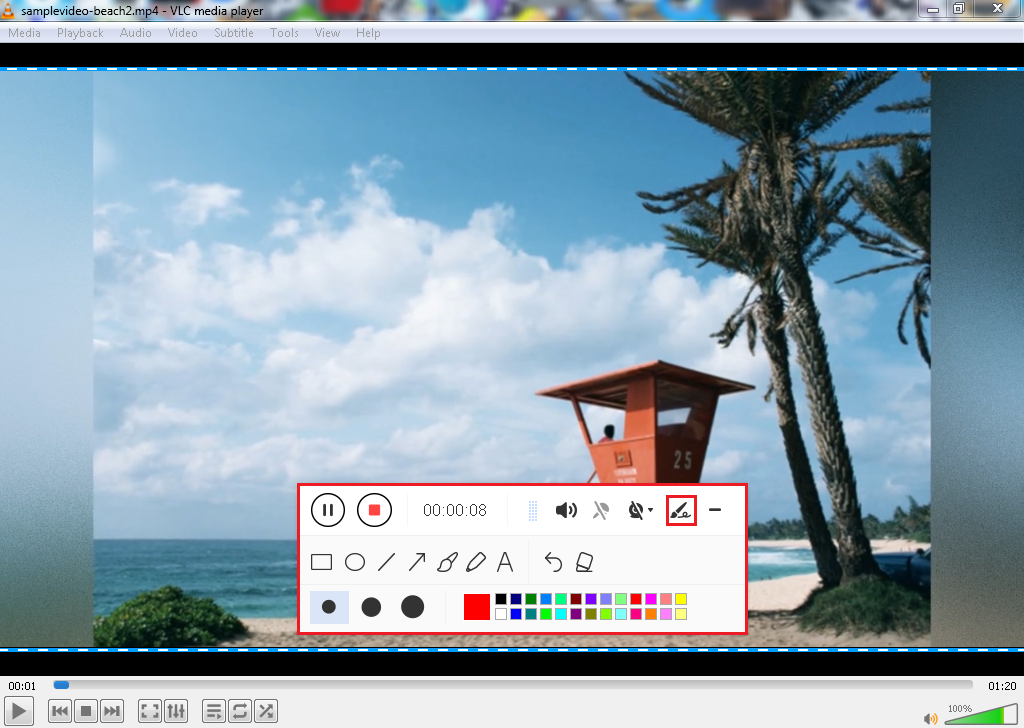
Step 4: Annotate Recording
Make your screen recording clip extra creative. While recording, adding lines, arrows, shapes, texts, highlight, blur, etc. is possible. Just click the edit button to show the editing toolbox.
Step 5: End the recording.
Click the “Stop” button to stop recording.

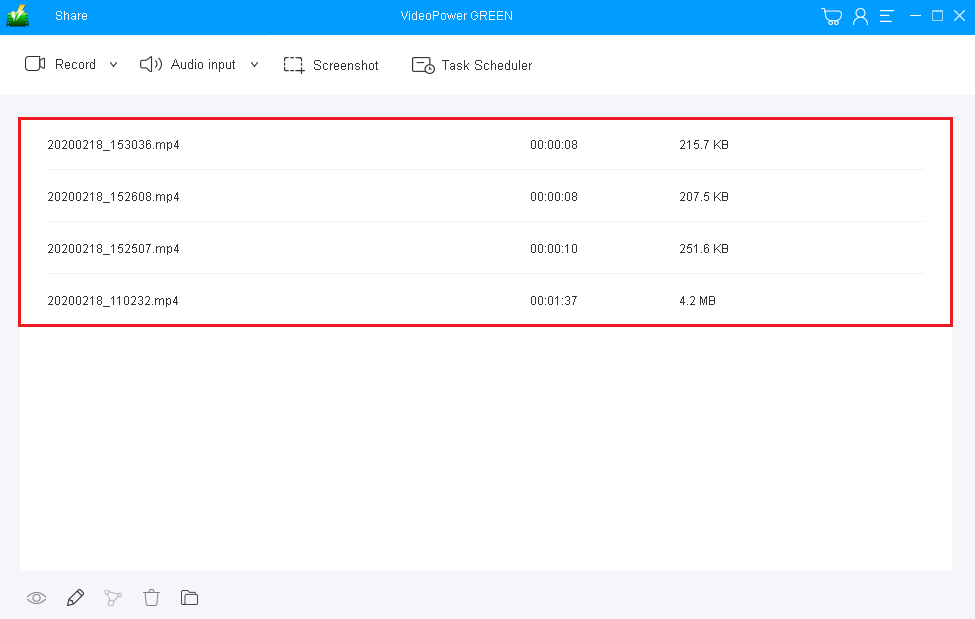
Step 6: Redirect to Recorded File List
After recording, the screen will automatically redirect to the recorded file list on the main interface window. Right-click the file and do more operations if necessary. Double click the file to play or view it.
Conclusion:
VideoPower GREEN is a very powerful screen recording software because it goes beyond your usual screencasting software like Camstudio. It is packed with highly functional features that enable you to stretch your creativity and do more than it should be. You can even record yourself via webcam during a tutorial, or compile a screenshot with highlighters on it, edit videos within the app, and finally record your screen at a particular desired size of the display. Try it now!