Tips Index
The quick emergence of technology changed the way people use their devices – mobile phones are now a necessity.
A Digital Video (DV) file is a file created by a digital camera and saved using a standard raw format. A recorded video file created by a digital video (DV) camera is somehow not supported by mobile phone and fail to open it.
Not a lot of devices support the DV file format and for that reason, you may have to opt to convert it into a more universally compatible format such as MP4.
To successfully do a video conversion, you need a software that can convert files from one format to another. VideoPower BLUE is a powerful tool that has a lot of functions such as screen recording, basic video editing, and audio and video conversion. This software can convert DV to MP4.
Download and install the program on your PC with the link below to start the conversion.
Step 1: Add the DV file to the program
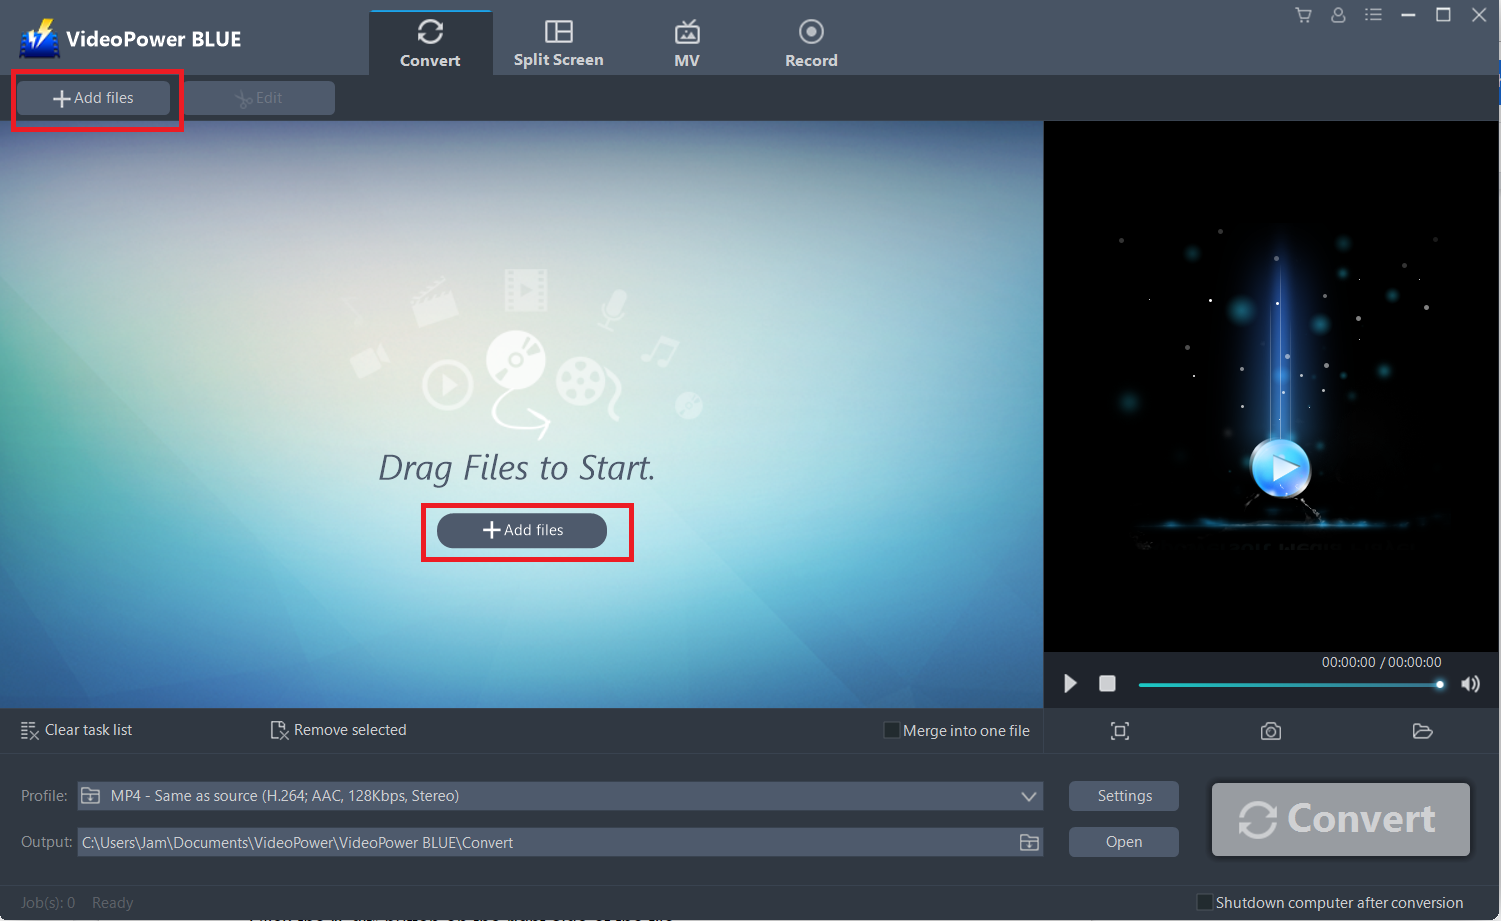
Run the program if you have installed the Video Converter software – VideoPower BLUE successfully on your PC. You can directly import the file to the program by clicking the “Add files” button or by drag-and-drop the file to the interface.
Step 2: Edit the DV video
If you want to edit the file first before converting, just follow the instructions below.
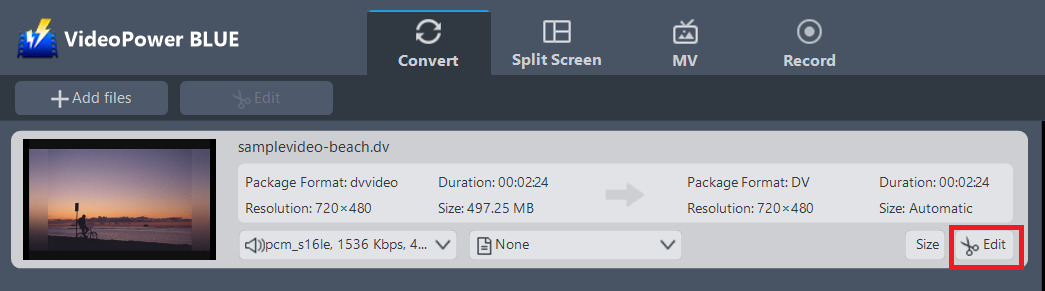
The imported DV file is displayed in the list.
Click the “Edit” button on the right side of the file.
The built-in video editor will pop up, with its help, you can make the perfect movie. Adjust speed and volume, trim, cut, crop, rotate or flip videos. Add effects, subtitles and watermark while adjusting brightness, contrast and saturation that will make editing conveniently easier.
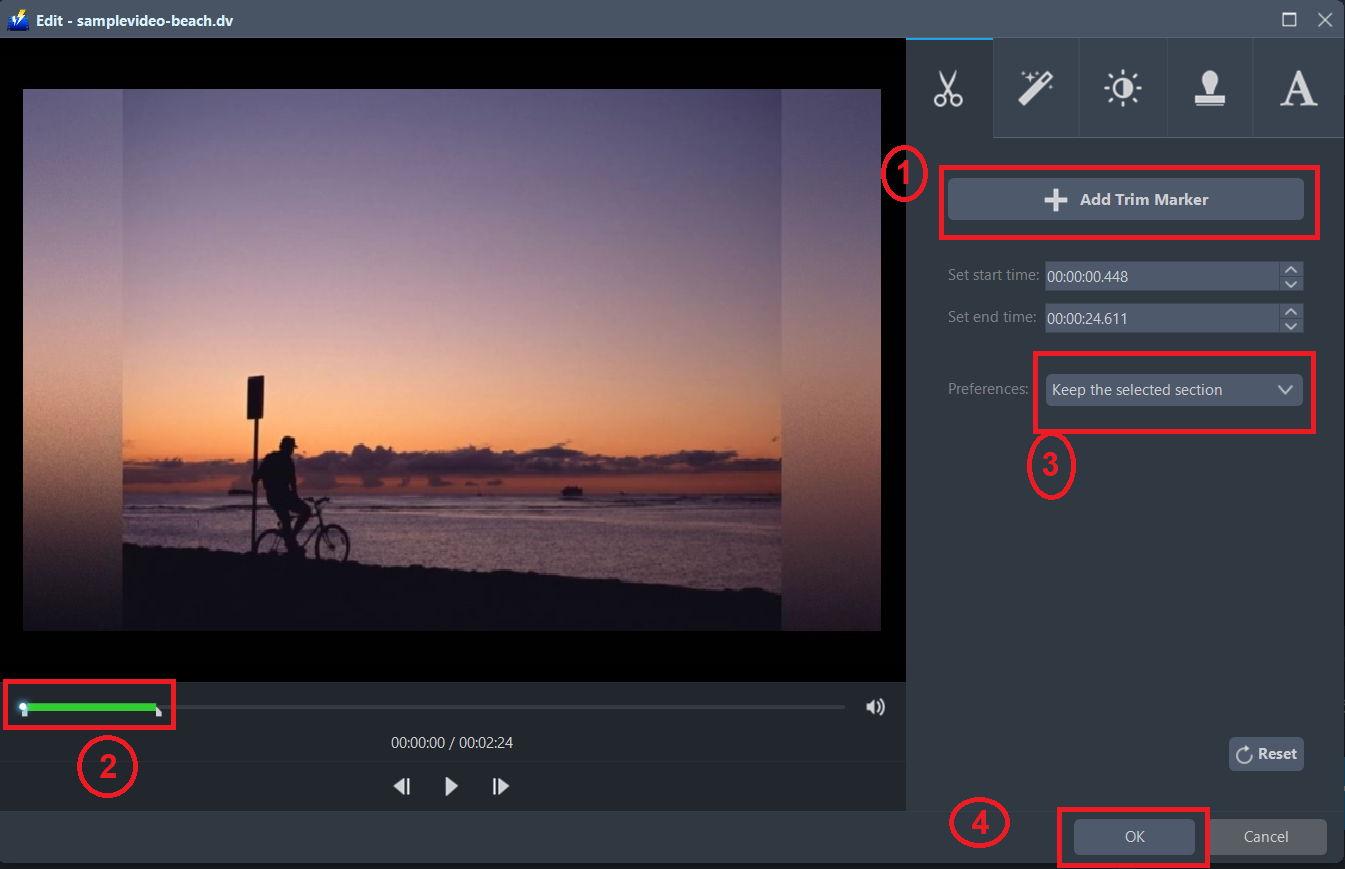
For example, you can trim your video as shown below:
1) Click “Add Trim Marker”.
2) Drag the mark as shown below to select the part you want to cut.
If you want to select multi-sections, please repeat 1 and 2.
3) Choose “Keep the selected section” or “Delete the selected section” from “Preferences”.
4) Click “OK” to save the setting.
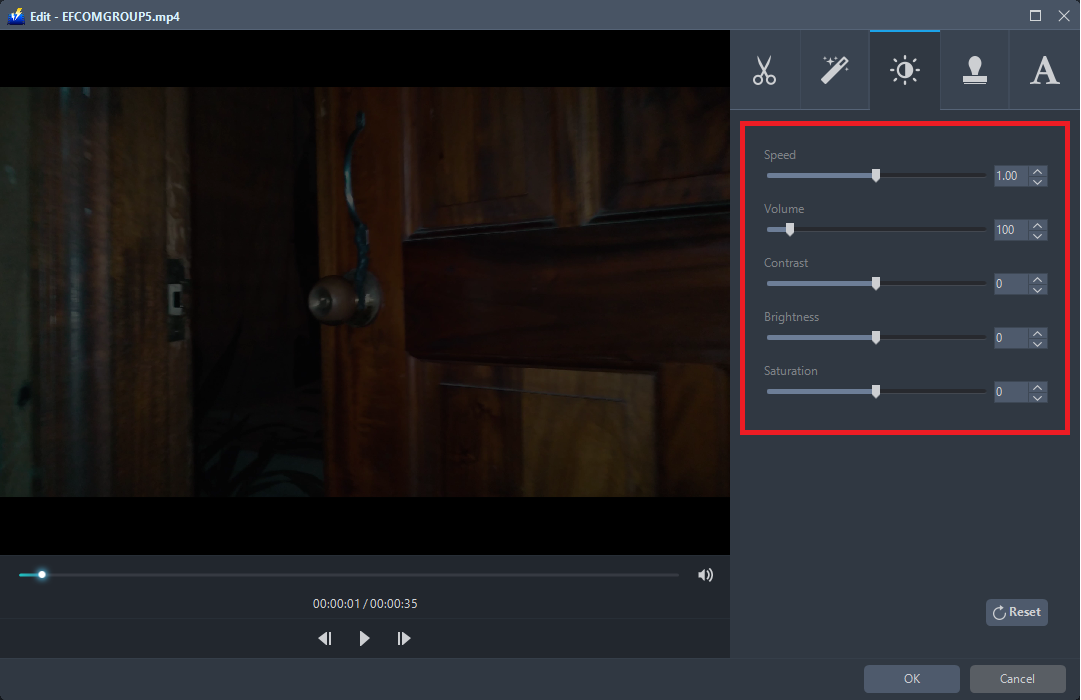
You can do the following steps to change some effects on your video:
1) Speed – Speed up, slow down, the tempo of your video.
2) Volume – Set sound level.
3) Contrast – Change or adjust the difference in lightness, brightness and/or hue.
4) Brightness – Where you can adjust how lightness or darkness you want your video.
5) Saturation – Adjust the intensity of color in an image.
Step 3: Convert DV to MP4 format
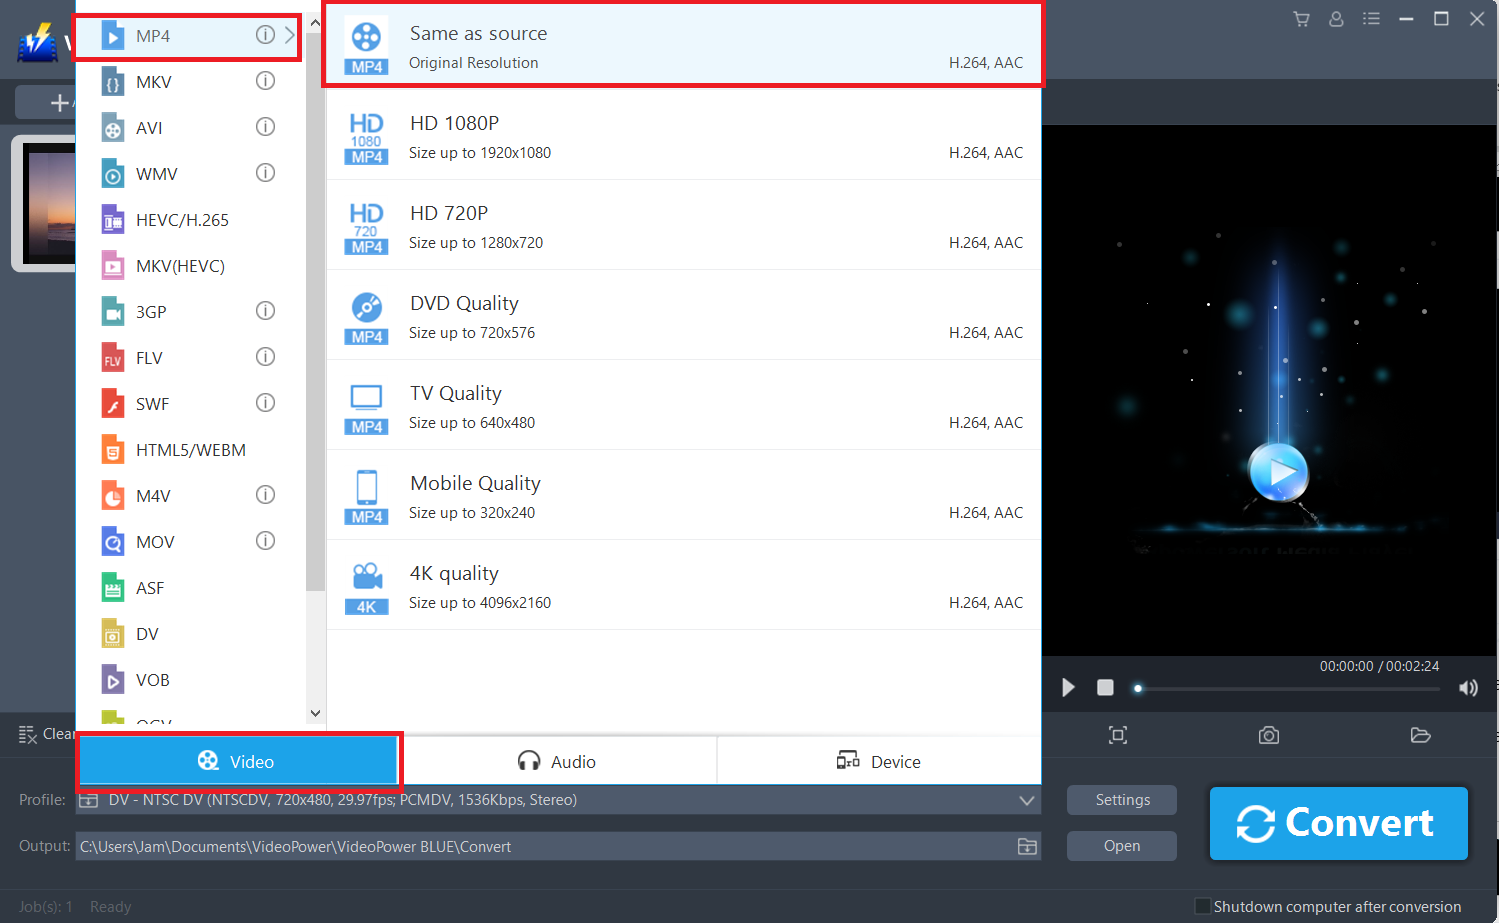
3.1 Set the output format.
Click to open the “Profile” drop-down menu, then choose the format you want from the profile list. Here choose “Video”, “MP4”, and quality “Same as source” or other options like “HD”, “4K quality” as per your need.
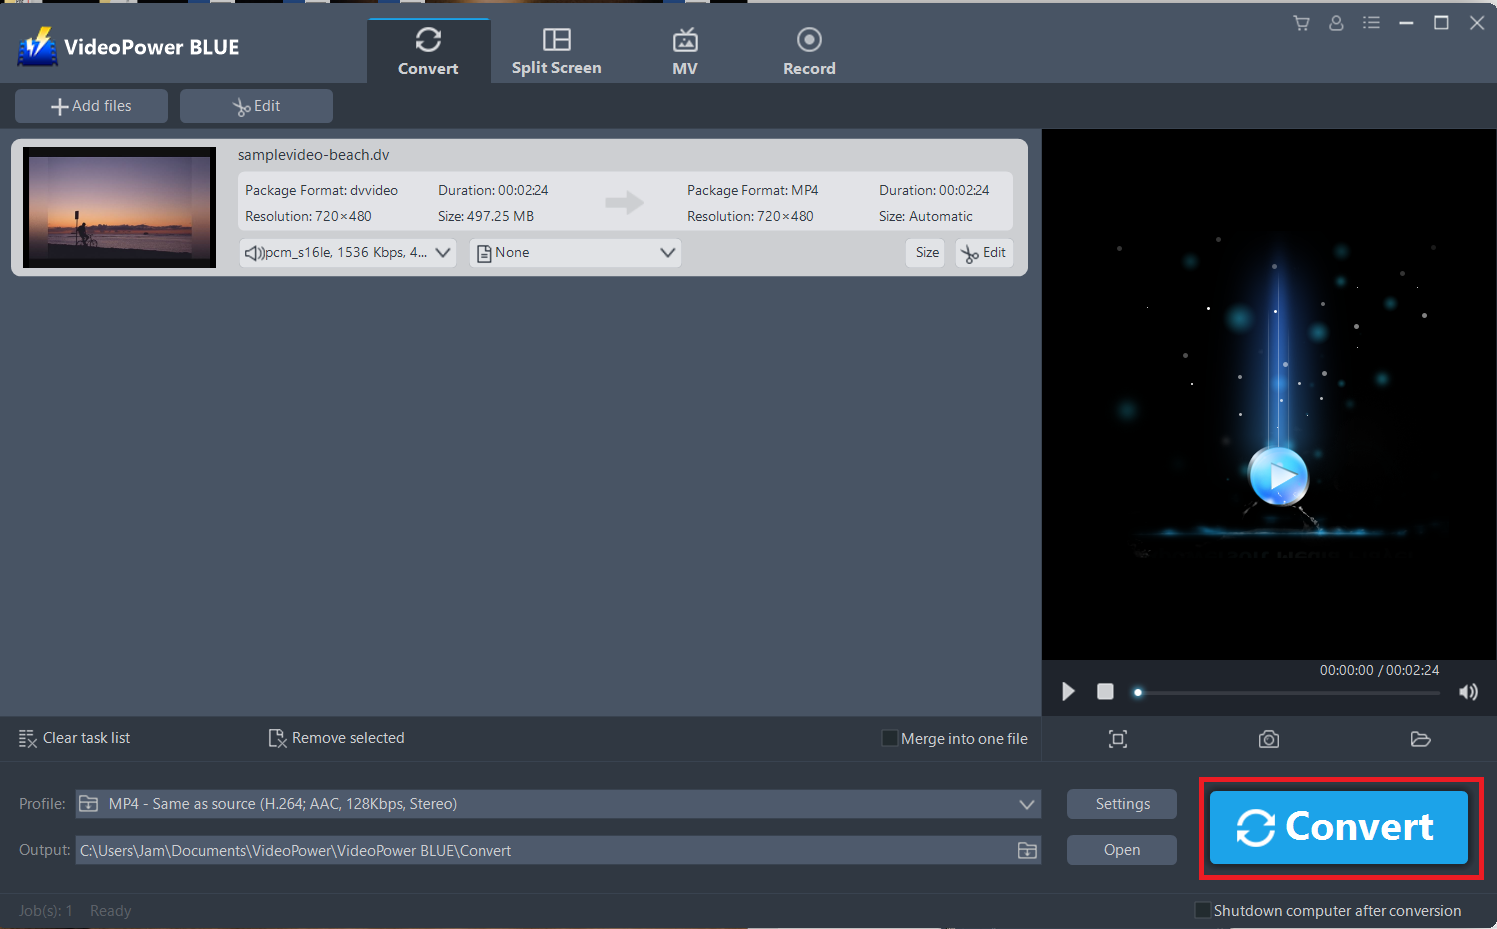
3.2 Start Conversion
Return to the file list.
Click the “Convert” button, then the converted MP4 file will be saved in the default output folder.
3.3 Find the Converted MP4 files
A pop-up window from the program will appear informing you that the conversion is complete.
Click “OK” to open the folder of your saved converted MP4 files.
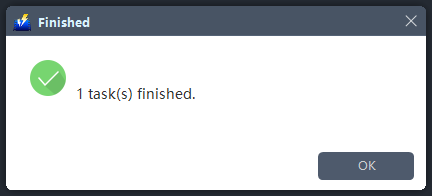
Or you can click the “Open” button to find the MP4 video.

Conclusion:
With this guide, you can now convert DV files into a more universally compatible format such as MP4.
VideoPower BLUE can convert any file into a file format that you want. This software is reliable and easy-to-use with a great interface. It could convert files to various file formats, has a built-in video editor that will enable you to edit slideshows or videos, apply watermarks, effects, and other basic video editing options such as trimming or cropping. Moreover, it has a split-screen tool for your photos and videos and a screen recorder which allows you to capture any on-screen activity on your computer.