





Tips Index
Brief Introduction of WAV
The WAV file is the most common and classical multimedia audio file on the PC platform. It’s file names end with the extension .WAV or .WAVE and is an audio file format that was developed jointly by Microsoft and IBM.
WAV is also known as a waveform file that can directly store sound waveform, and the restored waveform curve is very realistic.
Supported Software
Windows Media Player, VLC Media Player, iTunes, and Winamp can play WAV files.
Solution for WAV Format Conversion
WAV files have a great disadvantage because it takes up too much storage space. Therefore, it’s better to convert this format to a smaller file size format in order to save the memory storage space of your device.
Below is the step-by-step guide on how to convert WAV files to MP3 format. other audio formats include WMA, M4R, MP2, M4A, AAC, OGG, etc. are also supported.
Download the VideoPower BLUE software first, a format converter that can convert video/audio to a different format with ease. Users can do many other things with this software like merge video clips, edit video/audio, make photo slideshow, and so on.
Step 1: Add the file to VideoPower BLUE.
Run the program if you have installed the Video Converter software successfully on your PC. You can directly import the file to the program by clicking the “Add files” button or by drag-and-drop the file to the interface.
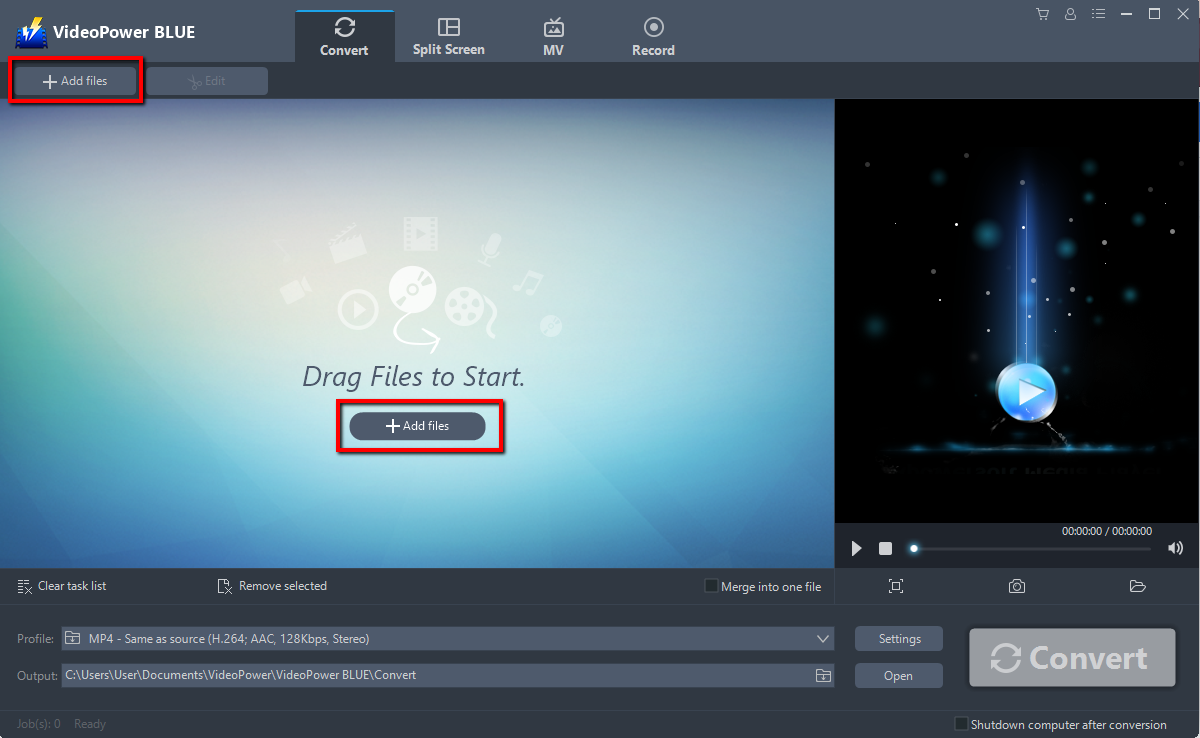
Step 2: Edit file before conversion
If you need to edit the file before conversion, follow the instructions below.
The imported file is displayed in the list.
Click the “Edit” button on the right side of the file.
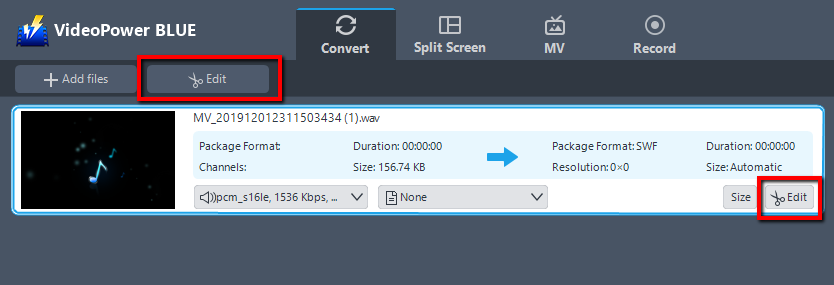
The built-in video editor will pop up, with its help, you can make the perfect movie. Adjust speed and volume, trim, cut, crop, rotate or flip videos. Add effects, subtitles, and watermark while adjusting brightness, contrast, and saturation that will make editing conveniently easier.
For example, you can trim your audio as shown below:
1) Click “Add Trim Marker”.
2) Drag the mark as shown below to select the part you want to cut.
3) Choose “Keep the selected section” or “Delete the selected section” from “Preferences”.
4) Click “OK” to save the settings.
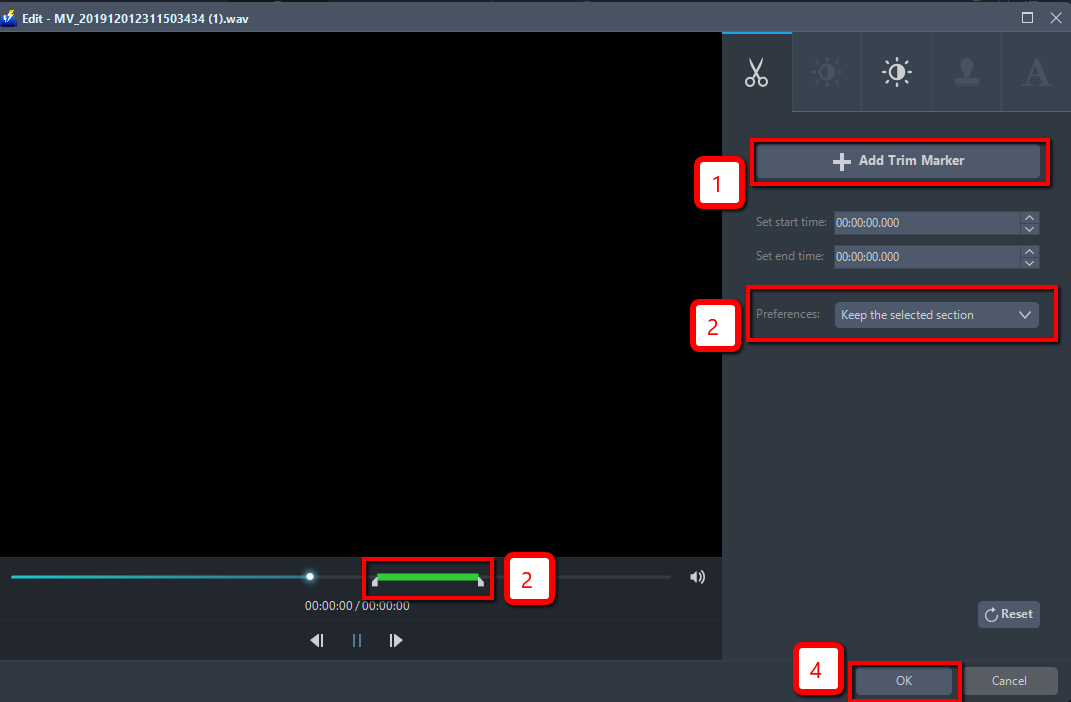
Step 3: Convert WAV to MP3 format.
3.1 Set the output format.
1) Click to open the “Profile” drop-down menu, then choose the format you want from the profile list.
2) Here you can click “Audio” and then “MP3”.
3) You may now choose the quality you prefer.
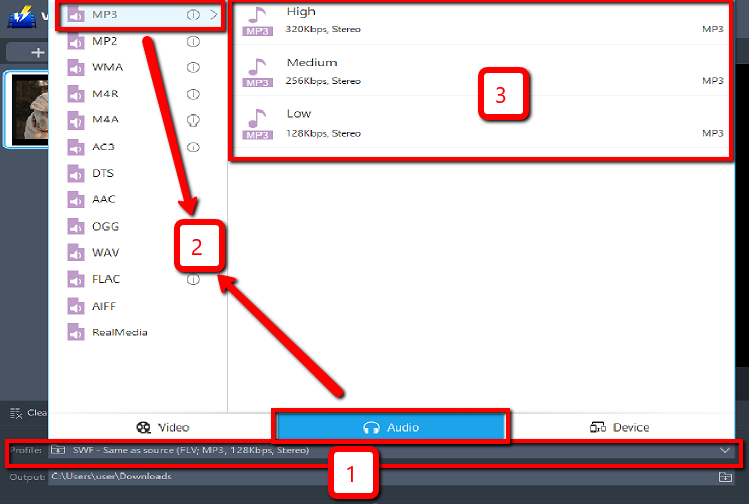
3.2 Start Conversion
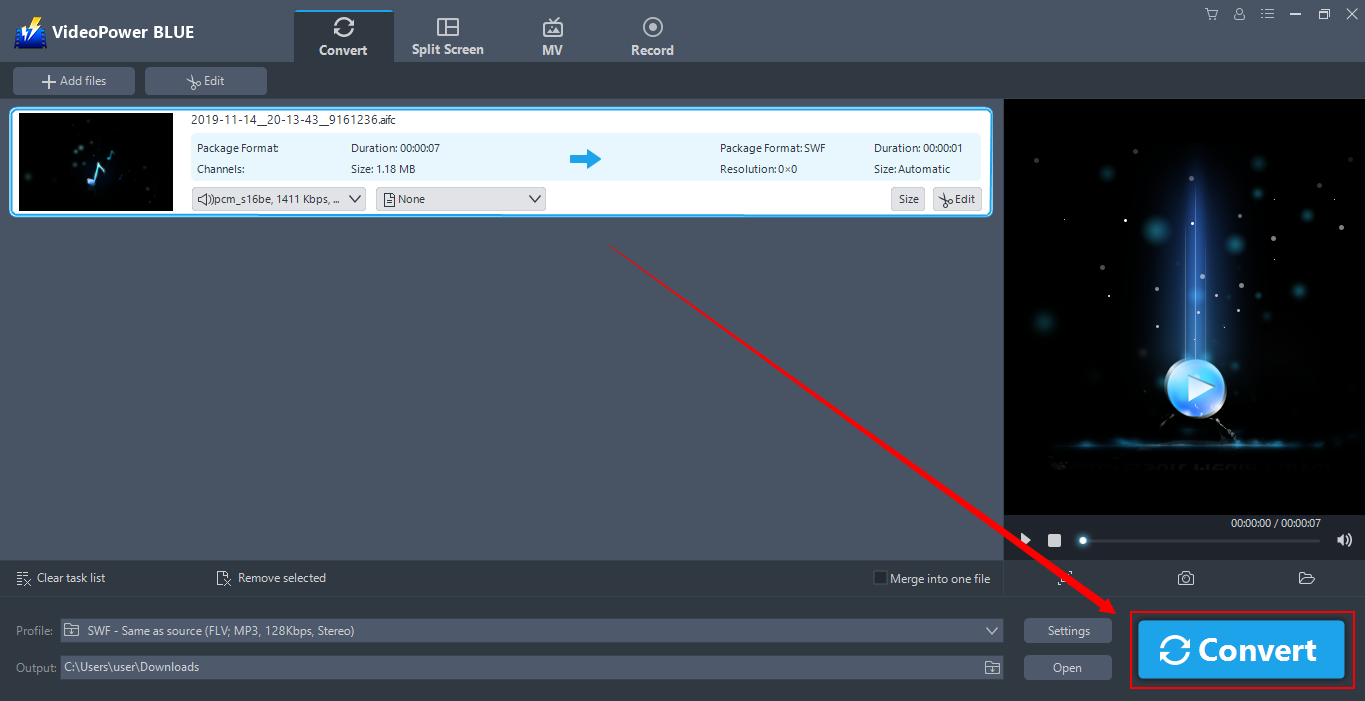
Return to the file list.
Click the “Convert” button, then the converted WMA file will be saved in the default output folder.
3.3 Find the Converted MP3 files
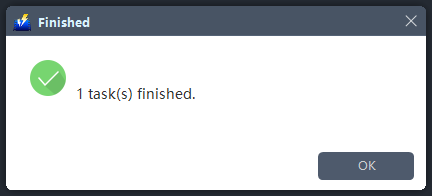
A pop-up window from the program will appear informing you that the conversion is complete. Click “OK” to open the folder of your saved converted MP3 files.
Conclusion:
The large size of WAV files will be a concern if you don’t have enough space on your devices. So converting WAV files to a smaller size and format through VideoPower BLUE is the best solution for this matter.
VideoPower BLUE is not just a converter but it also comes with other features. Users can convert audio or video files into various formats, make videos using the built-in video editor where you can edit slideshows or videos, apply watermarks, effects, and other basic video editing options such as trimming or cropping. Lastly, the software has a screen recorder which allows you to capture any on-screen activity on your computer.


