Tips Index
Recording a screen has been a real challenge a few years ago. You either had to use complicated tools or pay someone who is an expert for this kind of thing which could cost you a lot. Lately, the market is full of software everywhere that could help you record your screen.
Besides tutorials, there are several reasons why you might want to record your screen. If you do any kind of demos, tech support, or use video calling, business meeting minutes recorded live then using the default screen capture of your computer won’t be good enough to capture high-quality footage.
A high-quality screen recorder like VideoPower GREEN will serve the purpose of whether you want a more precise way to record the entire screen of your computer or if you want to just capture a specific area.
With this software, you can now create professional-looking tutorials with minimal effort, and with a big plus, it has an embedded video editor. It’s easy to use you to can edit recorded videos by applying watermarks, effects, adjustments, and other basic video editing options such as trimming or cropping.
VideoPower GREEN is an amazing, hassle-free, and trusted screen recorder application software that is highly recommended.
Try to use the software for free by downloading its trial version below.
Record Screen
Step 1: Choose a sound source
If audio is needed in recording, choose the desired sound source among “System sound, Microphone or System sound and microphone” on the “Audio Input” menu. If audio isn’t needed, just choose “None”.

Step 2: Choose a recording area
Click on the “Record” button to choose the recording mode among “Full screen, Region, Audio, Web camera, and Around mouse” and then select the area you are going to record.

Step 3: Record screen activities
After choosing a recording area, a prompt pop-up will appear. Click “Ok” to start the recording.

While recording, adding annotations like lines, arrows, shapes, texts, highlight, blur, etc. is possible. Just click the edit button to show the editing toolbox.
![]()
Step 4: End the recording
Click the “Stop” button to stop recording.

After recording, the screen will automatically redirect to the recorded file list on the main interface window.

Video Editor
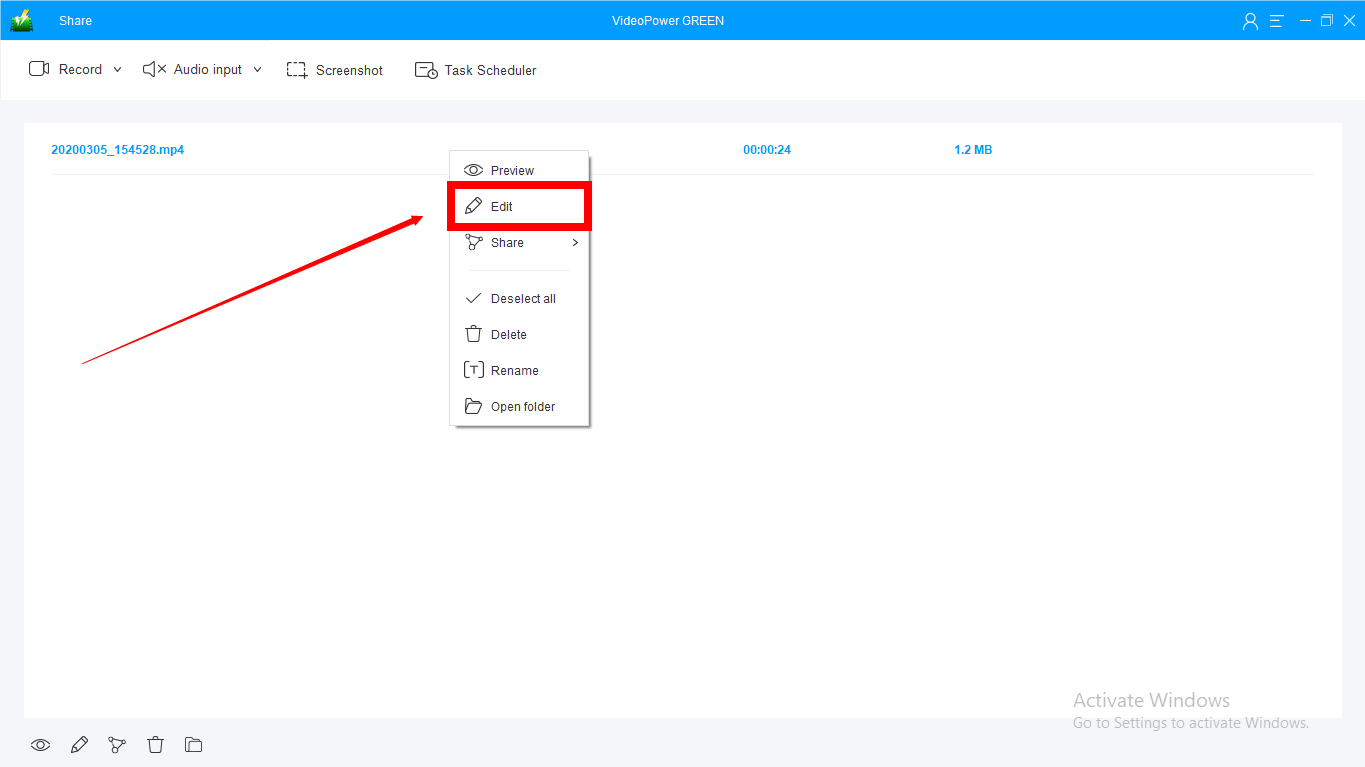
Step 1: Edit the Recorded File
After recording, the screen will automatically redirect to the recorded file list on the main interface window. Right-click the file and click “Edit” to be directed on the Video Editor.
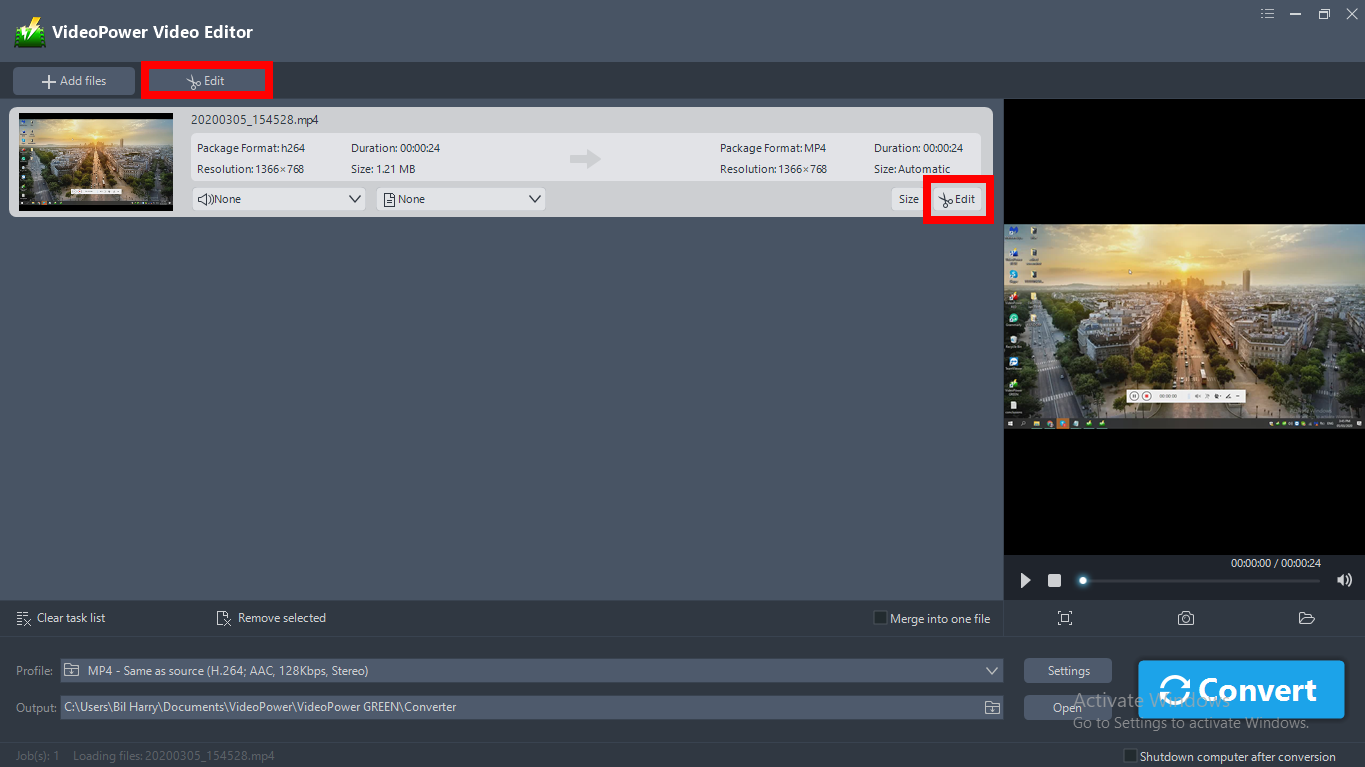
Step 2: Open the editor
A video editor will open another window. Click the “Edit” button on the right side of the recorded video file to start editing.
Step 3: Edit Process
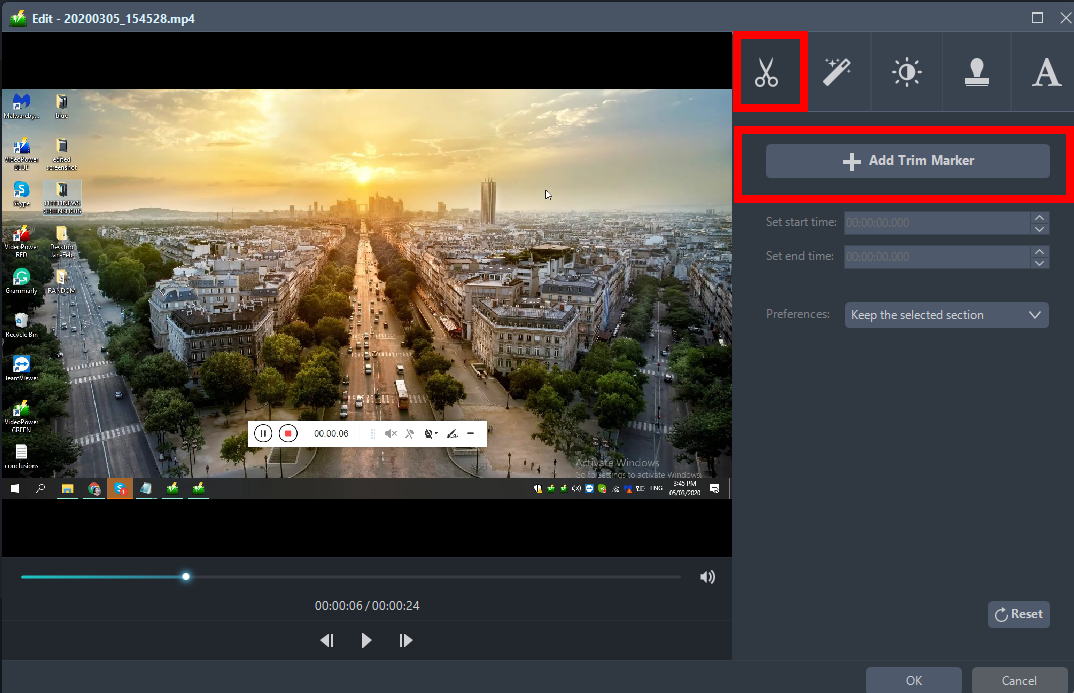
3.1 Trim Video
You can do the following steps to trim your video:
1) Click “Add Trim Marker” to add a trim marker to the progress bar, you can also add multiple trim markers by clicking this button multiple times.
2) Drag the slider to select the part you want to hold.
3) You can click the up or down button to set the start and end time as well.
4) Now you can choose to keep or delete the selected section.
3.2 Adjustments
1) You can do the following steps to adjust your video:
2) Rotate your video position.
3) Crop video screen size.
4) Synchronize the video and audio.

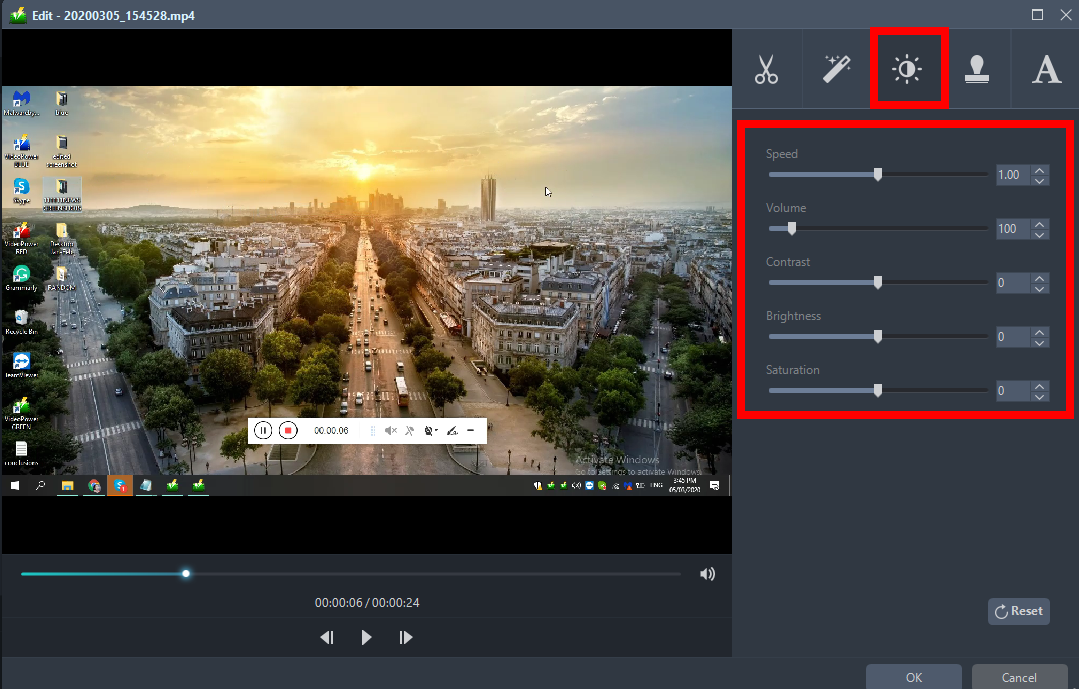
3.3 Effects
You can do the following steps to change some EFFECTS on your video:
1) Speed – Speed up, slow down, the tempo of your video.
2) Volume – Set sound level.
3) Contrast – Change or adjust the difference in lightness, brightness and/or hue.
4) Brightness – Where you can adjust how lightness or darkness you want your video.
5) Saturation – Adjust the intensity of color in an image.
3.4 Watermark
Add a watermark on the video.
1. Click the Watermark icon.
2. Add text, logo, or image as a watermark.

3.5 Subtitle
Add subtitles for the video. You can import external subtitles, or search subtitles for the corresponding subtitles from the Internet.
Please refer to another tip about how to edit the subtitle file.
1) Click the Subtitle icon.
2) Click Search Box (you can either click a subtitle saved on your computer or find it online).

Step 4: Save Edited Video
When the edits are done, click the “Convert” button, then the software will start to convert and save the edited video in MP4 format by default.
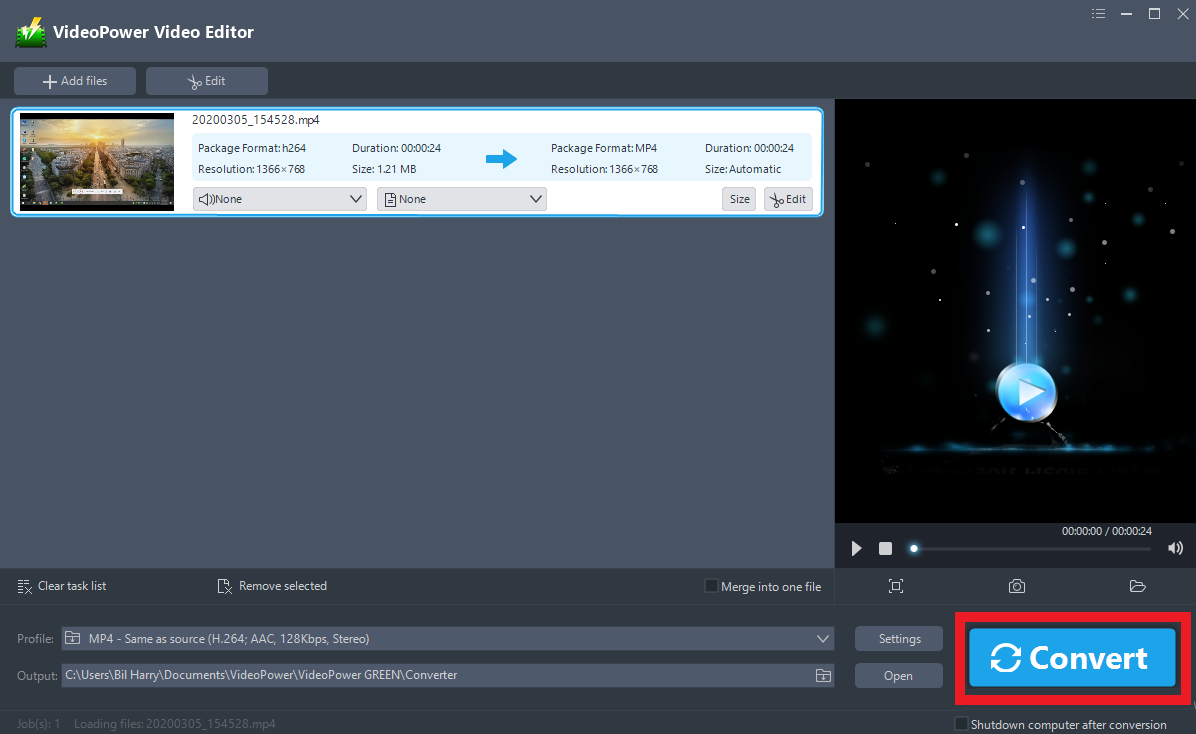
A pop-up window from the program will appear informing you that the conversion is complete.
Click “OK” to open the folder of your saved converted files.

Conclusion:
This is a wonderful software that has far advanced features compared to other streaming video recorders and screenshot tools.
VideoPower GREEN, a powerful screen recording software that supports conversion to any video formats as well. It has a video editing function to trim video, adjust video size, change video effects and add watermarks.