Tips Index
With the development of the Internet and multimedia, many users are dedicated to online video sharing. You can find a lot of teaching videos, gameplay videos, music videos and more on the Internet.
All kinds of videos are being uploaded every day by users all around the world. One of the most frequently uploaded video type is teaching video or instructional video.
Are you also wondering how they make this kind of video including screen animation and sound?
In this article, you will learn how to record screen and audio synchronously on a PC using the best and easiest screen recorder software of all time called VideoPower GREEN. Now, there is no need for you to be bothered about how to record screen and audio synchronously since you’re on the right track.
Just click the link below to download this free app.
Step 1: Customize video settings before recording your screen
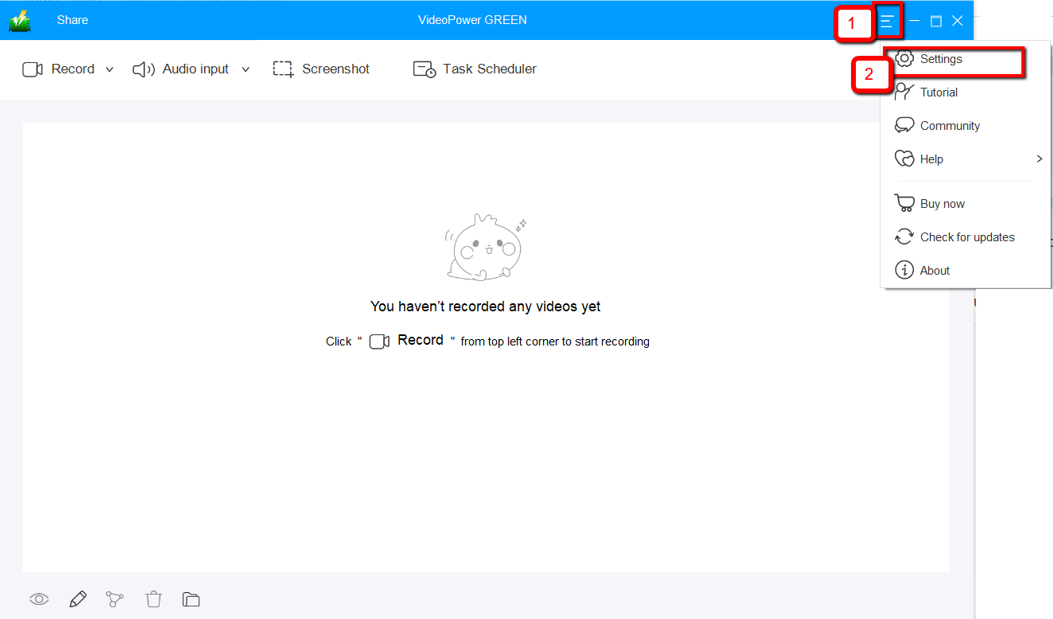
1.1 Open Settings
1) Click the menu on the upper right corner of the interface.
2) Choose “Settings” from the drop-down menu.
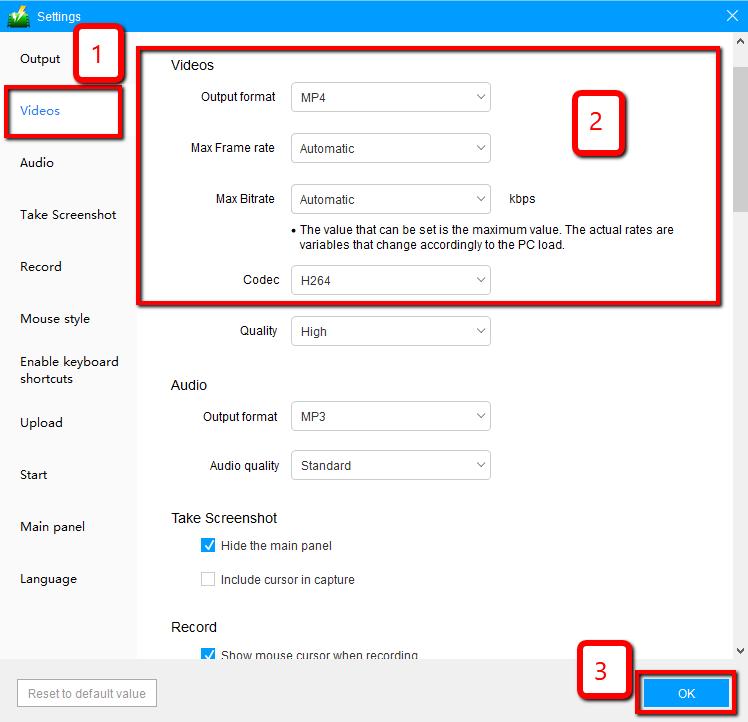
1.2 Change video settings
1) Click the “Video” tab on the left side of the interface.
2) You are now able to customize the Output format, Codec, Bitrate, and Frame rate of the recording video as per need.
3) Click “OK” to save settings
Step 2: Record Screen and Audio Synchronously on PC
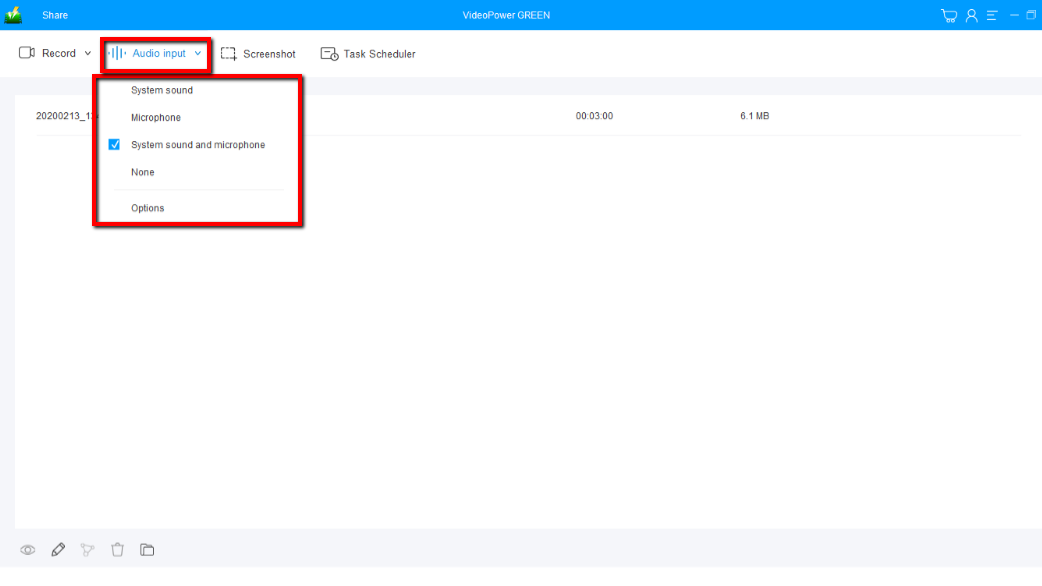
2.1 Choose a sound source
You can choose “System sound, Microphone, System sound and microphone or None.” To record streaming video, you can select “System sound”.
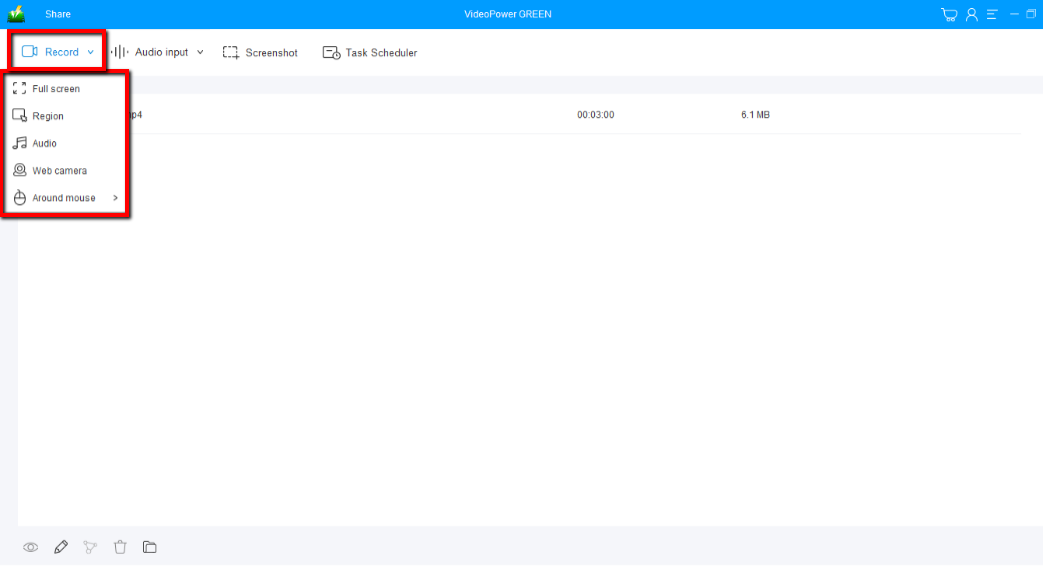
2.2 Select a recording area
Click on the “Record” button to choose the recording mode from “Full screen, Region, Audio, Web camera, Around mouse”. Select the area you are going to record.
2.3 Start to record
The pop-up window will ask whether you are ready to start recording, click “OK” to confirm when you are ready to record.

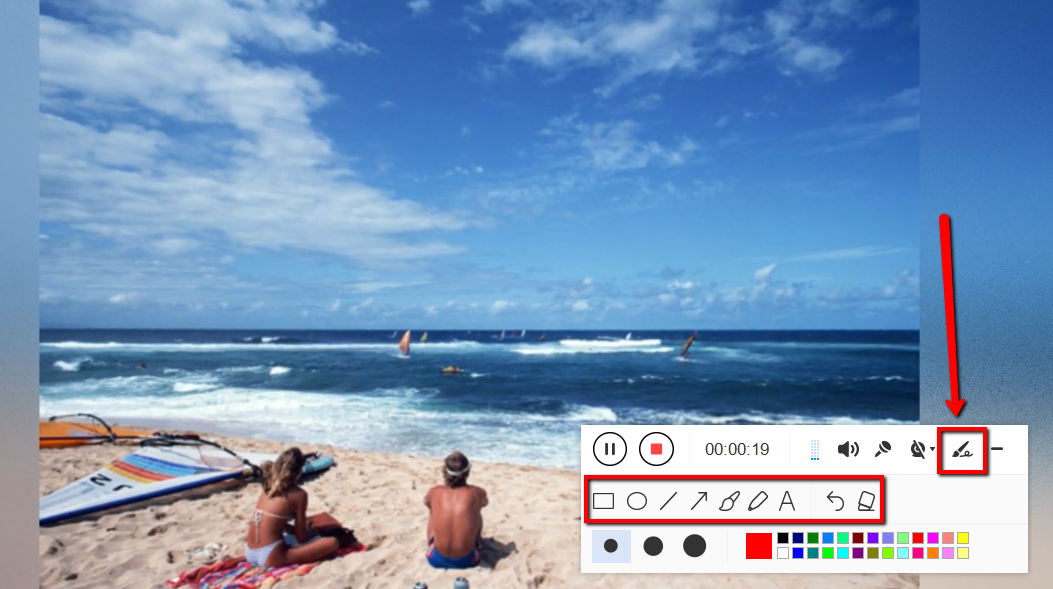
2.4 Edit video while recording
While recording you can add lines, arrows, shapes, texts, highlight, blur, etc. by clicking the edit button.
2.5 End the recording
Click the “Stop” button to stop recording.

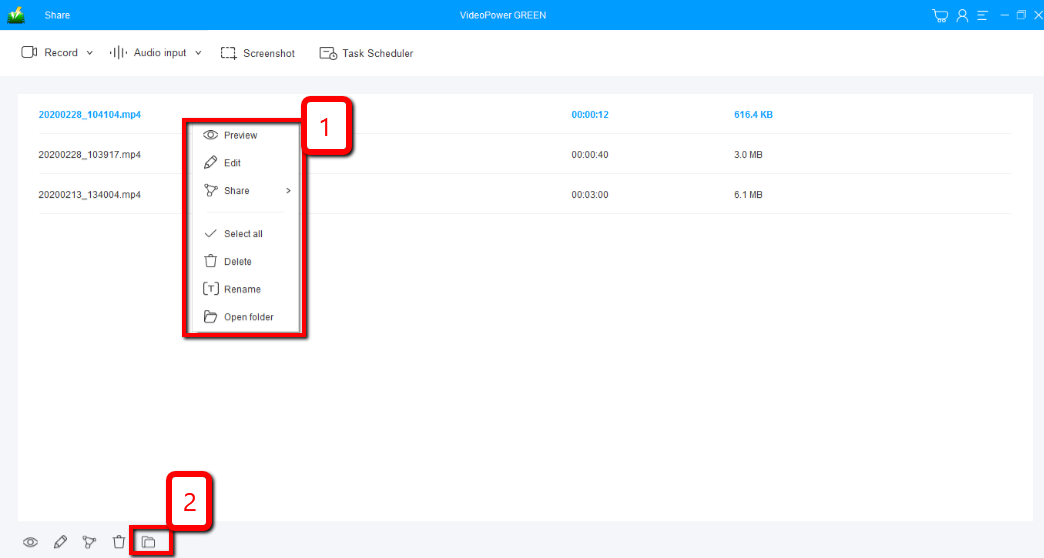
Step 3: Manage your recorded video
After that, the recorded file is already saved in the pointed output folder.
1) Your recorded file can be seen in the main interface. You can right-click the file and do more operations if you like.
2) Click the folder icon to view it in the pointed output folder.
Conclusion:
Screen recording with VideoPower GREENv is a total package. This software features a screen capturing tool, video editor, converter and many more!
This software records your screen in great quality and what’s great about VideoPower GREEN is its video editor. You can apply watermarks, effects, do trimming or cropping, adjust the speed, volume, contrast, brightness and saturation of a video.
You can merge multiple files into one file as well and convert it to any audio or video format that you like.