Tips Index
I believe that everyone has had such an experience when downloading videos. After spending a lot of time downloading the movie, it turns out that the image and sound don’t match. If just a slight gap, you can still watch it, but if it is serious enough that the characters and sounds are completely disoriented, you will not be able to watch the video.
This often occurs in English movies, very annoying!
In order to solve this problem, we can adjust the playing speed of sound and image through third-party software to make them consistent. In this article, we will recommend VideoPower BLUE to you, which supports adjusting sound and picture.
VideoPower BLUE can help you fix audio video sync problems. What it basically does is to delay the audio or the video so that they will be synced properly. It also provides various functions that include video conversion, video downloading, screen recording and video editing in which fixing the unsynchronized video can be done.
This software is very easy to use and it is 100% reliable, what you do upon editing is also what you will get after rendering the video file. Plus it supports any kind of file formats which bring comfort to every user.
You can download the trial version of this software with the below link.
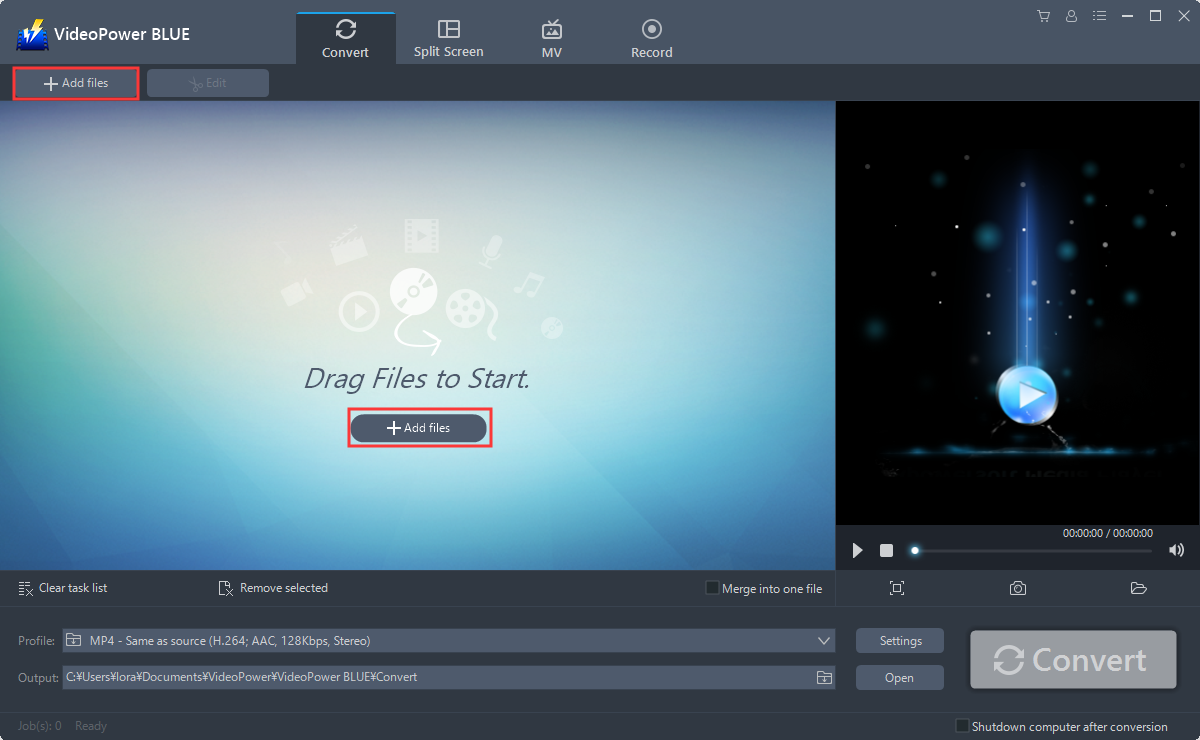
Step 1: Add the video you want to correct to VideoPower BLUE
Launch VideoPower BLUE and go to the “Add files” button to upload your video file to the program.
Step 2: Edit video
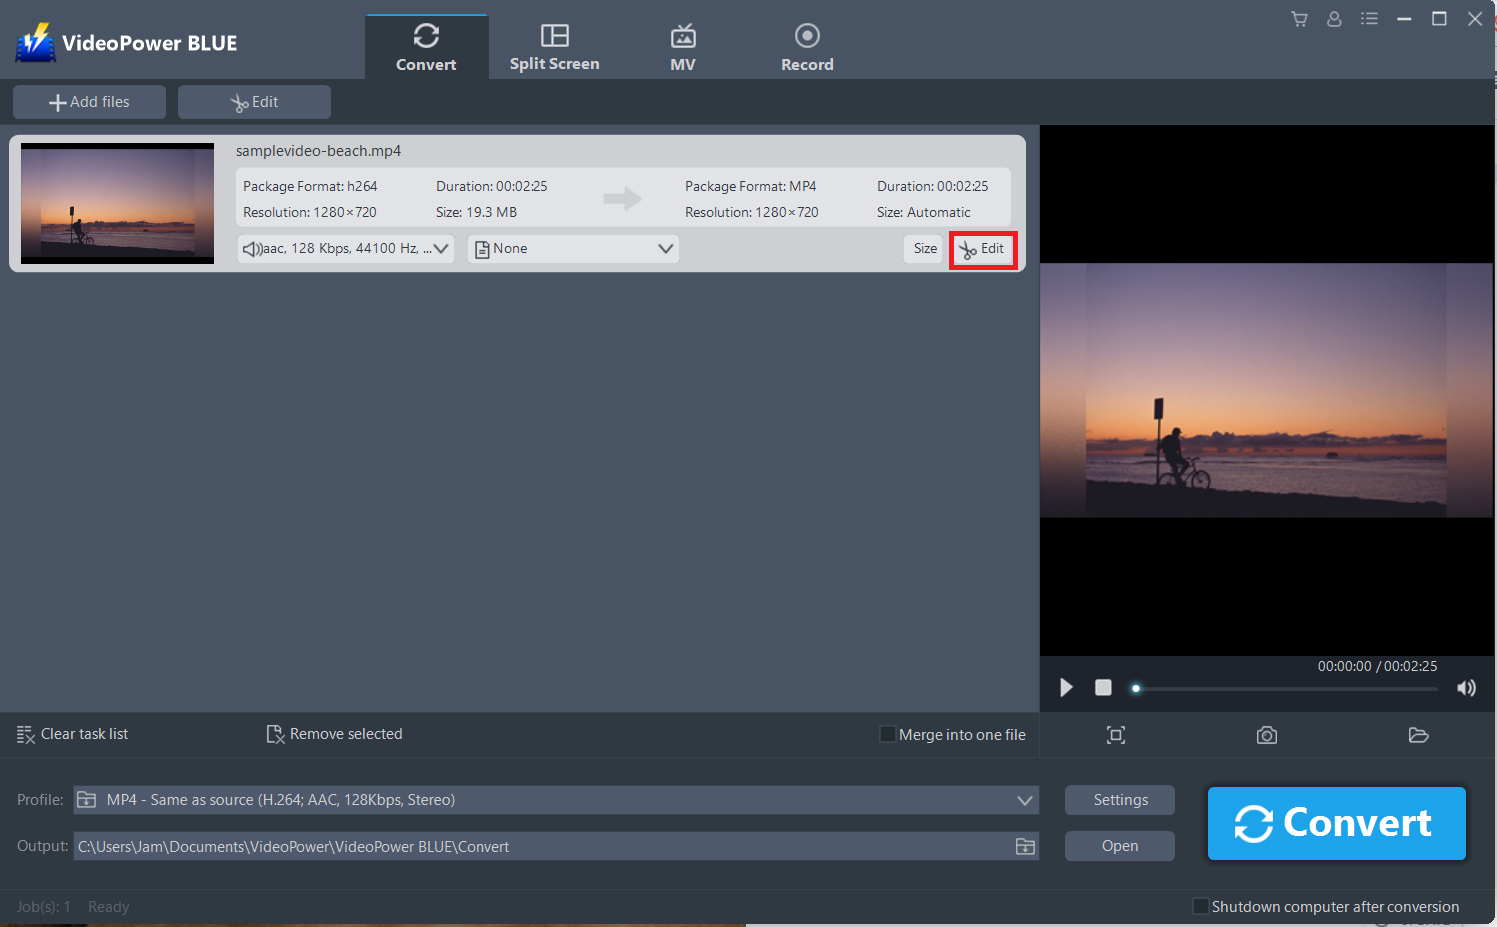
The imported file is displayed in the list.
Click the “Edit” button at the right side of the added video to enter the built-in video editor.
2.1 Adjust the gap
You can do the following steps to asynchrony the image and sound in your video:
1) Open the “Adjust” tab on the editing window.
2) Correct the misalignment with “synchronize” in the “Adjust” tab. If the audio is 1 second later than the image, set plus to 1.0, and If the audio is 1 second earlier than the video, set minus to -1.0. Adjustment is possible in units of 0.1 seconds.
3) Click “OK” to save the changes.

For more edit features, you can read on further steps.
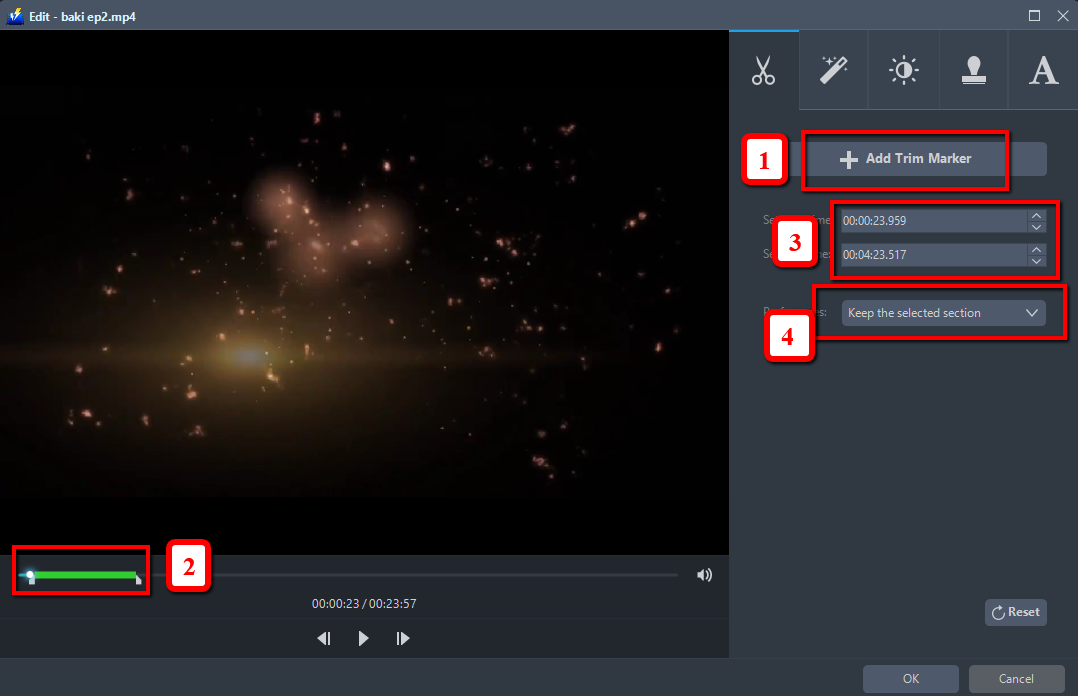
2.2 Trim
You can do the following steps to trim your video:
1) Click “Add Trim Marker” to add a trim marker to the progress bar, you can also add multiple trim markers by clicking this button multiple times.
2) Drag the slider to select the part you want to hold.
3) You can click the up or down button to set the start and end time as well.
4) Now you can choose to keep or delete the selected section.
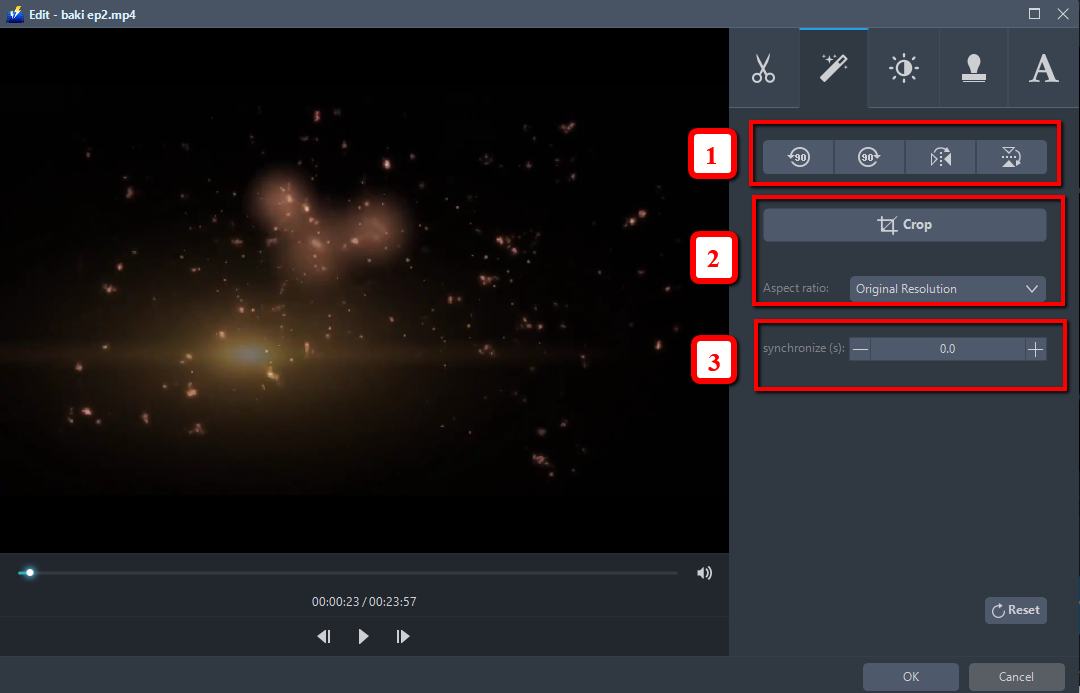
2.3 Adjustments
1) You can do the following steps to adjust your video:
2) Rotate your video position.
3) Crop video screen size.
4) Synchronize the video and audio.
2.4 Effects
You can do the following steps to change some EFFECTS on your video:
1) Speed – Speed up, slow down, the tempo of your video.
2) Volume – Set sound level.
3) Contrast – Change or adjust the difference in lightness, brightness and/or hue.
4) Brightness – Where you can adjust how lightness or darkness you want your video.
5) Saturation – Adjust the intensity of color in an image.

2.5 Add Watermark
Add a watermark on the video.
1) Click the Watermark icon.
2) Add text, logo or image as a watermark.

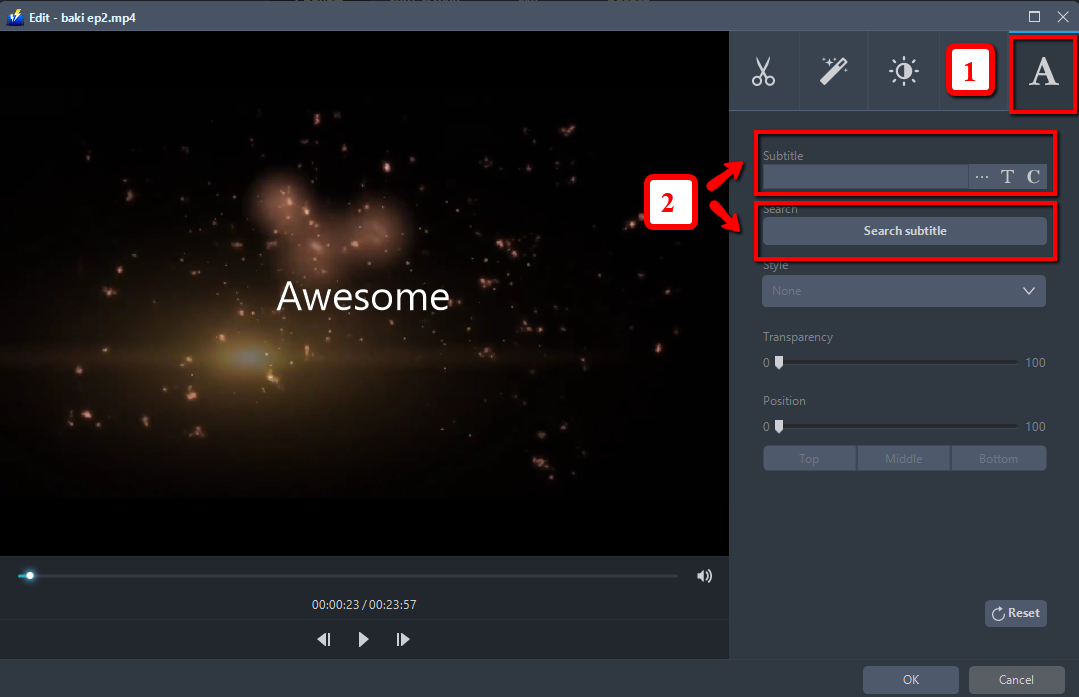
2.5 Subtitle
Add subtitles for the video. You can import external subtitles, or search subtitles for the corresponding subtitles from the Internet. Please refer to another tip about how to edit the subtitle file.
1) Click the Subtitle icon.
2) Click Search Box (you can either click a subtitle saved on your computer or find it online).
Step 3: Conversion
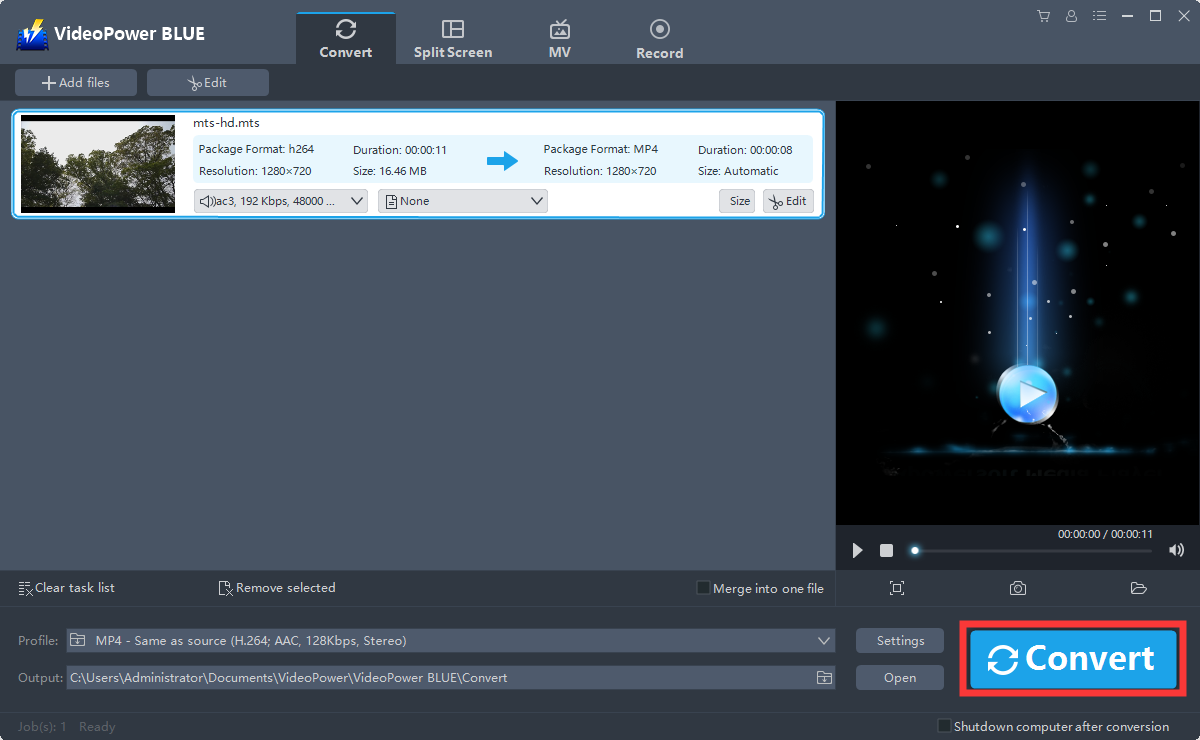
3.1 Convert
When the edits are done, click the “Convert” button, then the software will start to convert and save the edited video in MP4 format by default.
3.2 Storage Folder
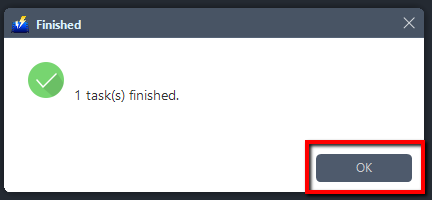
A pop-up window from the program will appear informing you that the conversion is complete.
Click “OK” to open the folder of your saved converted files.
Note: The edited video will be saved as a new file, and the original file still exists without anything changes. The adjusted video will be shorter than the original one.
Step 4: Complete download
After the track has been downloaded, it will be transferred to the “Completed” downloads list. Click on the folder icon to locate the file folder destination of the track.

Conclusion:
This software is a multi-faceted software that has a simple, easy-to-use and straightforward interface. VideoPower BLUE is great to correct asynchrony between image and sound in the video through the built-in video editor that will enable you to edit slideshows or videos, apply watermarks, effects, and other basic video editing options such trimming or cropping. Moreover, it has a split-screen tool for your photos and videos and a screen recorder which allows you to capture any on-screen activity on your computer.