Tips Index
Nowadays, not only digital technologies are persistently developing but also digital applications. This time, disseminating pieces of information through videos is very common.
You can simply open any websites and applications on your mobile phones, laptops, and computers to surf, browse and send some videos. You can also save online videos by recording the PC screen. But one question is, How could you successfully record live streaming videos on your PC? What software would be best for this?
Asking these questions leads you to discover VideoPower GREEN an impressive application software for screen capturing and recording.
This application software’s recording feature works flexibly as you can record any genres and categories of videos most especially streamings on your screen as much as you want in any way you want.
If you wish to record any streaming videos using your laptop, we highly recommend to you the best and easiest screencast/screen recorder software of all time called the VideoPower GREEN. Now, there is no need for you to be bothered anymore on how to record while streaming videos since you have come to the right place and with the simple guide below, you are one step ahead of your game.
Just click the link below to download its trial version and enjoy recording your favorite videos.
Step 1: Customize video settings before recording a live stream
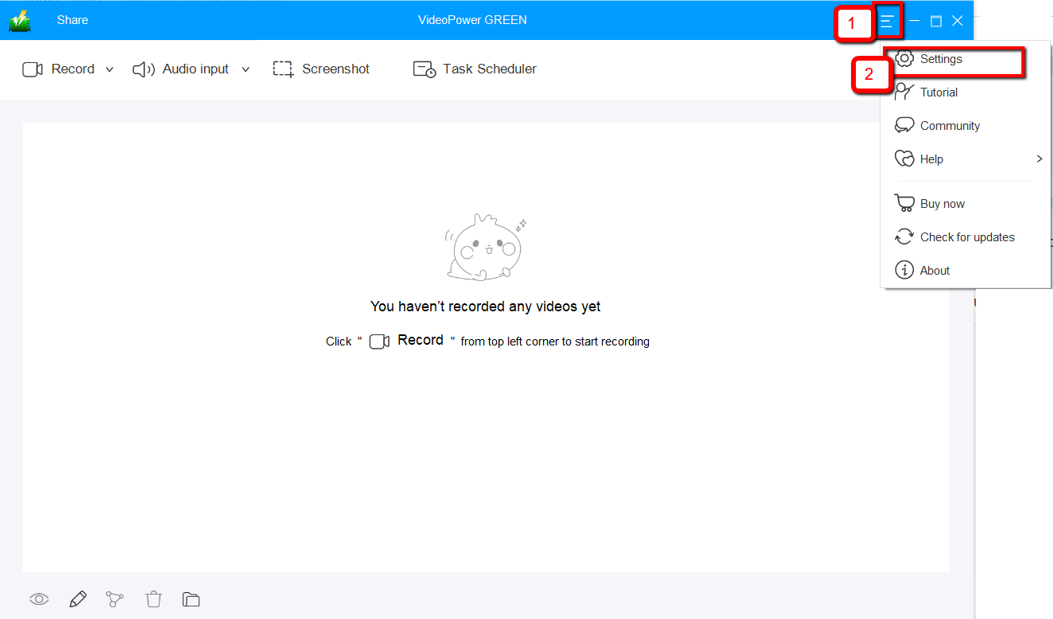
1.1 Open Settings
1) Click the menu on the upper right corner of the interface.
2) Choose “Settings” from the drop-down menu.
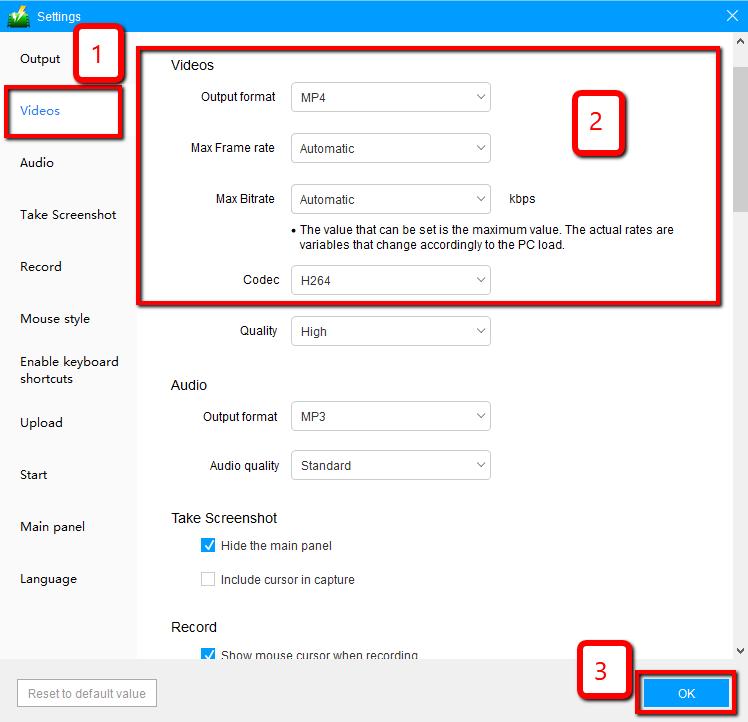
1.2 Change video settings
1) Click the “Video” tab on the left side of the interface.
2) You are now able to customize the Output format, Codec, Bitrate, and Frame rate of the recording video as per need.
3) Click “OK” to save settings.
Step 2: Record live stream videos
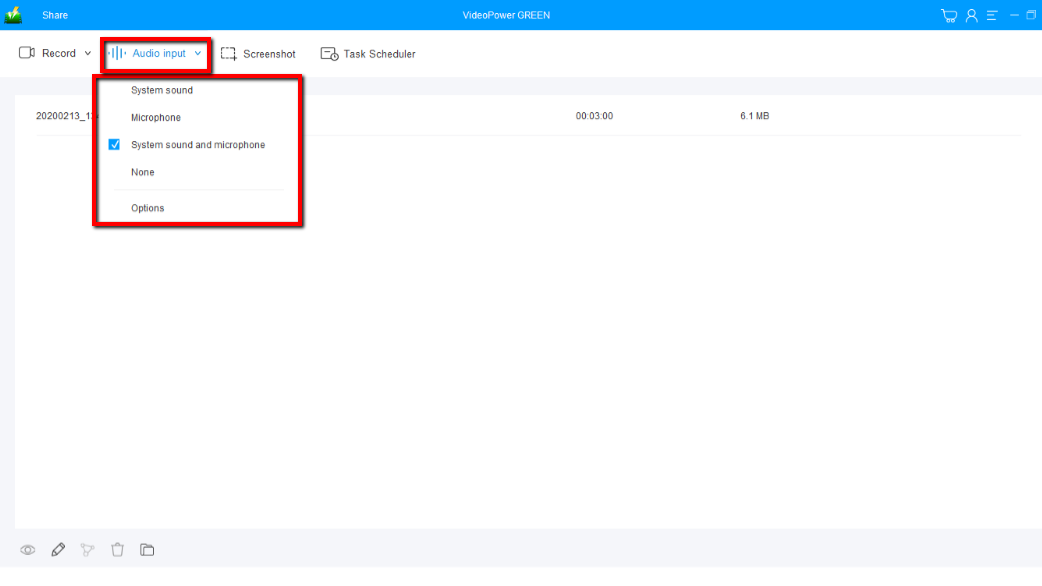
2.1 Choose a sound source
You can choose “System sound, Microphone, System sound and microphone or None.” To record streaming video, you can select “System sound”.
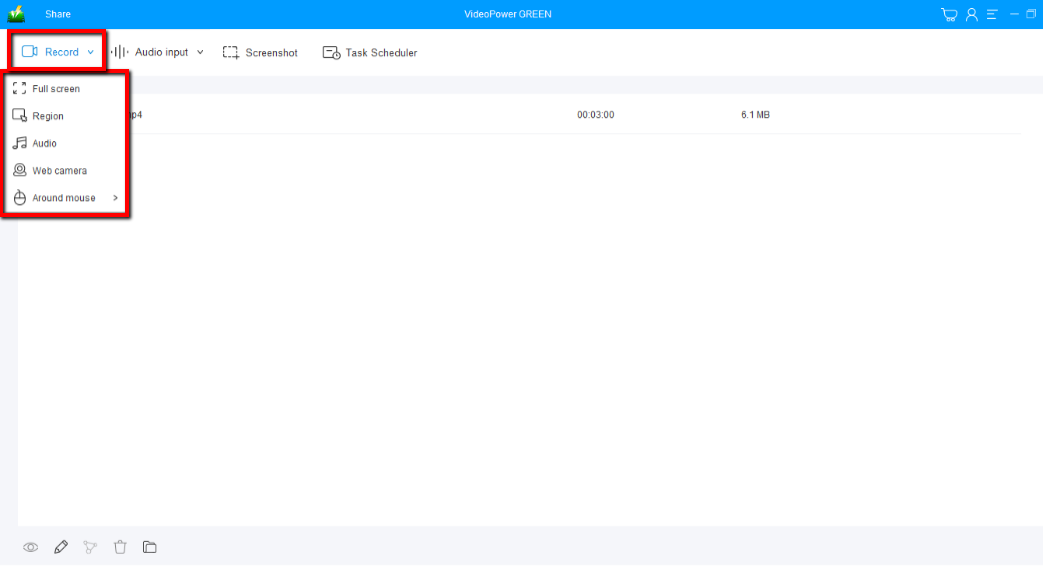
2.2 Select a recording area
Click on the “Record” button to choose the recording mode from “Full screen, Region, Audio, Web camera, Around mouse”. Select the area you are going to record.
2.3 Start to record
The pop-up window will ask whether you are ready to start recording, click “OK” to confirm when you are ready to record.

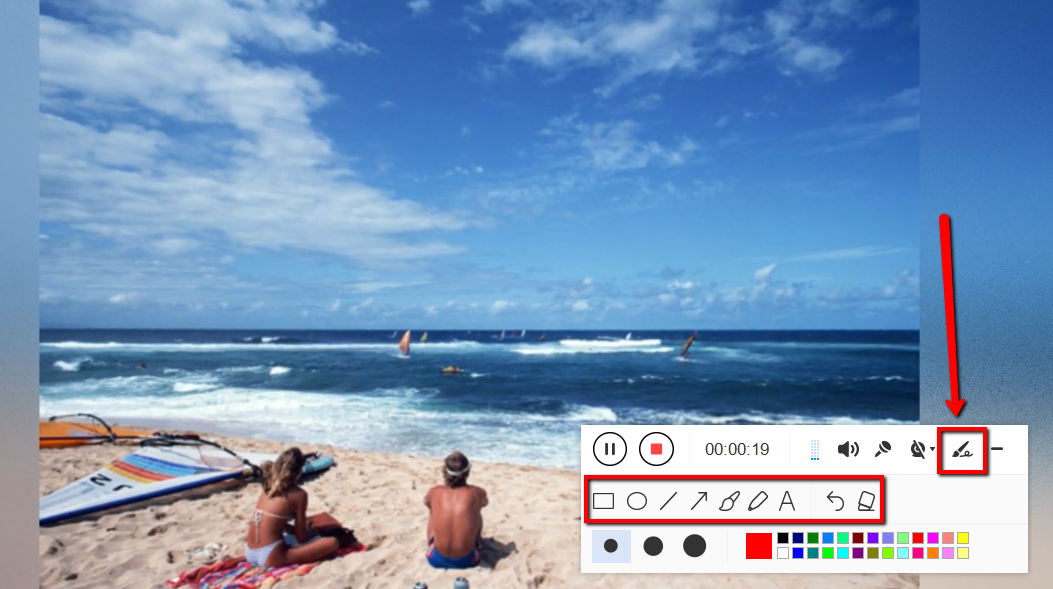
2.4 Edit video while recording
While recording you can add lines, arrows, shapes, texts, highlight, blur, etc. by clicking the edit button.
2.5 End the recording
Click the “Stop” button to stop recording.

Step 3: Manage your recorded live stream videos
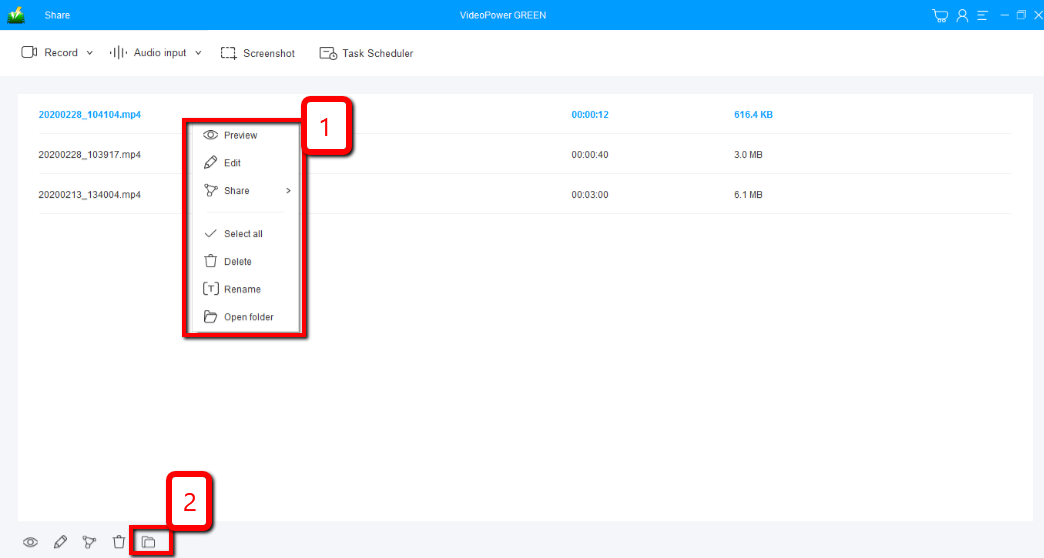
After that, the recorded file is already saved in the pointed output folder.
1) Your recorded file can be seen in the main interface. You can right-click the file and do more operations if you like.
2) Click the folder icon to view it in the pointed output folder.
Conclusion:
Whether you want to record your screen for personal consumption or professional use, VideoPower GREEN is just right for you. It records in high quality and a task scheduler tool helps you to be more efficient when you are not in front of your computer if you want to record streaming video. Tet the date and time and VPG will record your screen automatically.
It’s fast and flexible with a built-in video editor that will enable you to edit audio or videos, apply watermarks, effects and other basic video editing options such as trimming or cropping. VideoPower GREEN editor extension will let you convert files into various formats that you want.