Tips Index
Google Chrome is one of the most famous internet browsers around the globe. It was first released for Microsoft Windows and was later ported to Linux, macOS, iOS, and Android. Google Chrome is a cross-platform web browser for web applications developed by Google where the browser is the main component of it. Also, this app has various kinds of extensions that can be installed to enhance Chrome user’s experience.
Chrome is indeed useful for all of its users as it offers amazing and numerous kinds of sources to suffice users’ needs and wants. However, accessing its contents can only be done online but sadly not offline. To extend the use of its contents most especially the protected ones that cannot be downloaded, saving it locally would be the smartest way. To make saving chrome content a success, a best chrome screen recorder third-party tool should be present.
Therefore, VideoPower GREEN is highly recommended for users who have a desire to save chrome content for later and offline purposes. Using this best and easy to access screen recording application software can help users record any on-screen activities with professional results.
Also, with this, users can access recorded contents anywhere they are and anytime they need and want it. This app exactly answers users’ questions on how to screen record on Chrome.
Just click the link below to download this free app. Try to use the software for free by downloading its trial version below.
Step 1: Set-up sound source and recording area
1.1 Set Sound Source
To record PC screen activities, you can choose among the sound sources that best fit your needs.
Choose the desired sound source among “System sound, Microphone or System sound and microphone” on the “Audio Input” menu. If audio isn’t needed in recording, just choose “None”.

1.2 Set Recording Area
Click on the “Record” button to choose a recording mode among “Full screen, Region, Audio, Web camera, and Around mouse” and then select the area you are going to record.

Step 2: Start the Recording Process
2.1 Start the recording
After choosing a recording area, a prompt pop-up will appear. Click “Ok” to start the recording.

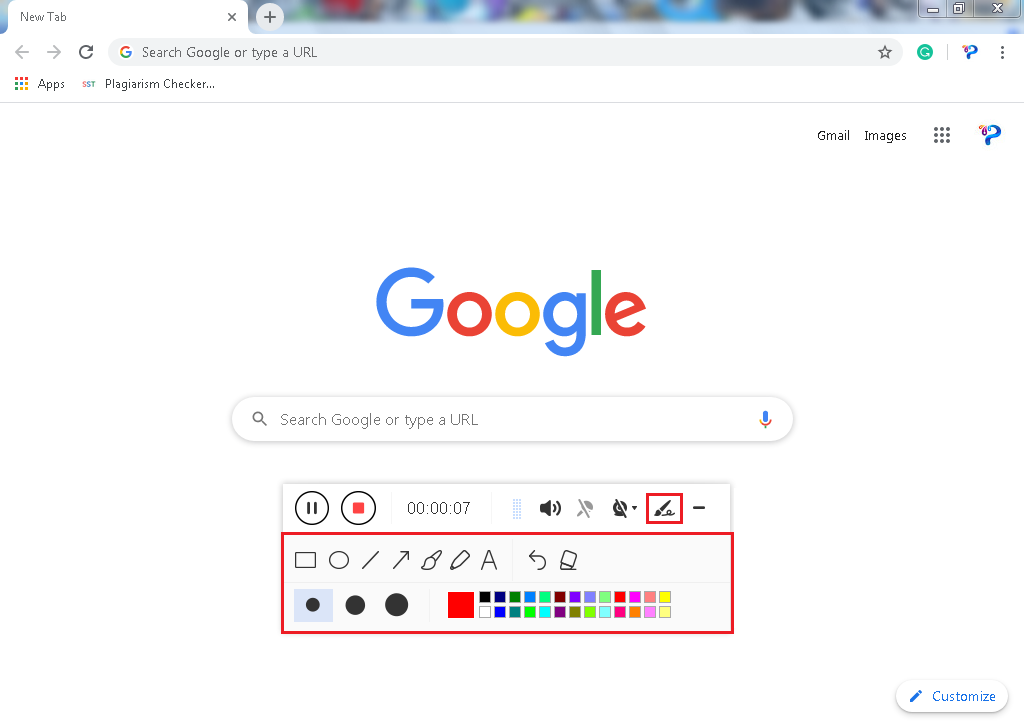
2.2 Edit video while recording
While recording, adding annotations like lines, arrows, shapes, texts, highlight, blur, etc. is possible. Just click the edit button to show the editing toolbox.
2.3 Stop the recording
Click the “Stop” button to stop recording.

Step 3: Redirect to Recorded List
After recording, the screen will automatically redirect to the recorded file list on the main interface window.
1) Right-click the file and do more operations if necessary, like playback the recorded video.
2) To open the storage folder, click the folder icon at the bottom of the interface.

Conclusion:
As digital technologies and applications started to develop as a part of human’s life, web browsers like Google Chrome were born and became famous and reached some places at the top as one of the most used browsers online.
Because of the evolution of this kind of browser, many things in people’s lives become simpler and easier than before. Complex information can be easily found and distant relatives and friends can easily be reached, desired movies and videos can easily be accessed and many more.
But then, there are users who wish to access and use Chrome contents offline and locally for some purposes most especially those protected ones. This would only be possible with the help of an amazing and trusted third-party screen recording application software called VideoPower GREEN.
Moreover, this app doesn’t only offer a screen recording feature but it also offers other various useful features such as screenshot for capturing images and task scheduler for scheduling a task to be continued most especially in the absence of users.