Tips Index
Digital technologies and applications are now enhanced. However, there are still questions on how to successfully capture the best videos from your computer and what would be the excellent and trusted recording software that can offer you the functions you need and desire.
This would be an application software that can answer questions like; What would be the best software you can use in place of your purchased online recording application that is in the peak of expiring before you finish your task? What would be the best tool to show clearly and completely your instructions if you would be asked to teach someone how to use complex software? What would be the application that would fit for you when you’ll need to add avatars in your recording and when you need to download online videos but can’t?
Only VideoPower GREEN video capture software can get all these things done for you.
Since screen recording is now commonly used in our daily activities, it now also has an application that can support its needs and can be downloaded for free.
Well, no need for you to be bothered anymore. Download, install and use VideoPower GREEN. Try it now!
Step 1: Customize video settings
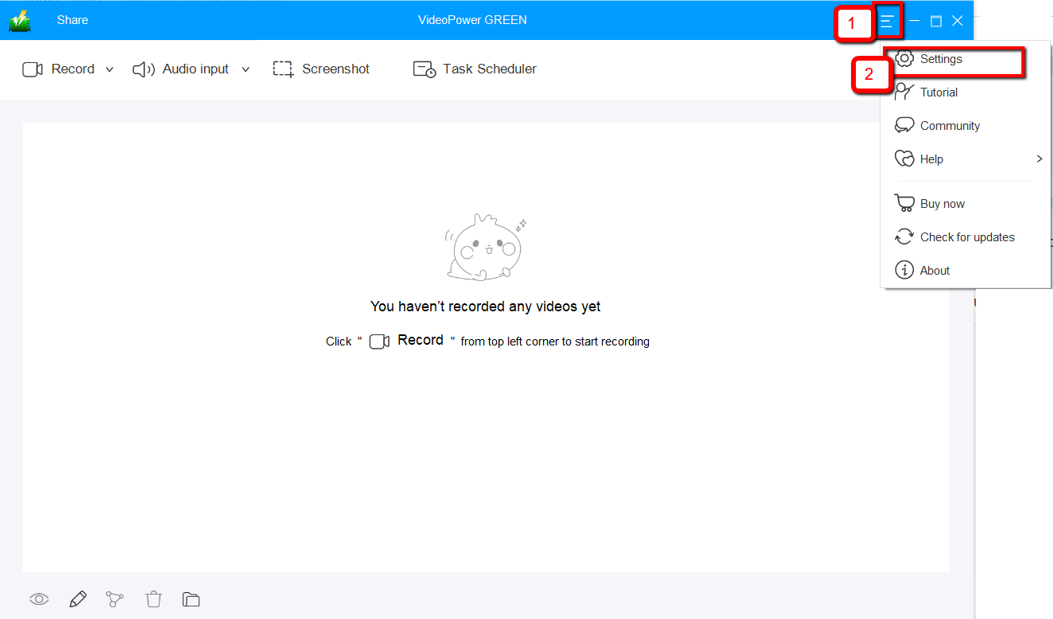
1.1 Open Settings
1) Click the menu on the upper right corner of the interface.
2) Choose “Settings” from the drop-down menu.
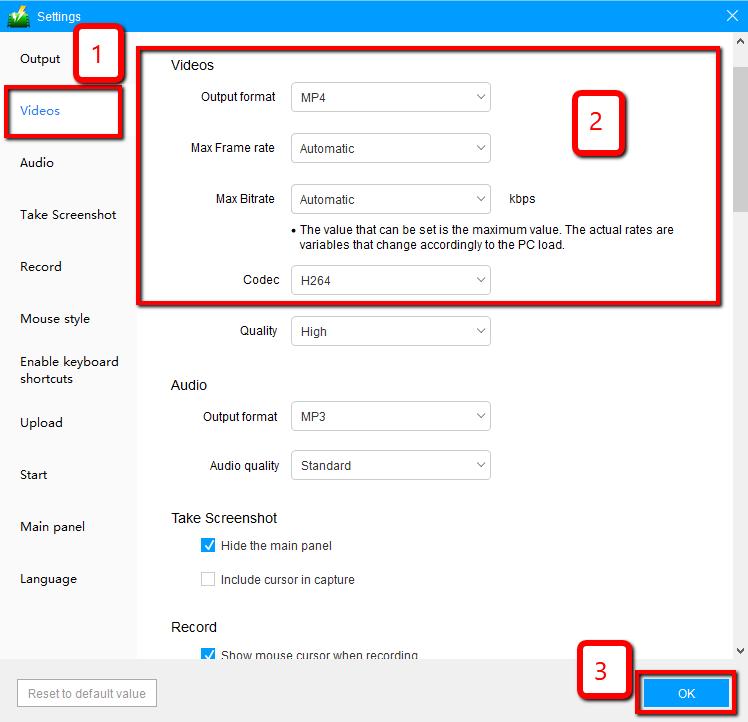
1.2 Change video settings
1) Click the “Video” tab on the left side of the interface.
2) You are now able to customize the Output format, Codec, Bitrate, and Frame rate of the recording video as per need.
3) Click “OK” to save settings.
Step 2: Record screen activities
2.1 Choose a sound source
You can choose “System sound, Microphone, System sound and microphone or None.” To record streaming video, you can select “System sound”.

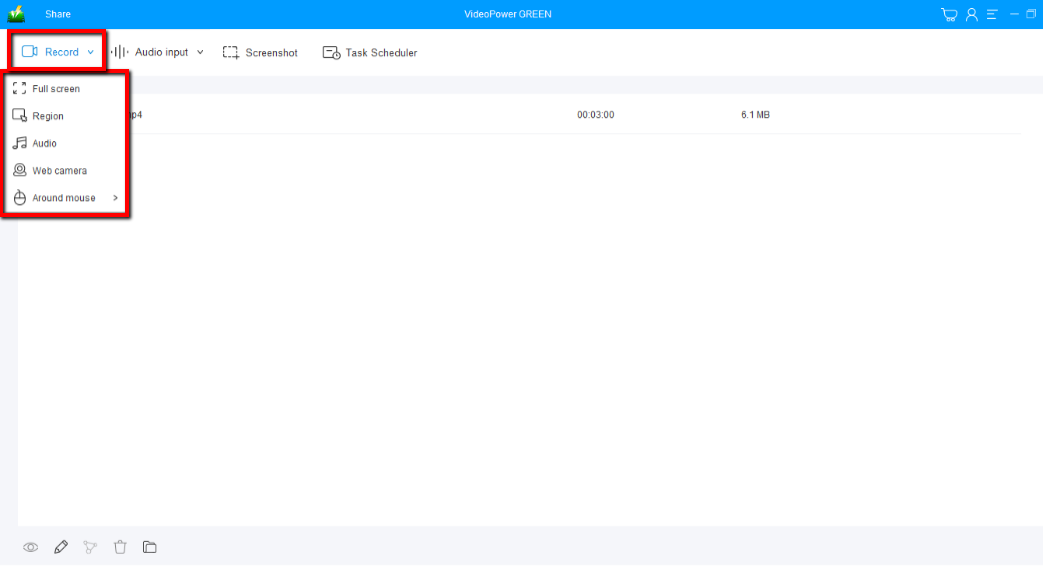
2.2 Select a recording area
Click on the “Record” button to choose the recording mode from “Full screen, Region, Audio, Web camera, Around mouse”. Select the area you are going to record.
2.3 Start to record
The pop-up window will ask whether you are ready to start recording, click “OK” to confirm when you are ready to record.

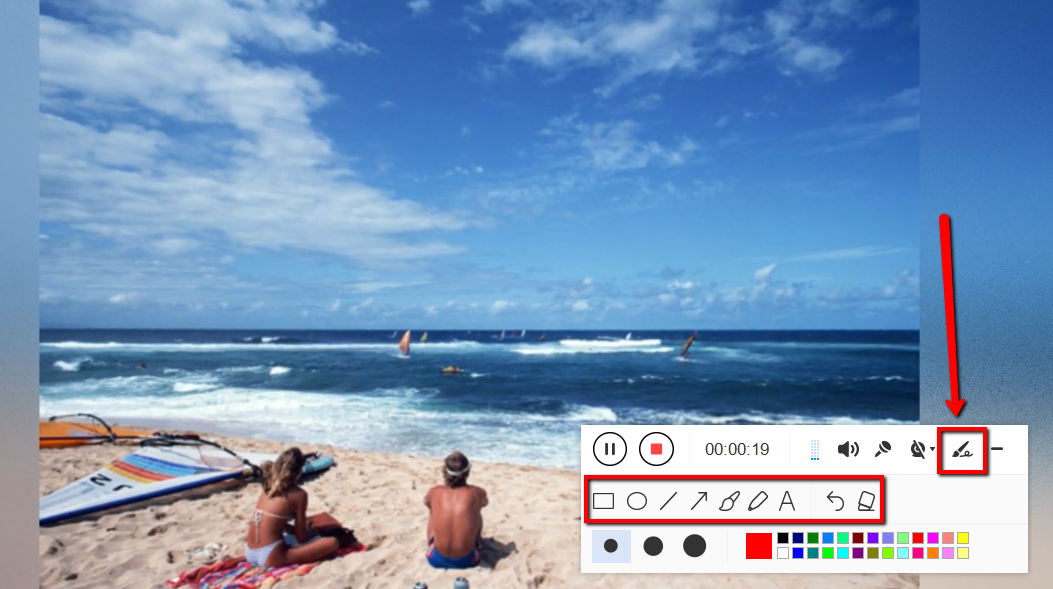
2.4 Edit video while recording
While recording you can add lines, arrows, shapes, texts, highlight, blur, etc. by clicking the edit button.
2.5 End the recording
Click the “Stop” button to stop recording.

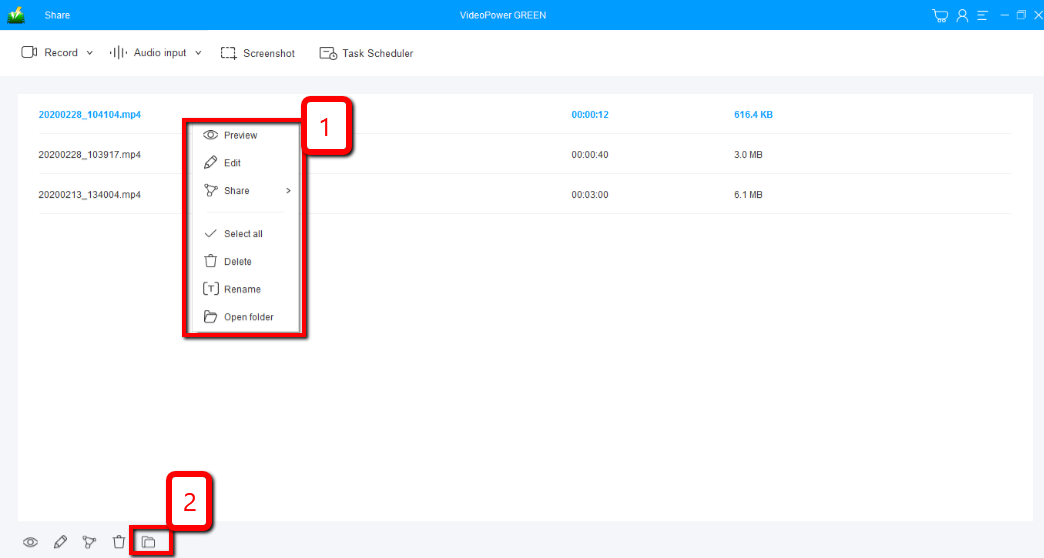
Step 3: Manage your recorded video
After that, the recorded file is already saved in the pointed output folder.
1) Your recorded file can be seen in the main interface. You can right-click the file and do more operations if you like.
2) Click the folder icon to view it in the pointed output folder.
Conclusion:
What’s great about this tool is that aside from being a great video capture software, the additional features are not seen on any other software. The video editor tool lets you apply watermarks, effects, and other basic video editing options such as trimming or cropping. Adjust the speed, volume, contrast, brightness and saturation of a video.
VideoPower GREEN captures videos in any format that you set it to, take screenshots of specific areas and add text, arrows, highlights, and texts.