Tips Index
It’s the era where influencers, celebrities, or just some who have their channels on YouTube. Many of this content is of “How to” like tutorials, and usually reviews, where people watch it for advice or help, or just doing some plain watching. I’m really curious about the parts in which it involves technology since I’ve been watching a lot from this genre. Typically they record the screen for instruction, and I got curious about how they do it, and what desktop recording software they’re using. I might know at the moment how to capture my screen, but do I know how to record mine? In a work or school setting where computers are involved, it is definitely hard to teach stuff just by saying it, we show photos of it, or better yet, a video instruction to make a learning process faster and more efficient along the way. So whether it is a desktop recording software for training or a desktop recording software with audio it should technically help us improve our materials in disseminating information.
I’m really particular with how an application is designed, how every tool is arranged, and how easy it is to deal with. VideoPower GREEN seemed to be pretty basic to me but as soon as I navigated, finally, I could say this app could do what I got curious about in the first place, which is recording my screen. I have yet to discover the tasks or projects which I could do with VideoPower GREEN and testing its functionality and usability, clear and outstanding results.
You can try to use the software for free by downloading its trial version below.
Step 1: Choose a sound source.
If audio is needed in recording, choose the desired sound source, “System sound, Microphone or System sound and microphone” on the “Audio Input” menu. If audio isn’t needed, just choose “None”. In recording video lectures, select “System sound”.

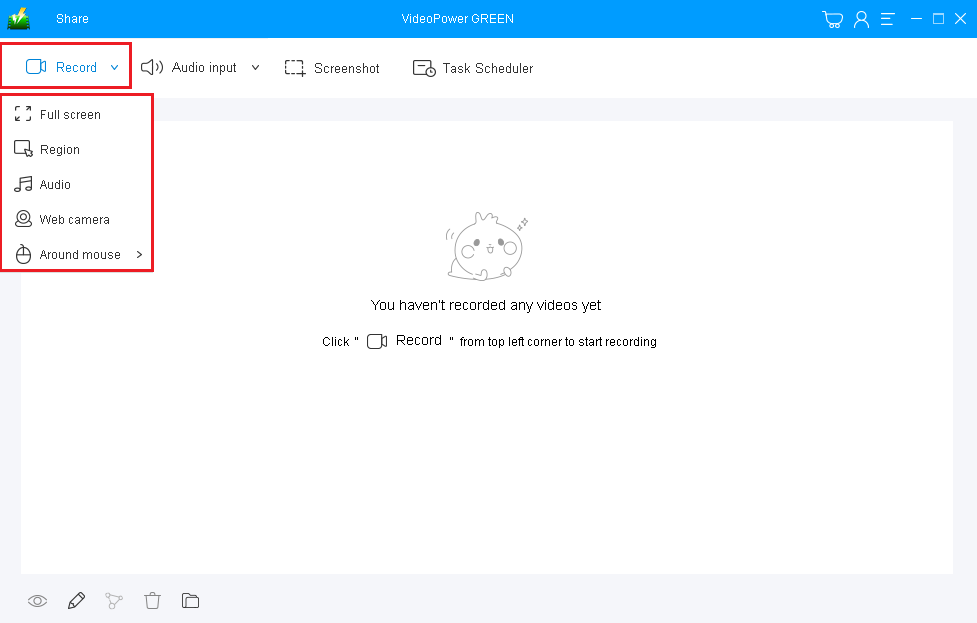
Step 2: Select a recording area.
Click on the “Record” button to choose the recording mode among “Full screen, Region, Audio, Web camera, and Around mouse” and then select the area you are going to record.
Full Screen:
The recording area will be the whole screen of the computer.
Region:
The recording area will only be a specific area of the computer screen.
Audio only:
Select “Only Audio” to record the audio-only.
You can save your files like MP3, AAC, OGG, WMA, WAV, FLAC, and other file formats.
Web camera:
Select this option to record video from an external webcam or a built-in laptop camera.
Around mouse cursor:
The mouse position is the center of the recording range. If you move the mouse during recording, the recording range will follow the movement of the mouse.
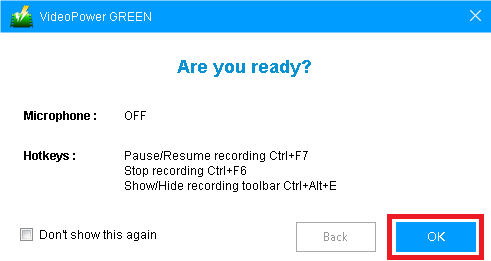
Step 3: Screen Record
A pop-up window will show to confirm whether to start the recording or not. Click “OK” to start the recording.
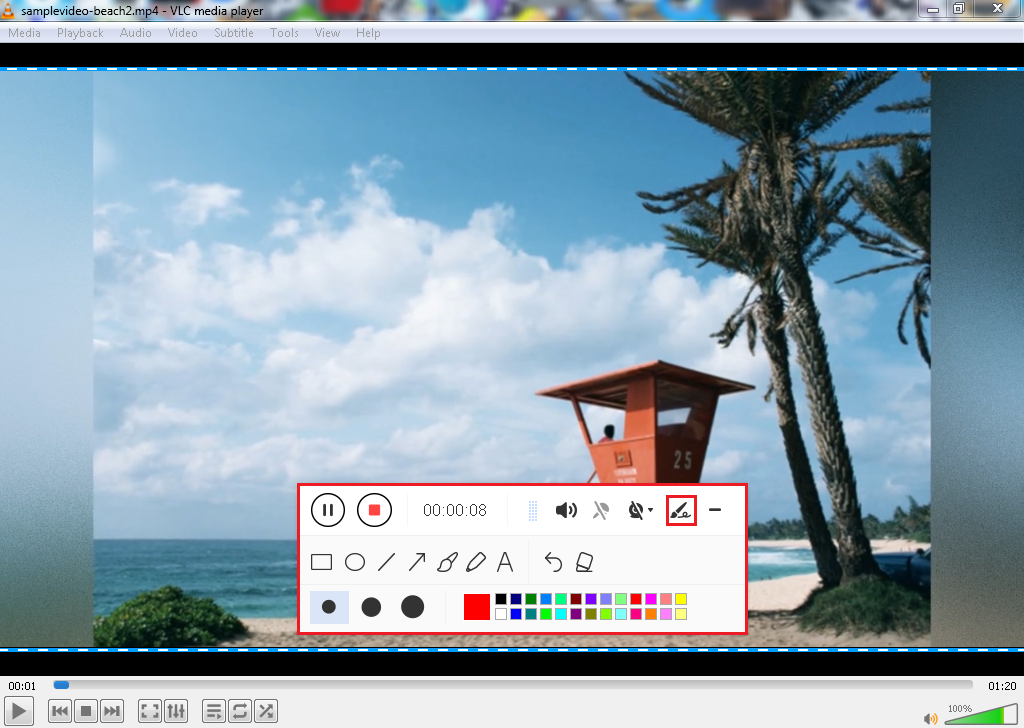
Step 4: Annotate Recording
Make your recording extra creative and clear. While recording, adding lines, arrows, shapes, texts, highlight, blur, etc. is possible. Just click the edit button to show the editing toolbox.
Step 5: End the recording.
Click the “Stop” button to end the recording.

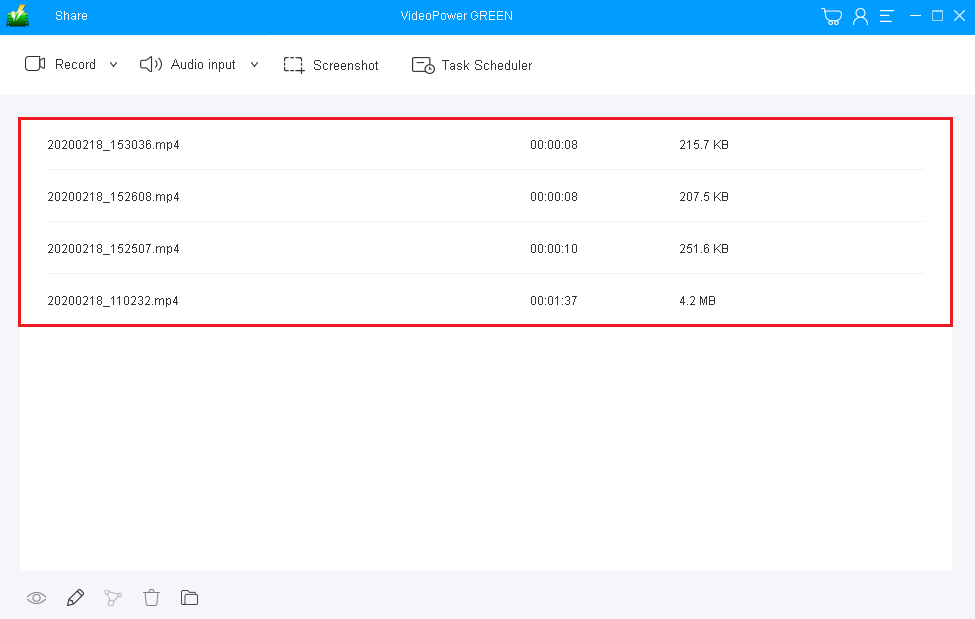
Step 6: Redirect to Recorded File List.
After recording, the screen will automatically redirect to the recorded file list on the main interface window. Right-click the file and do more operations if necessary. Double click the file to play or view it.
Conclusion:
Can I now finally make my own YouTube tutorial? Yes! This desktop recording software, VideoPower GREEN provides a perfect interface for your social media and YouTube content, especially for people who like teaching stuff in a technological category.
It is possible it offers more to just the usual screen view of the computer recording, but rather users have the capacity to only record a portion of the screen if they want. Webcam and audio features also help users to narrate better within the screen. It is the most outstanding desktop recording software windows 10, the versatility has no match yet! Try it now!