





Tips Index
When you watch videos on the Internet, you will often see a variety of different watermarks somewhere in the video screen, with text or pictures.
I believe many people have tried to watermark a video. In particular, those who share video tutorials on the Internet will more or less add their own trademarks on the video or promote their own watermark information for them, right?
Today, in making or editing videos it’s very important to add watermark on it. If your video has a watermark then you can easily avoid people from stealing your masterpiece and the question is, how do you actually add watermarks to your video?
You are one lucky person to find out about how awesome VideoPower BLUE is.
VideoPower BLUE is a powerful, multi-faceted software that contains a lot of features such as screen recording, video editing, and conversion. Its video editing function will allow you to watermark your video.
You can try to use the software for free by downloading its trial version below.
Step 1: Add video files to VideoPower BLUE
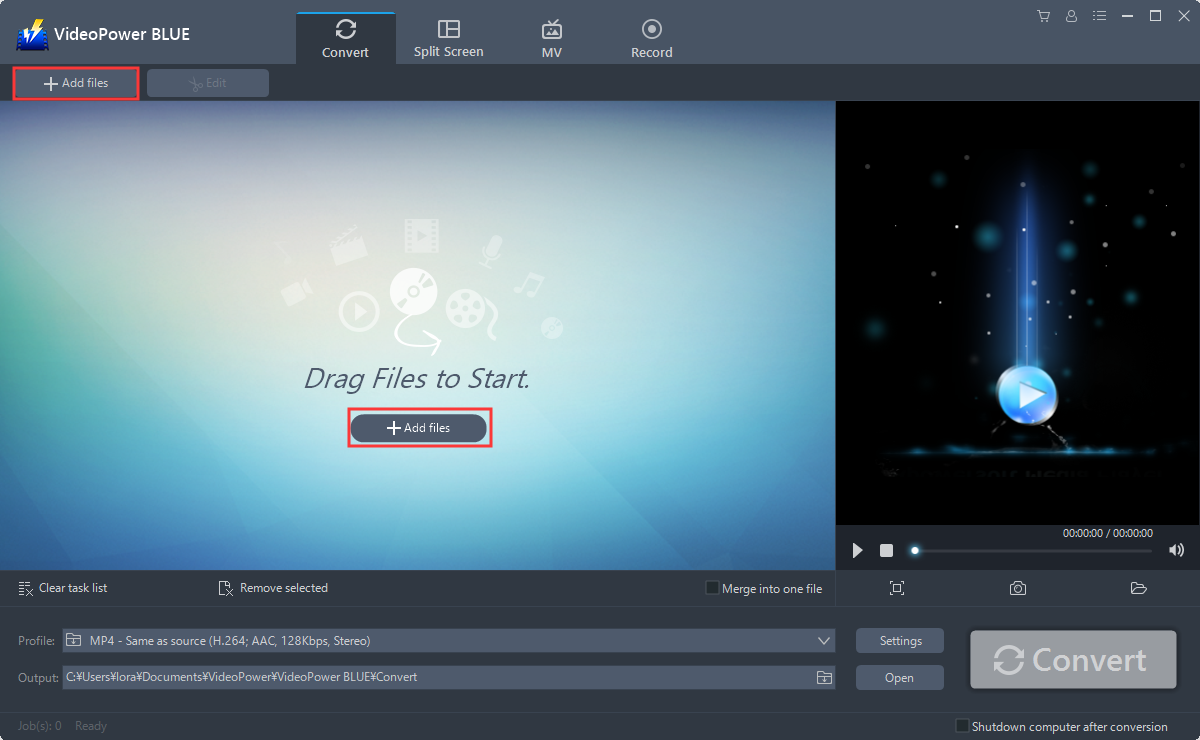
Launch VideoPower BLUE and go to the “Add files” button to upload your video file to the program.
Step 2: Edit video
2.1 Editor
The imported file is displayed in the list.
Click the “Edit” button at the right side of the added video to enter the built-in video editor.

The built-in video editor will pop up, with its help, you can make the perfect movie. Adjust speed and volume, trim, cut, crop, rotate or flip videos. Add effects, subtitles, and watermark while adjusting brightness, contrast, and saturation that will make editing conveniently easier.
2.2 Add Watermark
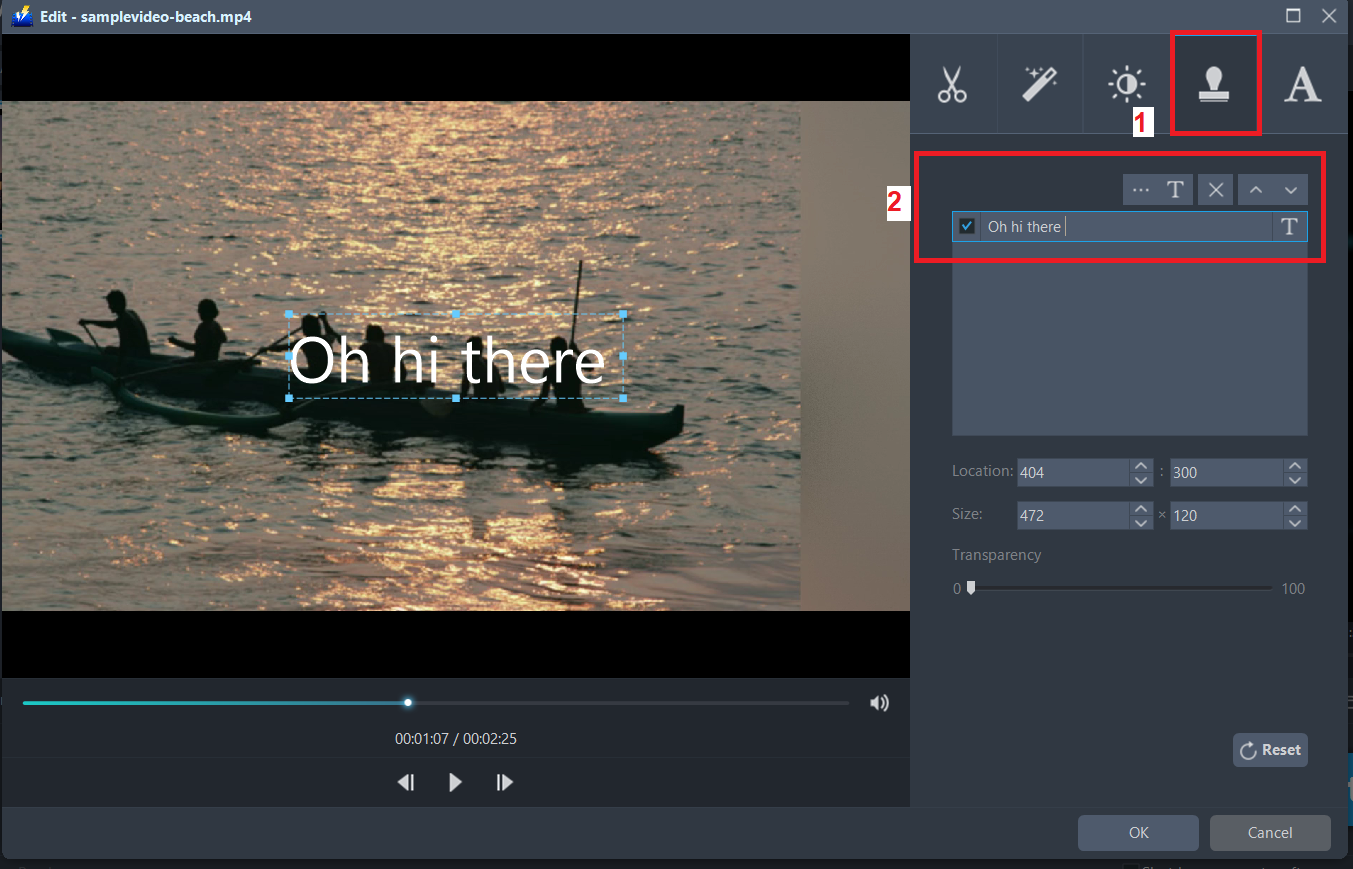
Add a watermark on the video.
1. Click the Watermark icon.
2. Add text, logo or image as a watermark.
2.3 Trim
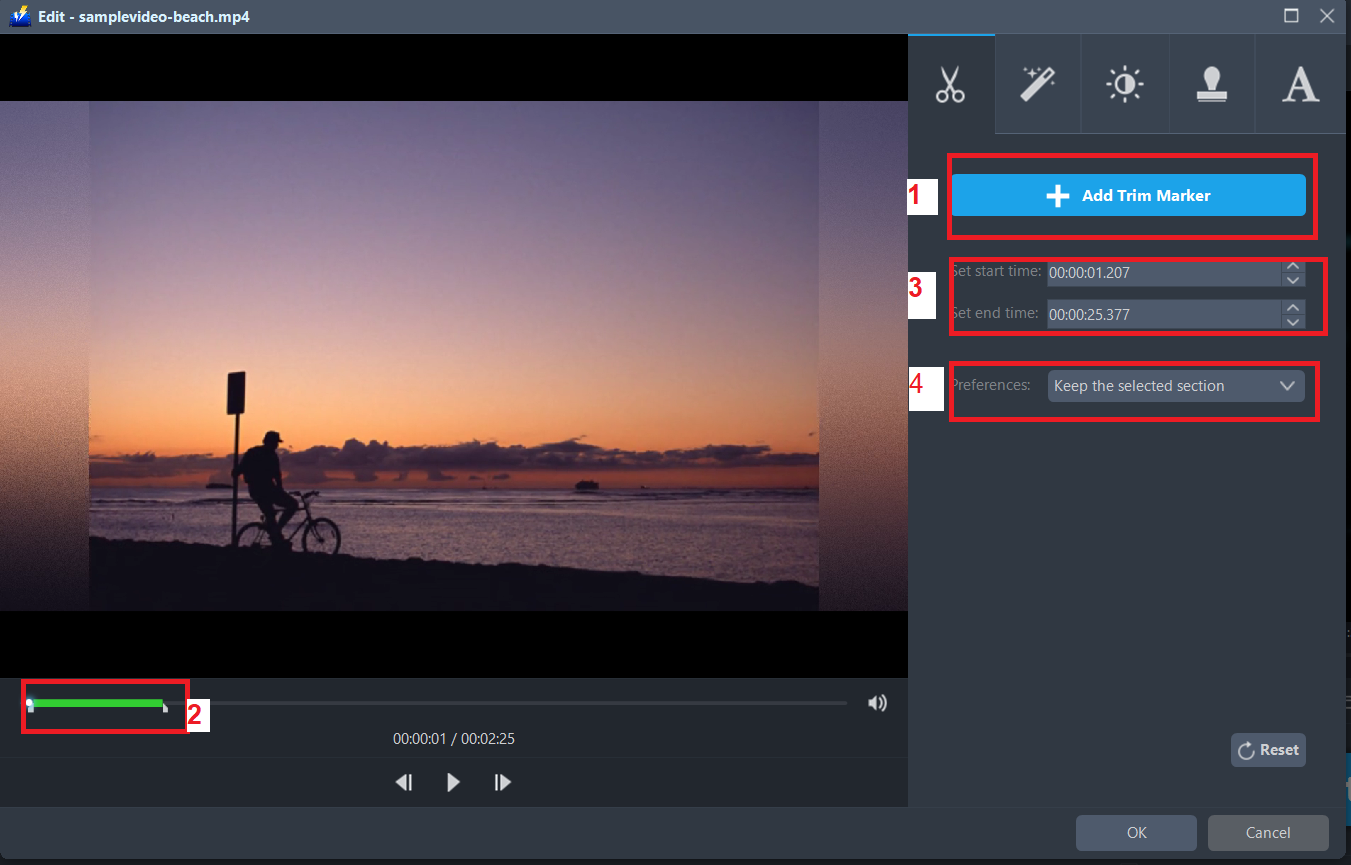
You can do more with this editor like trimming your video as shown below:
1) Click “Add Trim Marker”.
2) Drag the mark as shown below to select the part you want to cut. If you want to select multi-sections, please repeat 1 and 2.
3) Choose “Keep the selected section” or “Delete the selected section” from “Preferences”.
4) Click “OK” to save the setting.
2.4 Effects
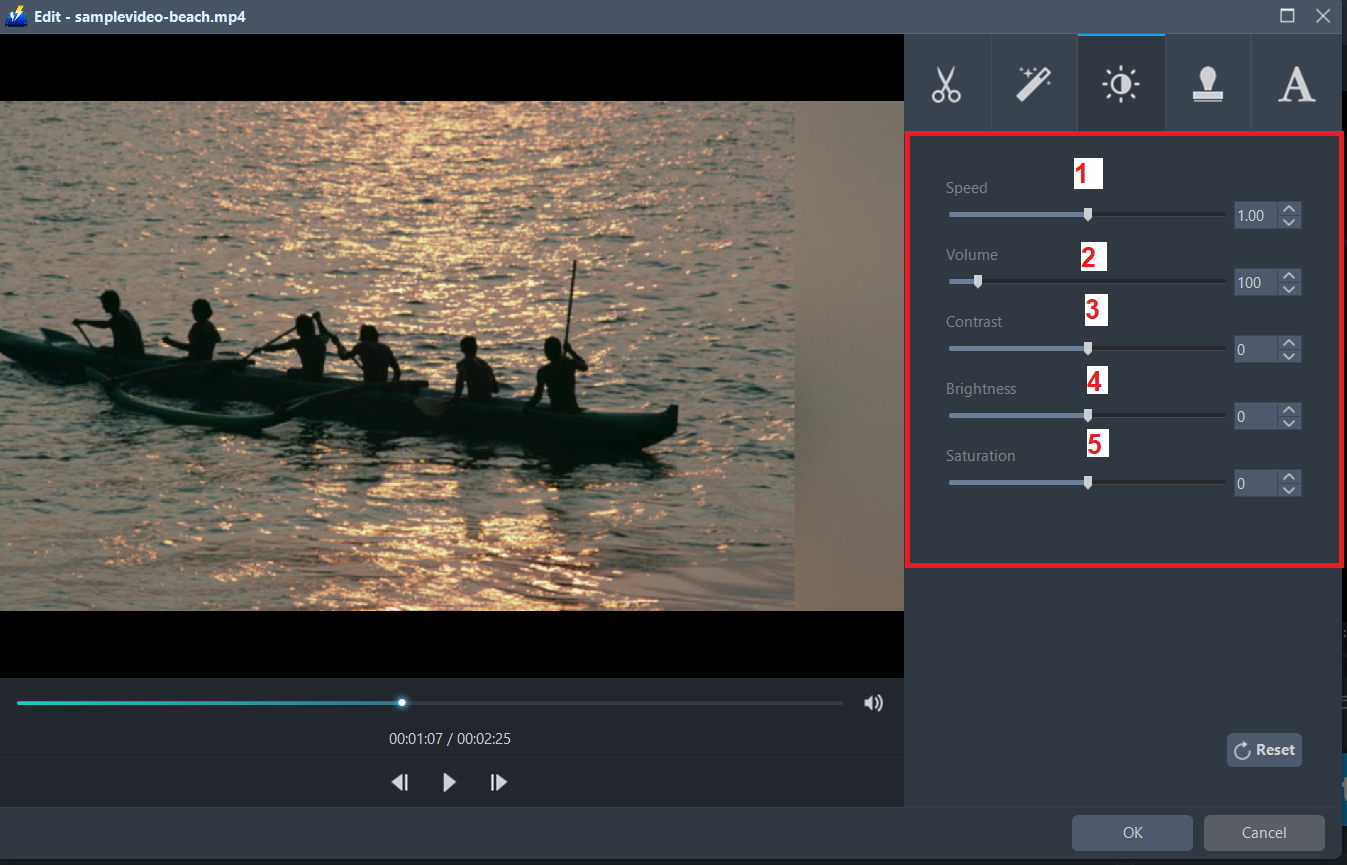
You can do the following steps to change some EFFECTS on your video:
1) Speed – Speed up, slow down, the tempo of your video.
2) Volume – Set sound level.
3) Contrast – Change or adjust the difference in lightness, brightness and/or hue.
4) Brightness – Where you can adjust how lightness or darkness you want your video.
5) Saturation – Adjust the intensity of color in an image.
2.5 Adjustments
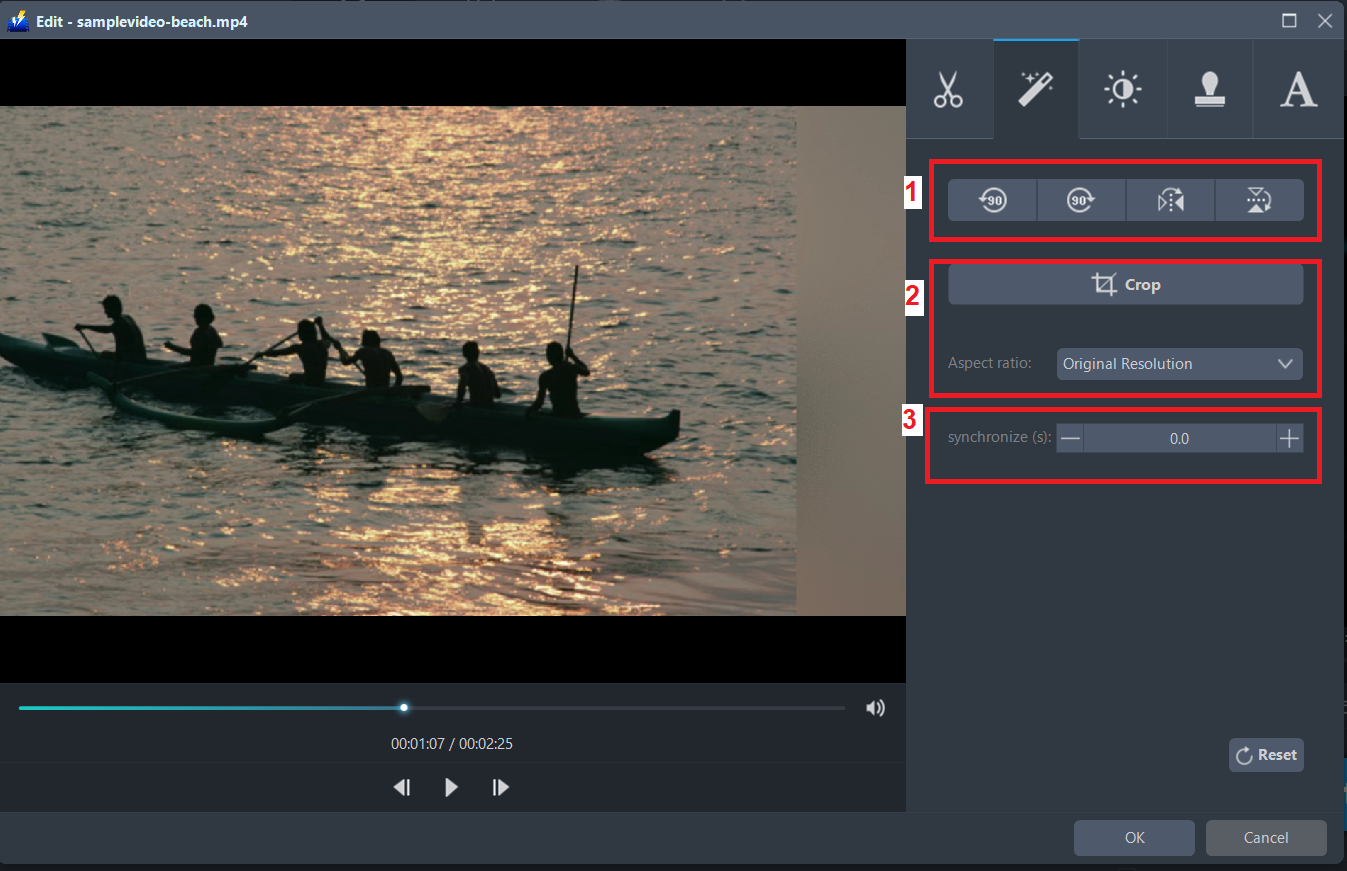
1) You can do the following steps to adjust your video:
2) Rotate your video position.
3) Crop video screen size.
4) Synchronize the video and audio.
2.6 Subtitle
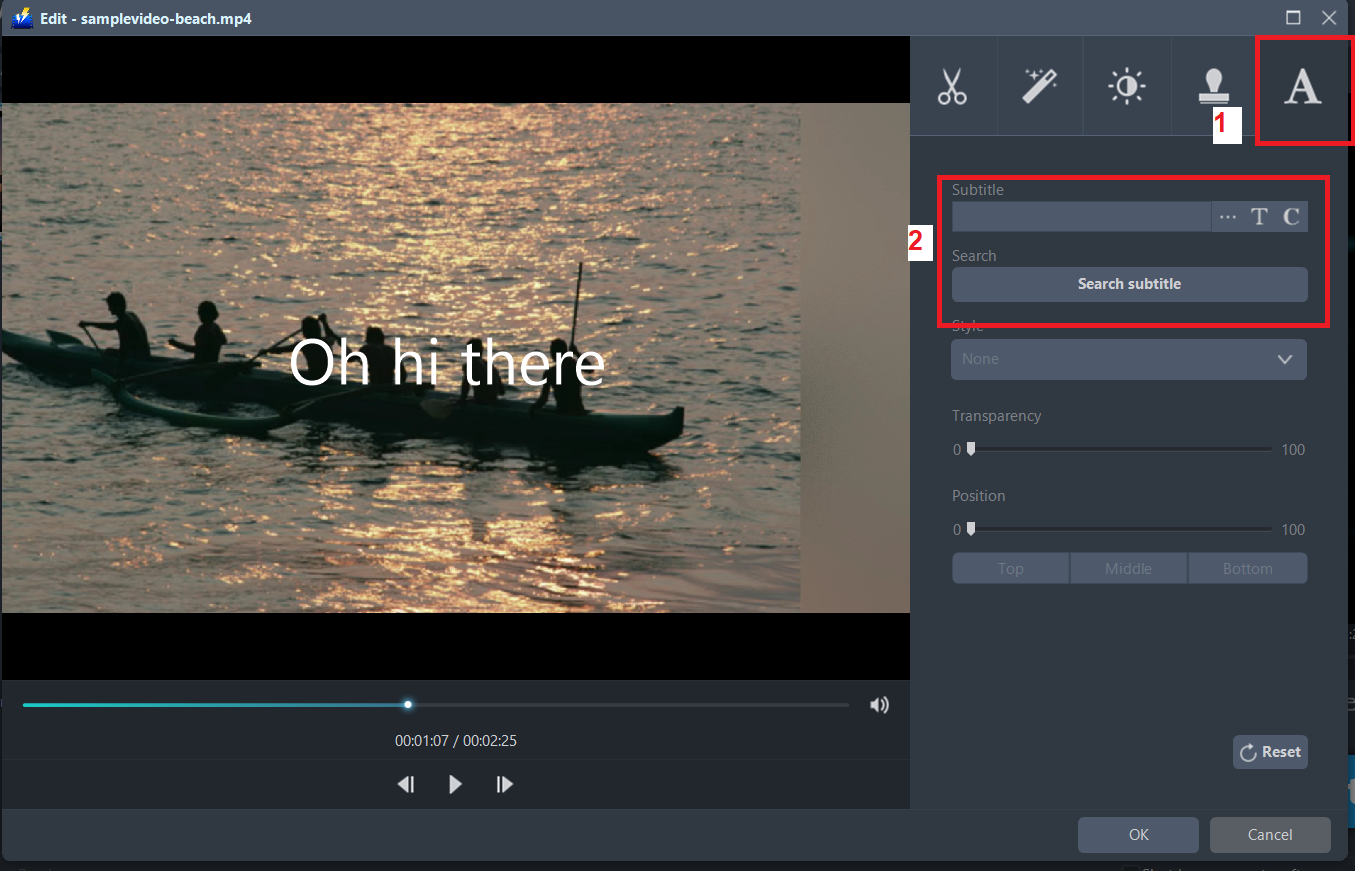
Add subtitles for the video. You can import external subtitles, or search subtitles for the corresponding subtitles from the Internet. Please refer to another tip about how to edit the subtitle file.
1) Click the Subtitle icon.
2) Click Search Box (you can either click a subtitle saved on your computer or find it online).
Step 3: Conversion
3.1 Convert
When the edits are done, click the “Convert” button, then the software will start to convert and save the edited video in MP4 format by default.

3.2 Conversion Complete
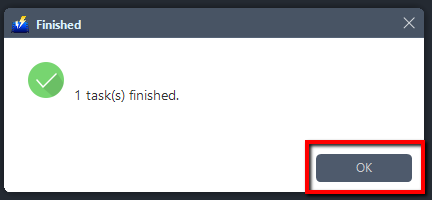
A pop-up window from the program will appear informing you that the conversion is complete.
Click “OK” to open the folder of your saved converted MP4 files.
Conclusion:
With these steps, you can easily put a watermark in your videos. A great watermark software that can help you add or remove watermarks in your photos and videos without any hassle is within your fingertips.
VideoPower BLUE is definitely perfect for you. It’s fast and flexible with a built-in video editor that will enable you to merge multiple videos into one single file. This software will allow you to edit slideshows or videos, apply watermarks, effects, and other basic video editing options such as trimming or cropping. Moreover, it has a split-screen tool for your photos and videos and a screen recorder which allows you to capture any on-screen activity on your computer.


