Tips Index
Video gaming is a recreational activity that a lot of people are into nowadays. There are mobile games, online games, and this game consoles to entertain people. PlayStation is known as a top game console brand developed by Sony Entertainment and its PlayStation 3, widely known as PS3 is one of the most popular game devices around the world. The best thing about PS3 is not only it can be taken as a game gadget but also a media player.
However, the compatibility of PS3 with video formats that it reads is limited. For example, MKV is not supported at all. There are so many movies that is in MKV format. With this problem, many users would like to convert their MKV video files to a compatible format in PS3 consoles.
Here we would like to introduce VideoPower BLUE that can help you do this job.
VideoPower BLUE is a powerful tool that has multiple functions and features such as basic video editing, screen recording, and audio and video conversion that can convert MKV to PS3.
Download and install the program on your PC with the link below to start the conversion.
Step 1: Add the MKV file to the program.
Run the program if you have installed the video converter software – VideoPower BLUE successfully on your PC. You can directly import the file to the program by clicking the “Add files” button or by drag-and-drop the file to the interface.

Step 2: Edit the MKV video.
If you want to edit the file first before converting, just follow the instructions below.
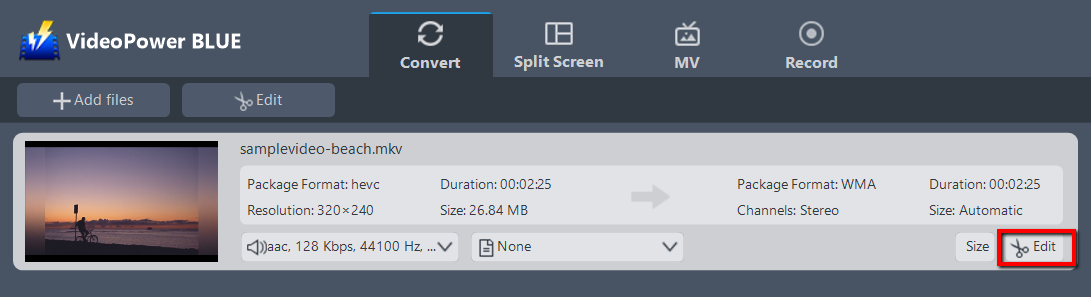
The imported MKV file is displayed in the list.
Click the “Edit” button on the right side of the file.
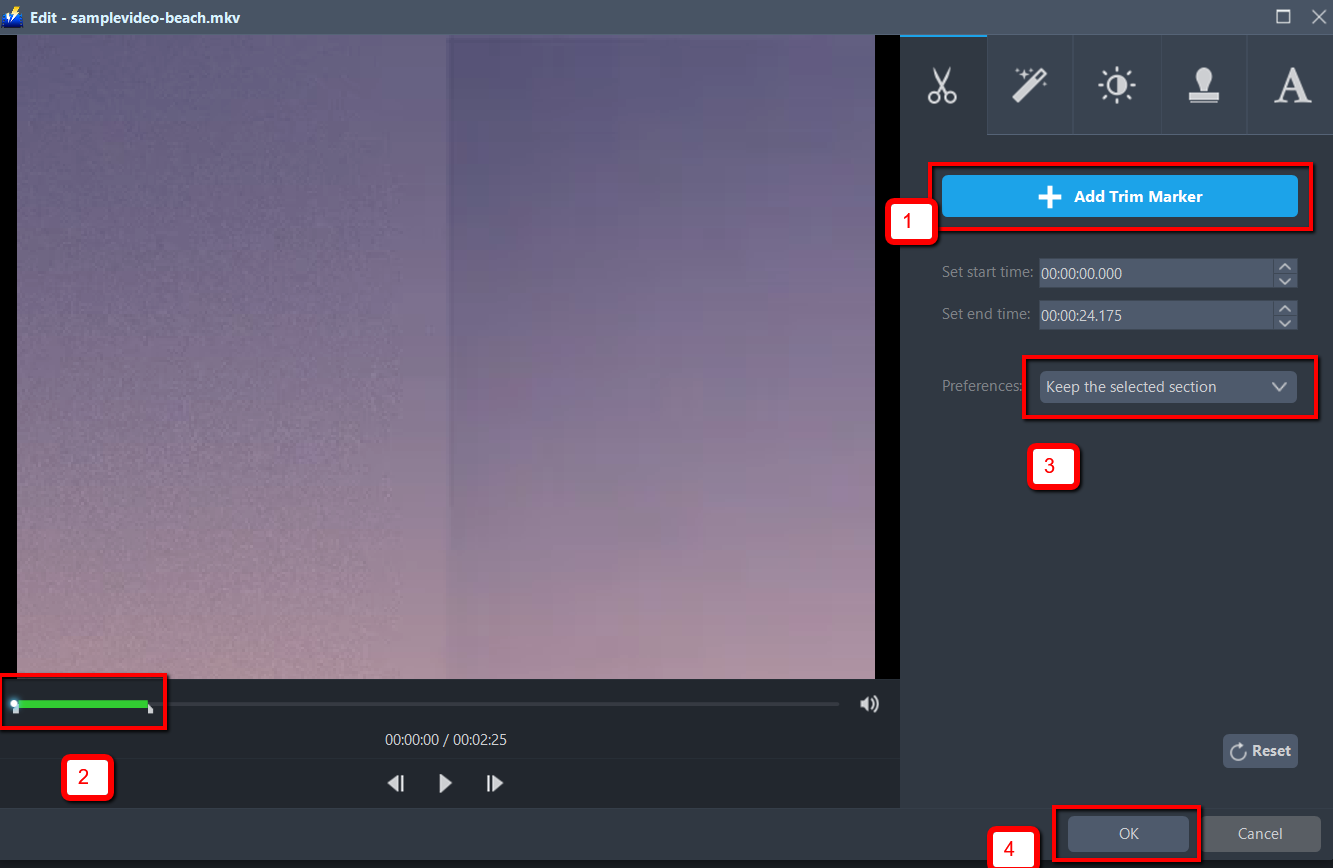
The built-in video editor will pop up. Here, you can make changes to the file – cut, trim, etc.
For example, you can trim your video as showing below:
1 ) Click “Add Trim Marker”.
2 ) Drag the mark as shown below to select the part you want to cut. If you want to select multi-sections, please repeat 1 and 2.
3 ) Choose “Keep the selected section” or “Delete the selected section” from “Preferences”.
4 ) Click “OK” to save the setting.
Step 3: Convert MKV to PS3 format.
3.1 Set the output format.
Click to open the “Profile” drop-down menu, then choose the format you want from the profile list. Here choose “Device”, “Sony”, and “PS3.”

3.2 Start Conversion
Return to the file list.
Click the “Convert” button, then the converted PS3 file will be saved in the default output folder.

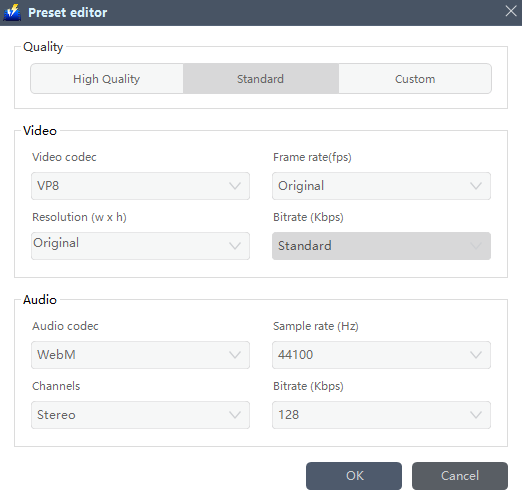
You can also customize frame rate, bitrate, codec, etc. manually. Just click the “Settings” button to enter the “Preset editor” window, then you can change the value and click “OK” to save the settings.
A pop-up window from the program will appear informing you that the conversion is complete. Click “OK” to open the folder of your saved converted PS3 files.

Or you can click the “Open” button to find the PS3 file.

Conclusion:
Not all videos that are processed using a video converter works well. Some of the converted files show some error or corrupt message notification, while others cannot be found at all. To avoid all of these troubles I recommend that you use this reliable video converter.
VideoPower BLUE is a multi-faceted software that is a simple, easy-to-use and straightforward interface. These functions are built-in video editor that will enable you to edit slideshows or videos, apply watermarks, effects, and other basic video editing options such as trimming or cropping. Moreover, it has a split-screen tool for your photos and videos and a screen recorder which allows you to capture any on-screen activity on your computer.