Tips Index
WAV is a standard file format developed by Microsoft and IBM for audio digital storage. It uses the RIFF file format structure, which is very close to AIFF and IFF formats.
Although WAV is capable of storing compressed audio, it is rarely used as such. WAV files often contain uncompressed audio that occupies a lot of drive space for every second of sound.
The full name of WMA (Windows Media Audio) is used to store compressed audio and files are smaller in size and retain high quality in this format. WMA may be a great substitute for WAV, especially when your audio player is WMP (Windows Media Player). WMA is largely used to store music and other audio files that are quite long because of its excellent quality to size ratio.
WMA and WAV are two common audio formats. The biggest difference between the two file formats is that the WAV is a lossless format, and the WMA is a lossy file format.
Then, some users will ask: Can these two formats be converted? The following article will explain to you how to achieve the conversion of WAV to WMA.
We will use VideoPower BLUE to get this job done.
This software is very powerful. It can convert video format, audio format, and various formats that are available to be converted. Besides, you are able to Convert Audiobook to MP3, so that you can play the audiobook on your device.
You can try to use the software for free by downloading its trial version below.
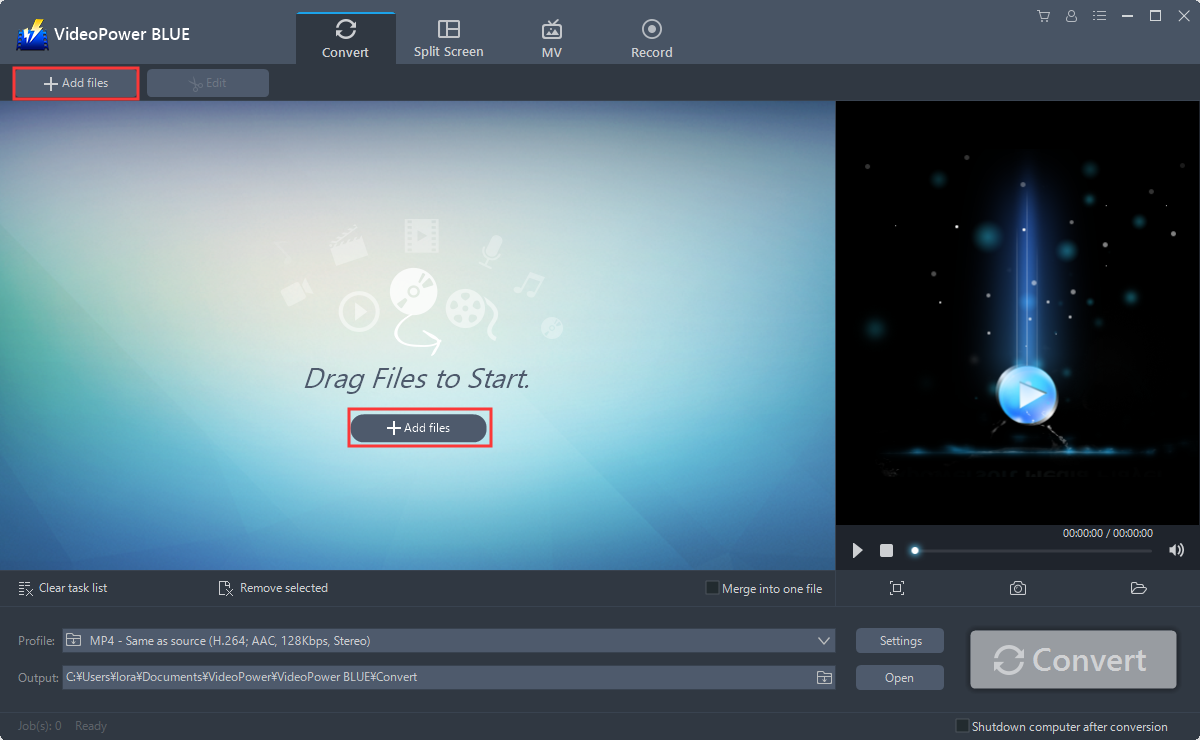
Step 1: Add the WAV file to the program.
Run the program if you have installed the video converter software – VideoPower BLUE successfully on your PC. You can directly import the file to the program by clicking the “Add files” button or by drag-and-drop the file to the interface.
Step 2: Edit the WAV audio.
If you need to edit the file first before conversion, just follow the instructions below.
The imported WAV file is displayed in the list.
Click the “Edit” button on the right side of the file.
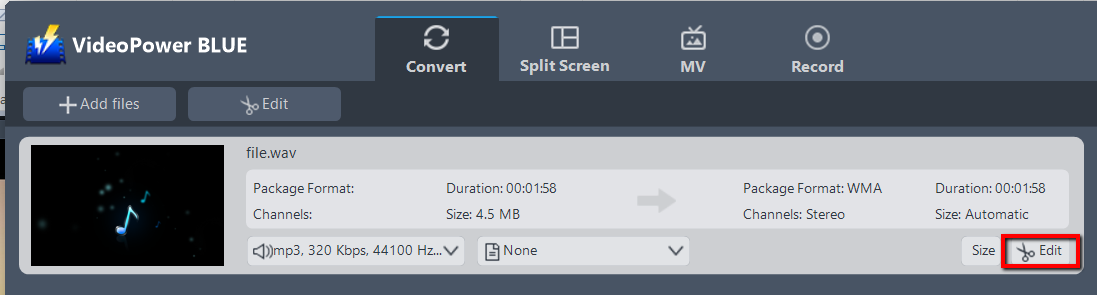
The editor will pop up. Here, you can make changes to the file – cut, trim, etc.
For example, you can trim your video as showing below:
1 ) Click “Add Trim Marker”.
2 ) Drag the mark as shown below to select the part you want to cut. If you want to select multi-sections, please repeat 1 and 2.
3 ) Choose “Keep the selected section” or “Delete the selected section” from “Preferences”.
4 ) Click “OK” to save the setting.

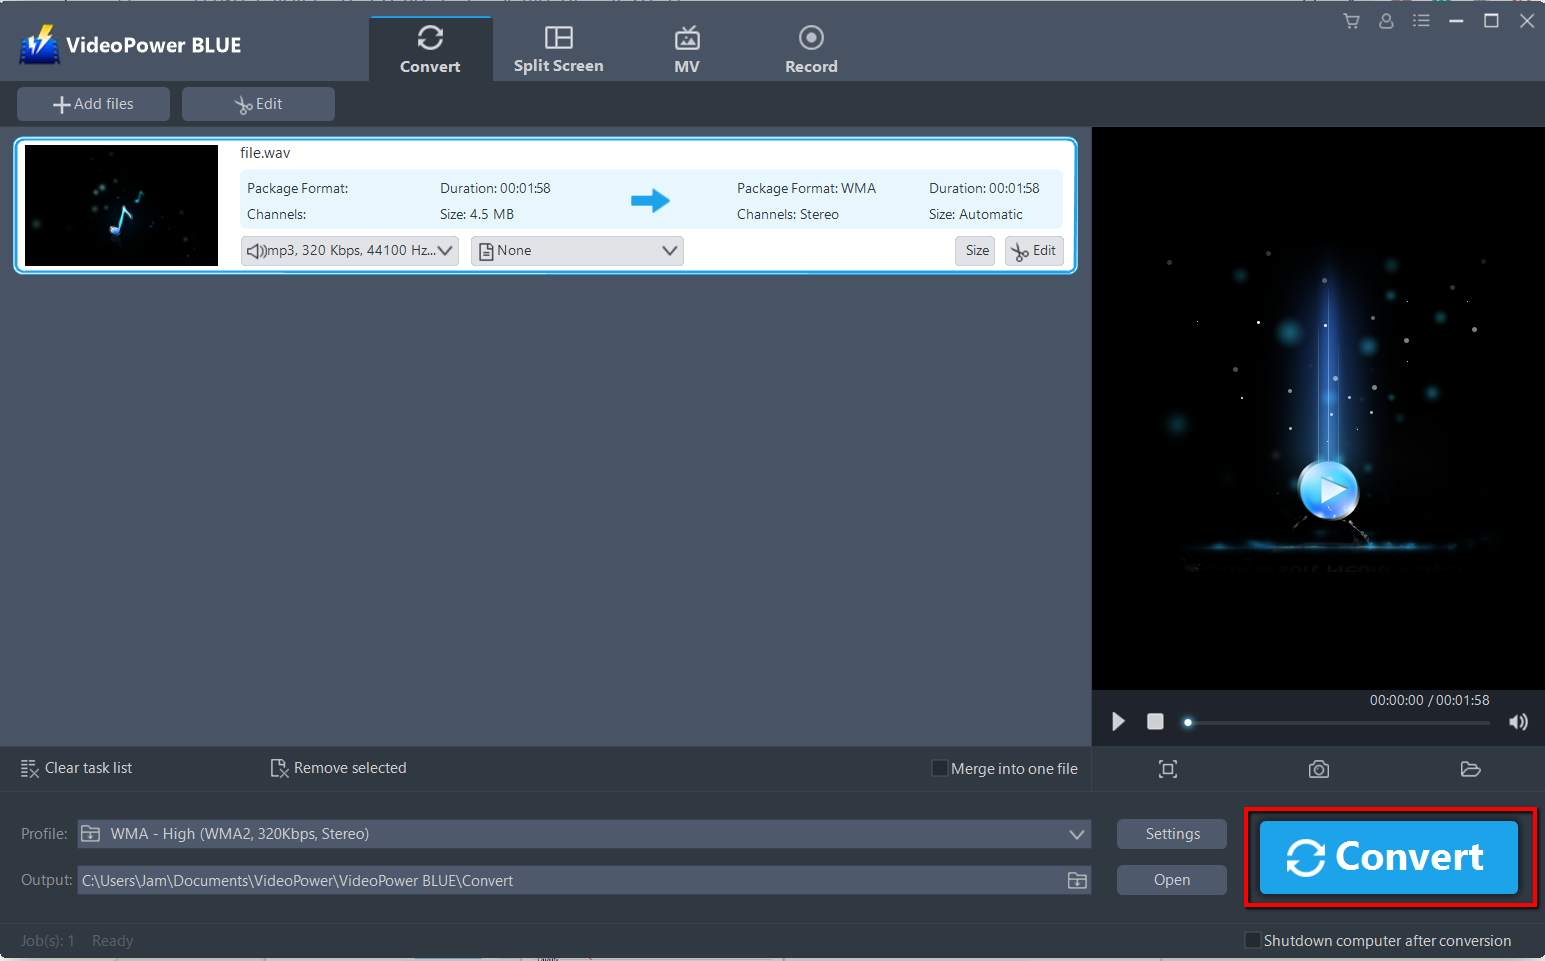
Step 3: Convert WAV to WMA format.
3.1 Set the output format.
Click to open the “Profile” drop-down menu, then choose the format you want from the profile list. Here choose “Audio”, “WMA”, and quality “High.”

3.2 Start Conversion.
Return to the file list.
Click the “Convert” button, then the converted MP3 file will be saved in the default output folder.
You can also customize frame rate, bitrate, codec, etc. manually. Just click the “Settings” button to enter the “Preset editor” window, then you can change the value and click “OK” to save the settings.

The program will pop up a window to inform you once the conversion is completed. Click “OK” to open the folder of your saved converted WMA files.
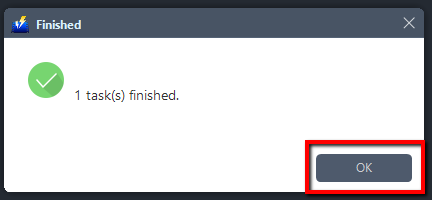
Or you can click the “Open” button to find the WMA file.

Conclusion:
This software is perfect especially for those who may need to convert or have no Internet connection always because VideoPower BLUE will convert your WAV to WMA files formats whether offline or online. Due to its wide array of formats to convert, it is the best converter out there.
VideoPower BLUE not only supports conversion of video and audio files it also features screen recording activity, basic video and audio editing such as effects, watermarks, subtitles, trimming and cropping.