Tips Index
WAV is an audio file format developed by Microsoft. This file format has become a standard PC audio file format for everything from system and game sounds to CD-quality audio.
The standard formatted WAV file is the same as the CD format and is also a 44.1K sampling frequency and a 16-bit quantized number. So the sound quality of the WAV audio is almost the same as the CD!
Windows system and its applications support this format very well, but Apple does not.
Apple devises users opt to convert their WAV files to M4A. A file with the M4A file extension is a MPEG-4 Audio file and they’re most often found in Apple’s iTunes Store as the format of song downloads.
WAV files will normally have a big size. Converting it to a different format such as the M4A format is better – it’ll also allow compatibility with Apple devices.
Convert your WAV files to the M4A format with VideoPower BLUE. This tool is one of the best online applications for basic video and audio conversion. The user interface is pretty intuitive so you would immediately know how to use it even if it’s the first time visiting this page. It can be used to convert both audio and video files.
You can try to use the software for free by downloading its trial version below.
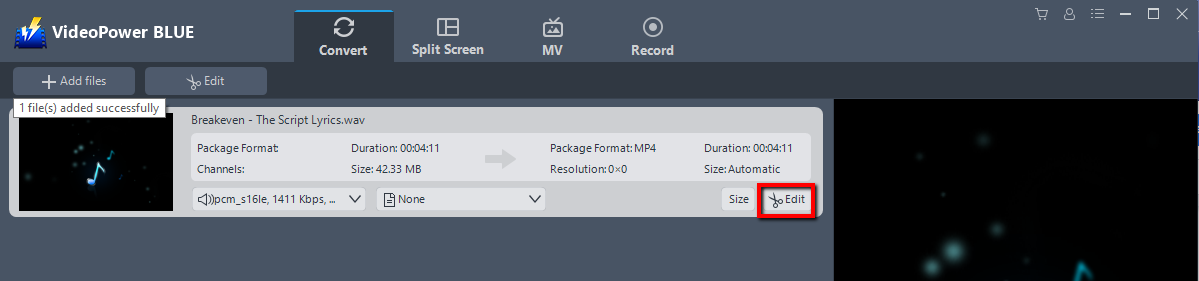
Step 1: Add the WAV file to convert it to M4A format
You can directly import the WAV file(s) to the program by clicking the “Add files” button or by drag-and-drop to the interface.

Step 2: Edit the WAV audio file before converting
If you need to edit the audio first before converting, click the “Edit” button on the right side of the file.
The editor will pop up. Here you can make changes to the audio – trim, cut, etc.
For example, you can trim your video as showing below:
1) Click “Add Trim Marker”.
2) Drag the mark as shown below to select the part you want to cut.
If you want to select multi-sections, please repeat 1 and 2.
3) Choose “Keep the selected section” or “Delete the selected section” from “Preferences”.
4) Click “OK” to save the setting.

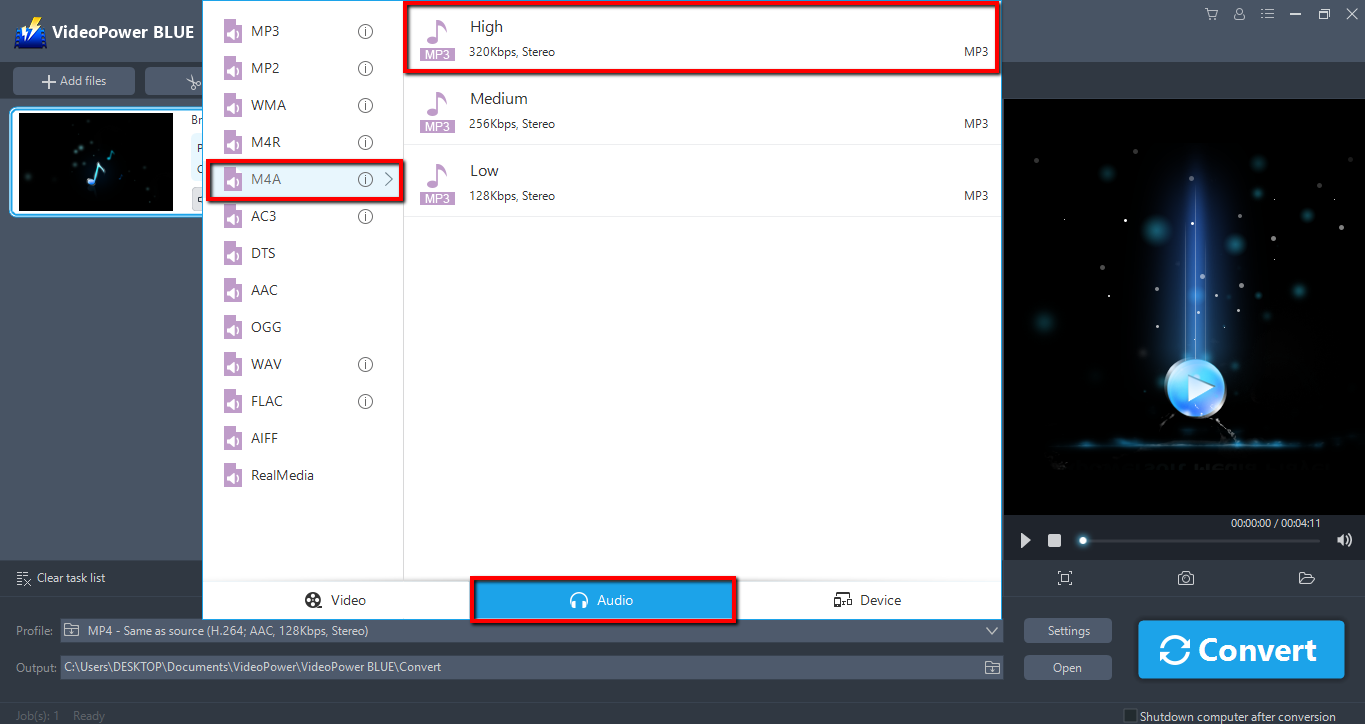
Step 3: Convert WAV to M4A format
3.1 Set the output format
Click to open the “Profile” drop-down menu, then choose the format you want from the profile list. Here choose “Audio”, “M4A”, and quality “High.”
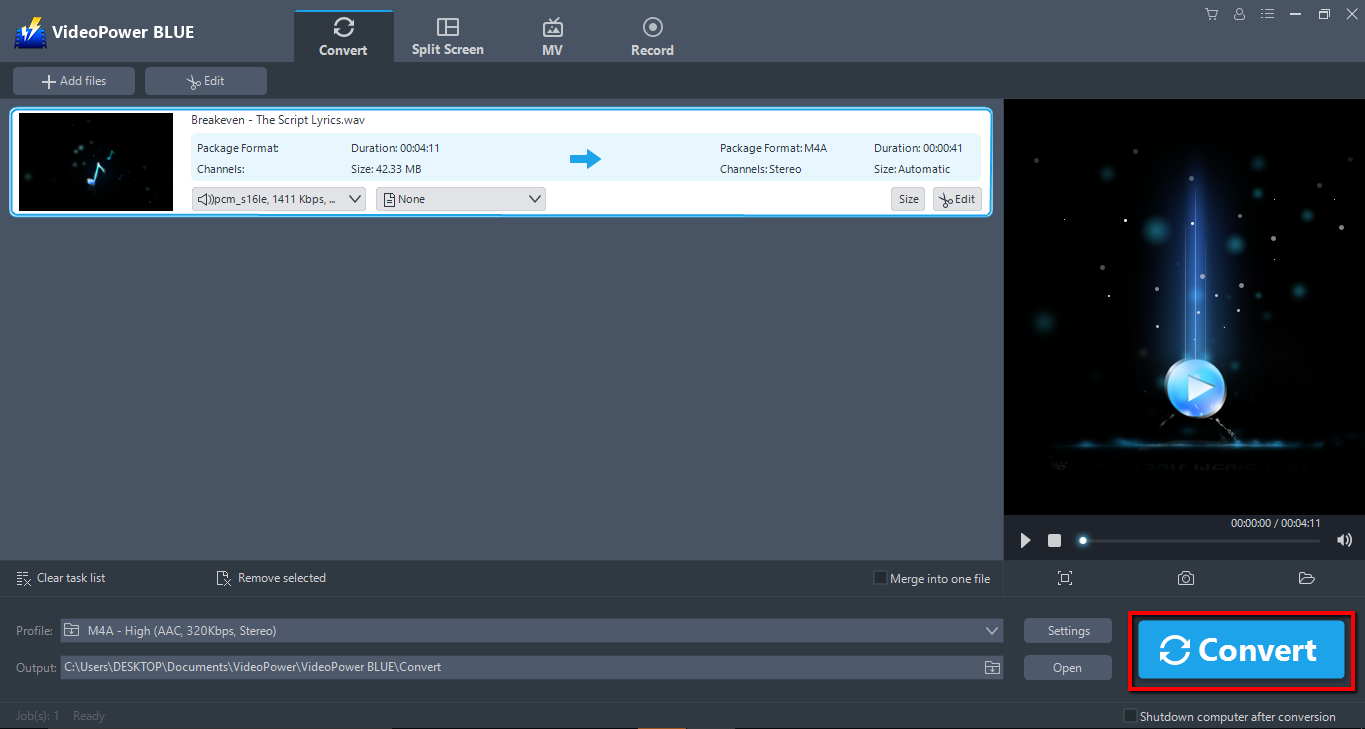
3.2 Start Conversion
Return to the file list.
Click the “Convert” button, then the converted MP4 file will be saved in the default output folder.
A pop-up window from the program will appear informing you that the conversion is complete. Click “OK” to open the folder of your saved converted M4A files.
Or you can click the “Open” button to find the M4A file.
