Tips Index
WMV (Windows Media Video) is a streaming media format launched by Microsoft. The files in WMV format can be played while downloading, so it is very suitable for playing and transmitting video on the Internet.
However, WMV video files often need to enable IE download license and certificate before they can be viewed. Trojan horse virus producers often use this to bundle the pop-up virus with the process of downloading certificates, resulting in inconvenience and threats to users.
WMV is a common video format. Due to the limitations of the Windows system, WMV is bound to rely on Windows and can only be played by the player that comes with the system.
Furthermore, the image quality of WMV video is very poor while the MP4 format has clear picture quality and compatible with many devices and software, which is naturally loved by many people.
That’s why many users choose to convert WMV into an MP4 file format.
VideoPower BLUE is a powerful, multi-faceted tool that contains a lot of features such as screen recording, conversion, and video editing where you can do video cutting.
You can try to use the software for free by downloading its trial version below.
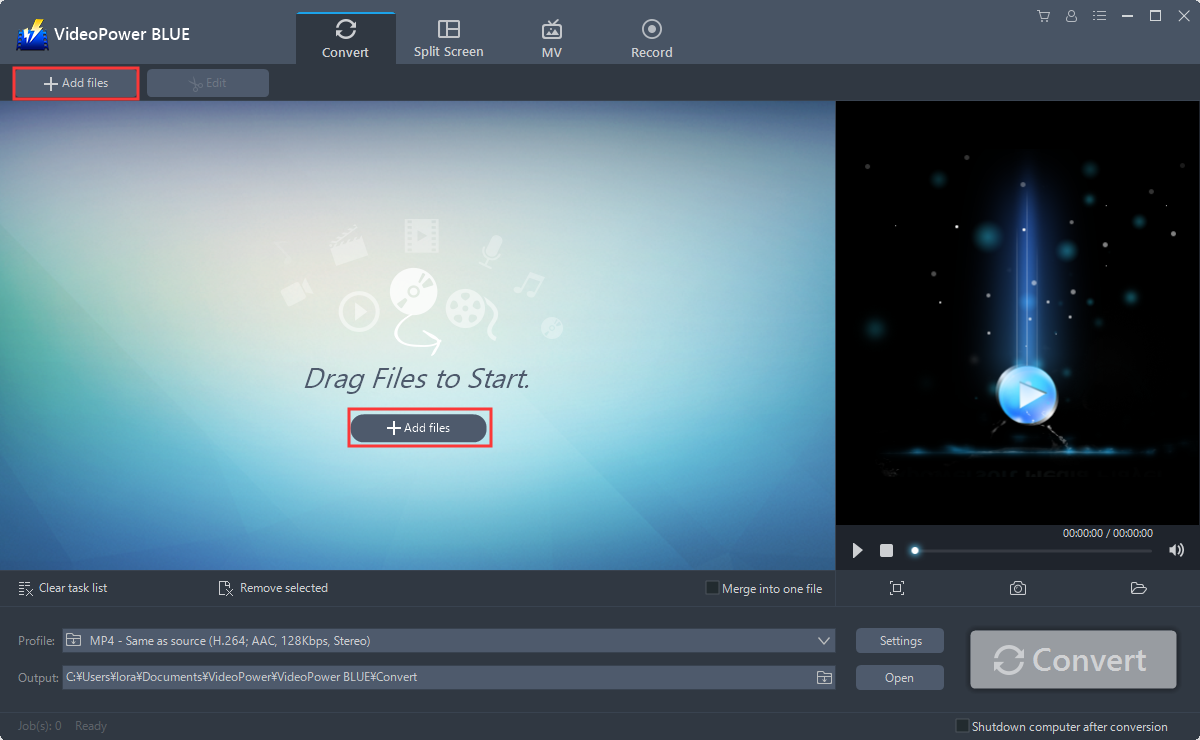
Step 1: Add the WMV File.
Run the program if you have installed VideoPower BLUE successfully on your PC. Import your video files into the program that you want to convert. Click the “Add files” button to select files from your PC, or directly drag-and-drop the files to the interface.
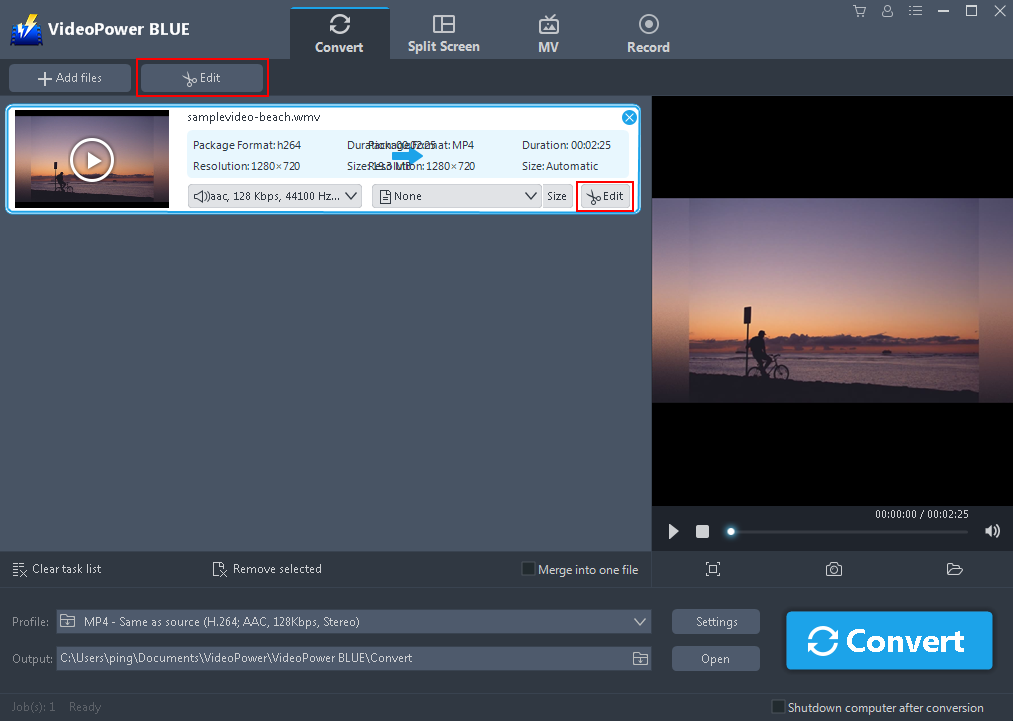
Step 2: Edit the WMV file.
If you need to edit the file before converting, just follow the instructions below.
The imported MP3 file is displayed in the list. Click the “Edit” button on top or at the right side of the added WMV file to enter the Edit window so you can design your WMV now.
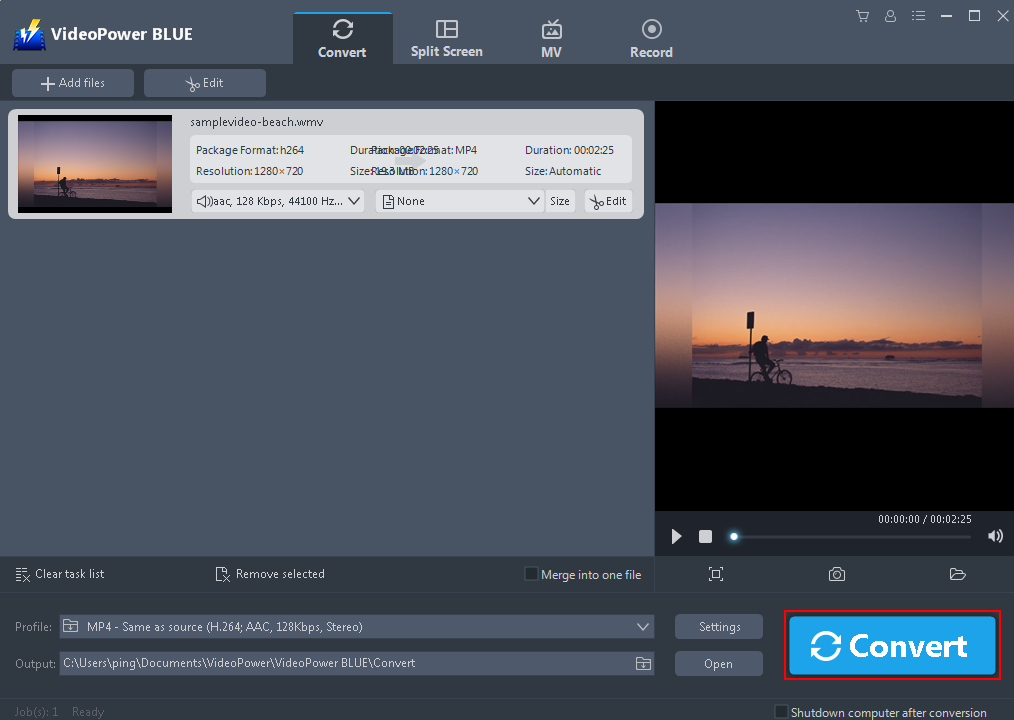
Step 3: Convert video to MP4 format.
3.1 Set Output Format
Check the output format to make sure that it is the format that you need. The default output format is in MP4.
1) Click the “Profile” bar
2) Choose “Video”
3) Set the format to “MP4 – Same as source”

3.2 Set Output Location
Choose a storage location to save the converted files. Click the “Output” icon and select the destination wherever you want to store the file.

3.3 Start Conversion
After setting the output location, click the “Convert” button, then the software will start to convert and save the edited video in MP4 format.
3.4 Redirect to Output Folder
A pop-up window from the program will appear informing you that the conversion is complete.
Click “OK” to open the folder of your saved converted WMV files.

Conclusion:
A desktop program loaded with terrific conversion features, VideoPower BLUE. Whether you want to convert WMV files in batch or merge all files into one, this software can handle it like no other. VideoPower BLUE has additional features including trimming video clips, cropping the blank edge of the video and adding effects, watermarks, and subtitles to a video. Even much better, it has output presets for you to convert videos directly to a specific device or player and can also record screen activity.