Tips Index
DTS is a music format known as surround stereo. The music in this format is often 5.1 7.1 surround, so the sound is very shocking that many 3D movies use this sound effect. The MKV file exported from Blu-ray disc mostly uses this format of audio too.
DTS files are also known as Digital Surround Audio files and are integrated into many audio playback hardware products. These files are used in surround sound formats for both commercial/theatrical and consumer-grade applications. The .dts file extension is used for an audio file format that was encoded and compressed using DTS (Digital Theater Systems) specifications and standards for storing multichannel audio data.
The AC3 format was created by Dolby Laboratories and is often the sound format used in movie theaters, video games, and DVDs. Much like the MP3 format, the AC3 file format uses lossy compression to reduce the overall size of the file.
AC3 audio files are designed to support surround sound and for this reason, you can convert DTS files to AC3 file format to access it in your devices like LCD TV reading.
VideoPower BLUE is a powerful tool that has multiple functions and features such as basic video editing, screen recording, and file conversion. This software can convert DTS to AC3.
Download and install the program on your PC with the link below to start the conversion.
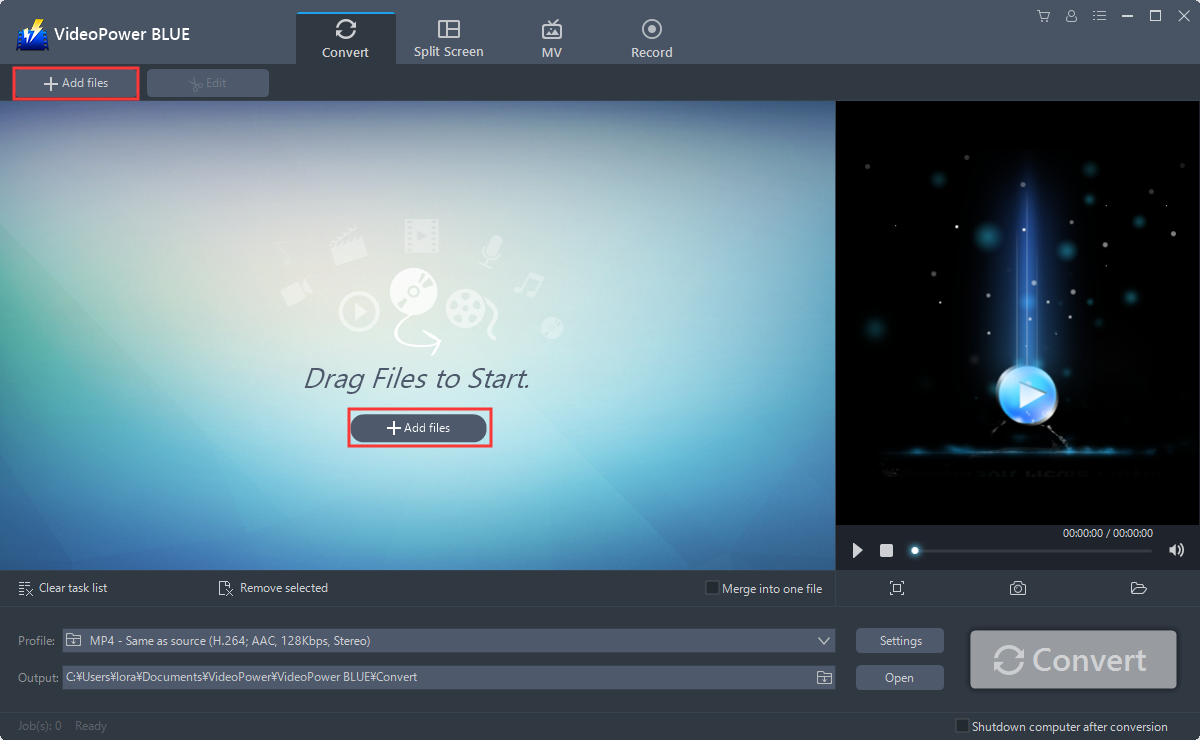
Step 1: Add the DTS file to the program.
Run the program if you have installed the audio converter software – VideoPower BLUE successfully on your PC. You can directly import the file to the program by clicking the “Add files” button or by drag-and-drop the file to the interface.
Step 2: Edit the DTS audio.
If you need to edit the audio file first before converting, just follow the instructions below.
The imported DTS file is displayed in the list.
Click the “Edit” button on the right side of the file.
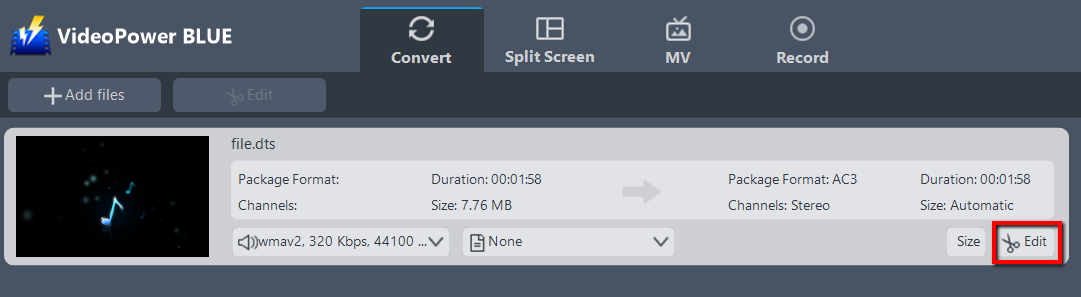
The editor will pop up. Here you can make changes to the audio – trim, cut, etc.
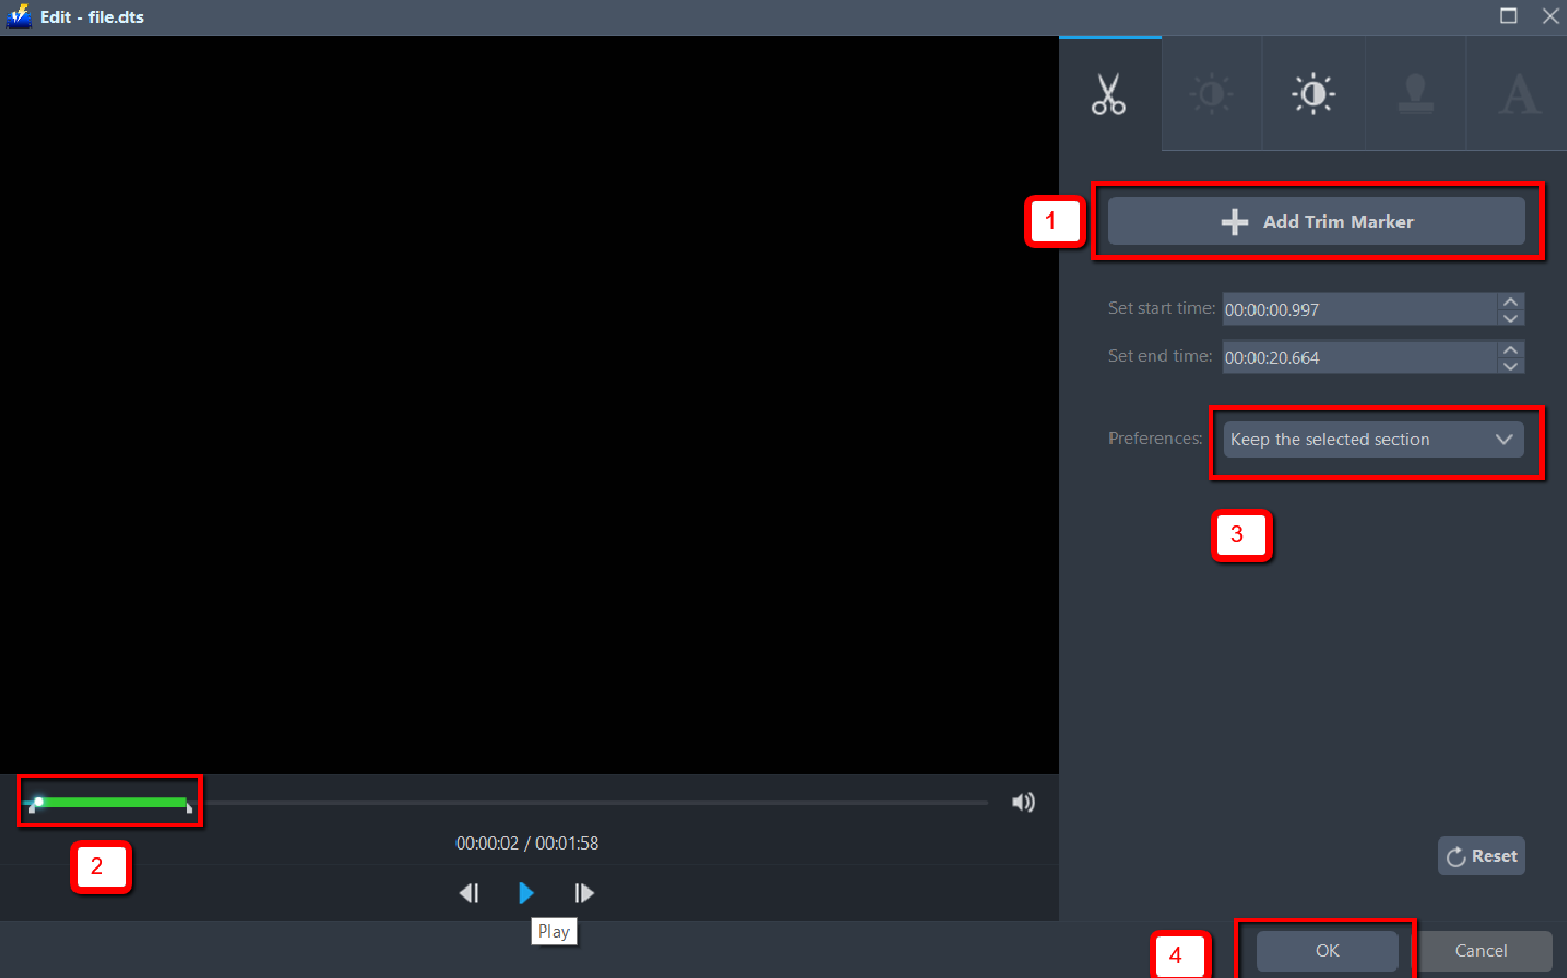
For example, you can trim your audio as showing below:
1 ) Click “Add Trim Marker”.
2 ) Drag the mark as shown below to select the part you want to cut. If you want to select multi-sections, please repeat 1 and 2.
3 ) Choose “Keep the selected section” or “Delete the selected section” from “Preferences”.
4 ) Click “OK” to save the setting.
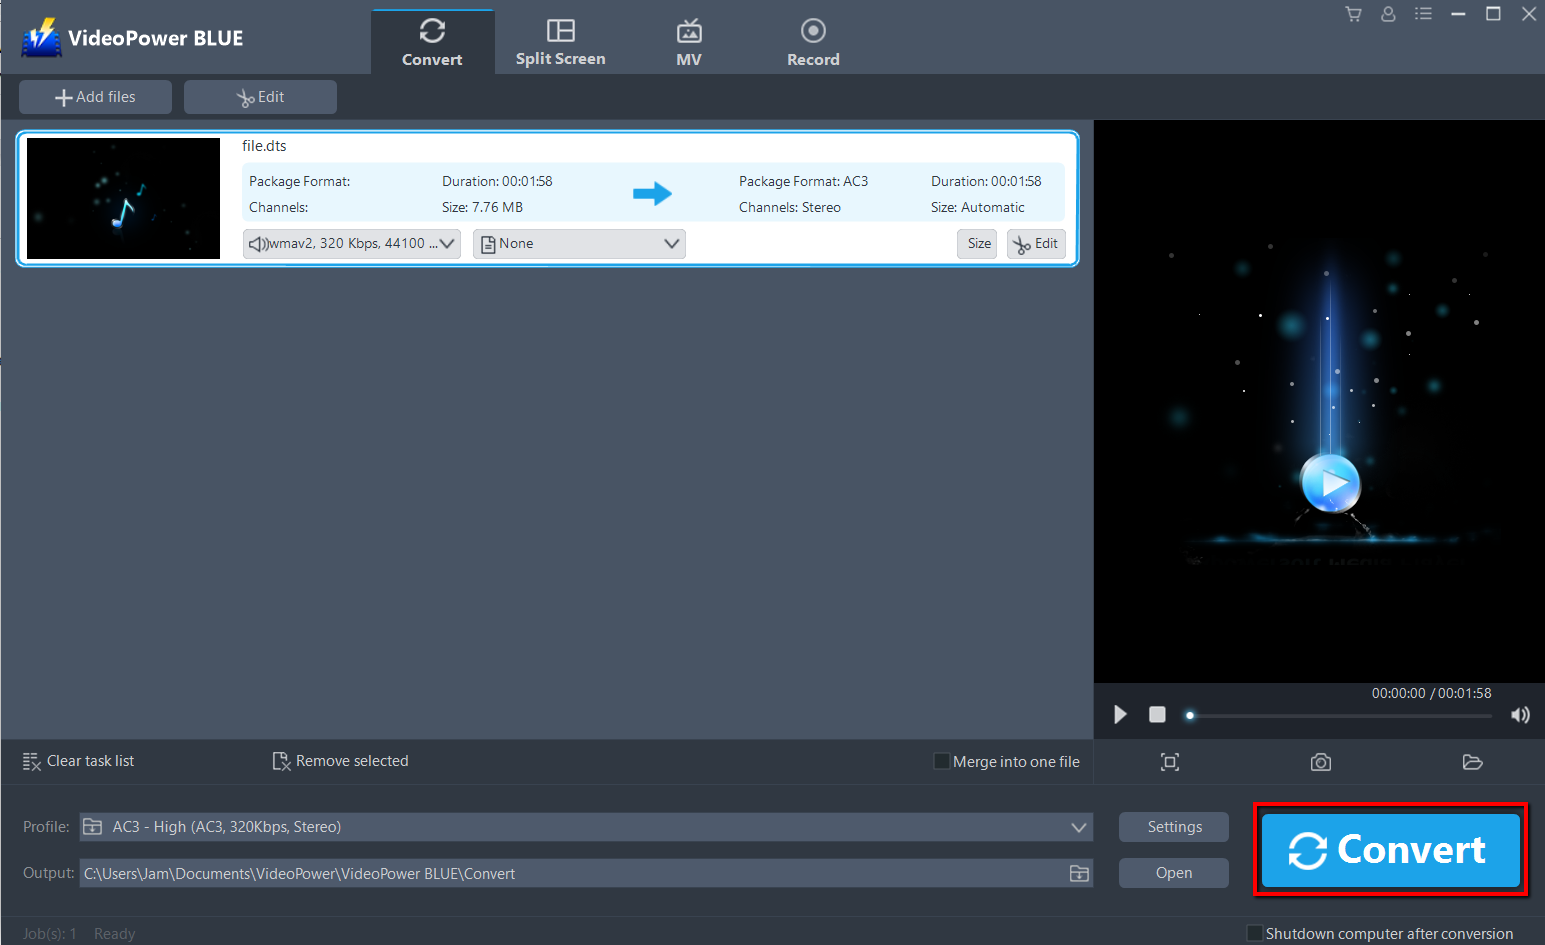
Step 3: Convert DTS to AC3 format.
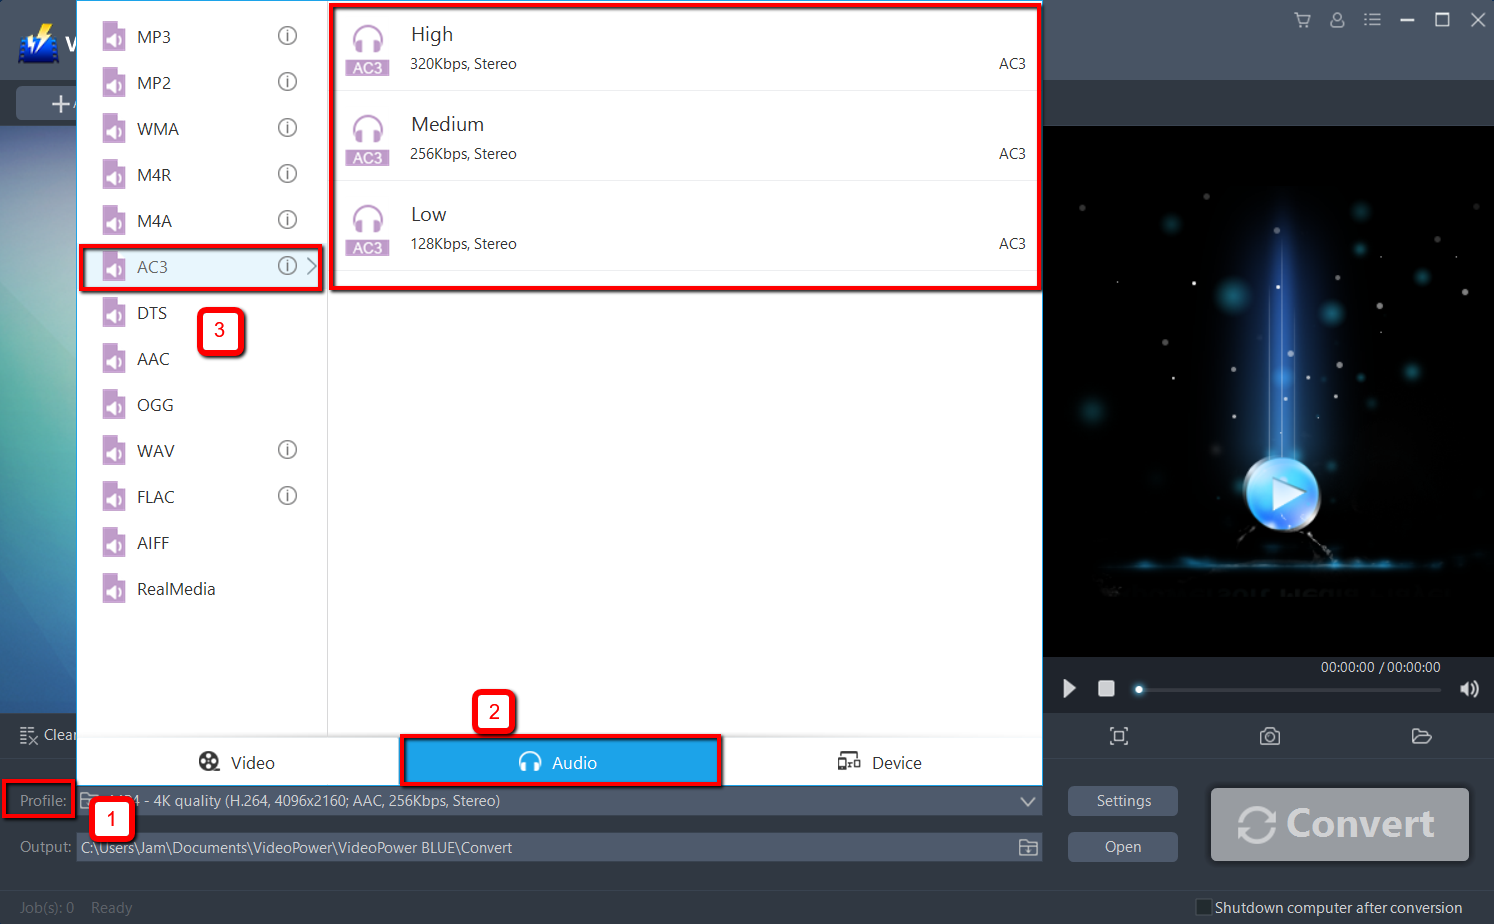
3.1 Set the output format.
1) Click to open the “Profile” drop-down menu, then choose the format you want from the profile list.
2) Here choose “Audio”, “AC3”.
3) Choose quality “High” or whatever quality you deem appropriate.
3.2 Start Conversion.
Return to the file list.
Click the “Convert” button, then the converted AC3 file will be saved in the default output folder.
The program will pop up a window to inform you once the conversion is completed. Click “OK” to open the folder of your saved converted AC3 files.
Or you can click the “Open” button to find the AC3 file.

Conclusion:
Converting DTS to AC3 file format with VideoPower BLUE lets users quickly change the audio codec, keeping your video data untouched. For sure compatibility with players and devices, VideoPower BLUE is the best converter.
It supports the conversion of any video and audio file with a wide array of formats to choose from. It has a video editing function, enables adding subtitles, applies watermarks, makes MV and split-screen videos. More importantly, it can record screen activity in many different ways, offline and online.