Tips Index
There are two compression methods in the audio field, lossy and lossless compression. The MP3, WMA, and OGG we often encounter are lossy compression.
Lossy compression as the name indicates is to reduce the audio sampling frequency and bitrate but the output file will become smaller in size than the original one.
Lossless compression can compress the size of an audio file even smaller on the premise of 100% preservation of all data in the source file.
After the compressed audio file is restored, the same size and the same bitrate as the source file can be realized.
This means that it doesn’t discard audio data like lossy audio formats do such as MP3, WMA, AAC, and others. It can, therefore, create digital audio files that faithfully reproduce the original sound source during playback.
Lucky for you, you found the best and easiest steps to convert lossless music and make it one of the most popular MP3 audio format.
VideoPower BLUE is great software with a variety of options and features including screen capture and recording, editing, MV making and file format conversion that can convert APE to MP3 within a few clicks.
You can try to use the software for free by downloading its trial version below.
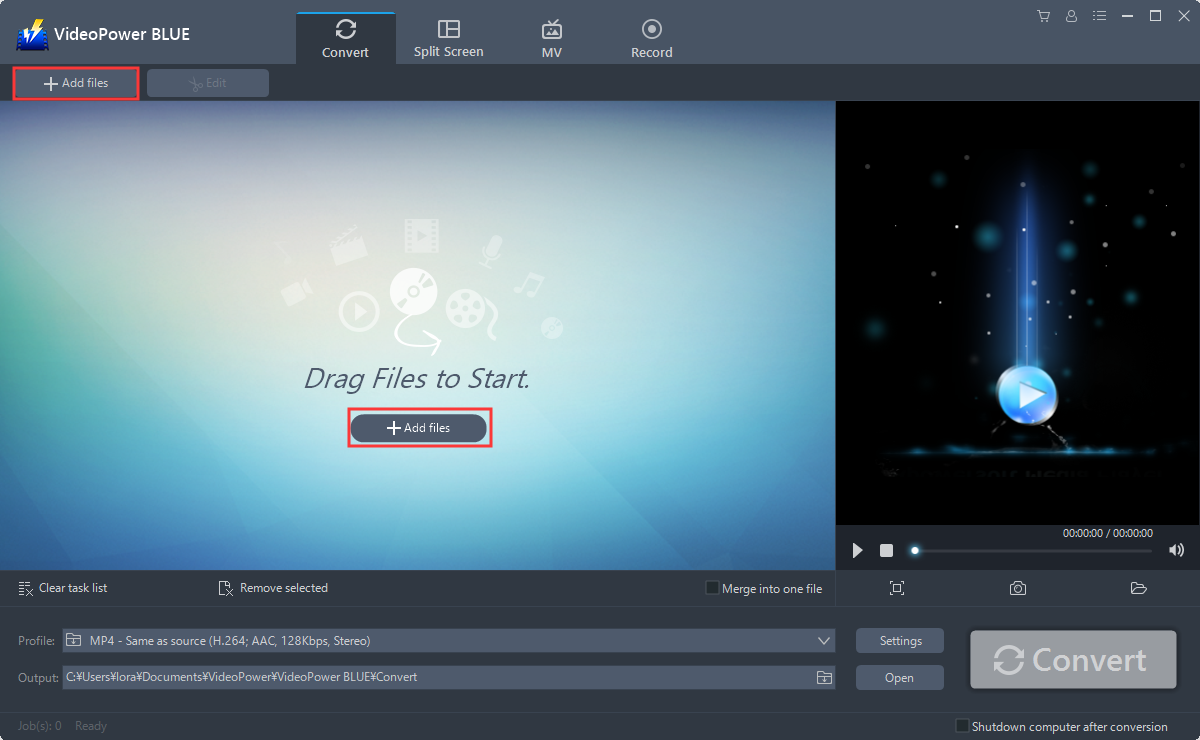
Step 1: Add the APE file to VideoPower BLUE
Run the program if you have installed the Video Converter software successfully on your PC. You can directly import the file to the program by clicking the “Add files” button or by drag-and-drop the file to the interface.
Step 2: Edit file before conversion
If you need to edit the audio file before conversion, follow the instructions below.
The imported file is displayed in the list.
Click the “Edit” button on the right side of the file.
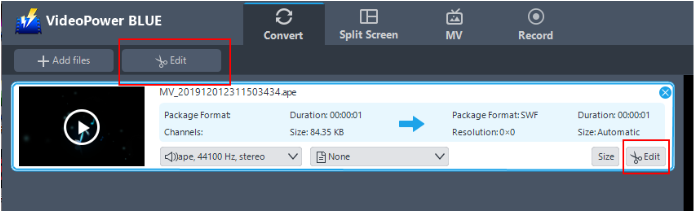
The built-in audio editor will pop up. Adjust speed and volume, or add a trim.
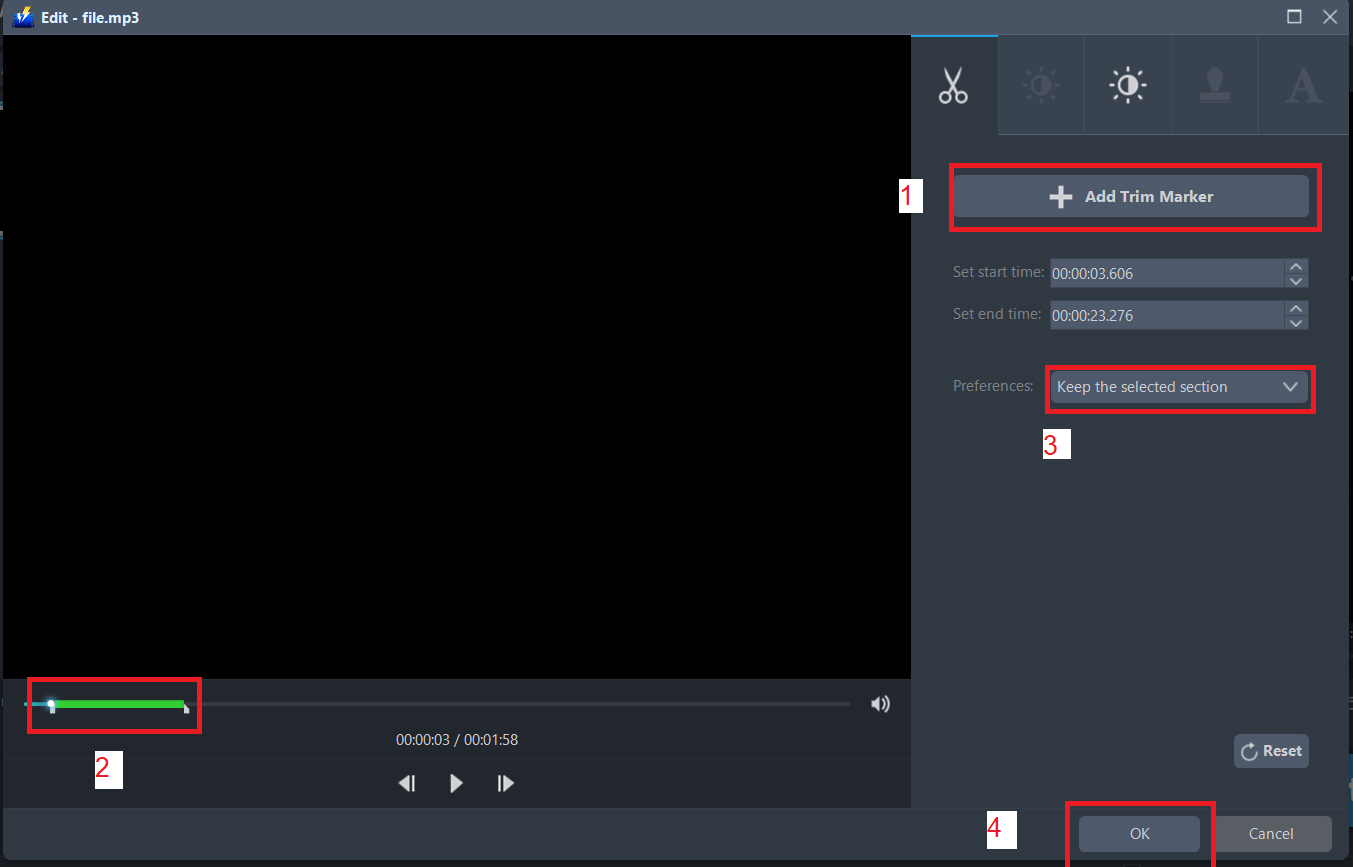
For example, you can trim your video as shown below:
1) Click “Add Trim Marker”.
2) Drag the mark as shown below to select the part you want to cut. If you want to select multi-sections, please repeat 1 and 2.
3) Choose “Keep the selected section” or “Delete the selected section” from “Preferences”.
4) Click “OK” to save the setting
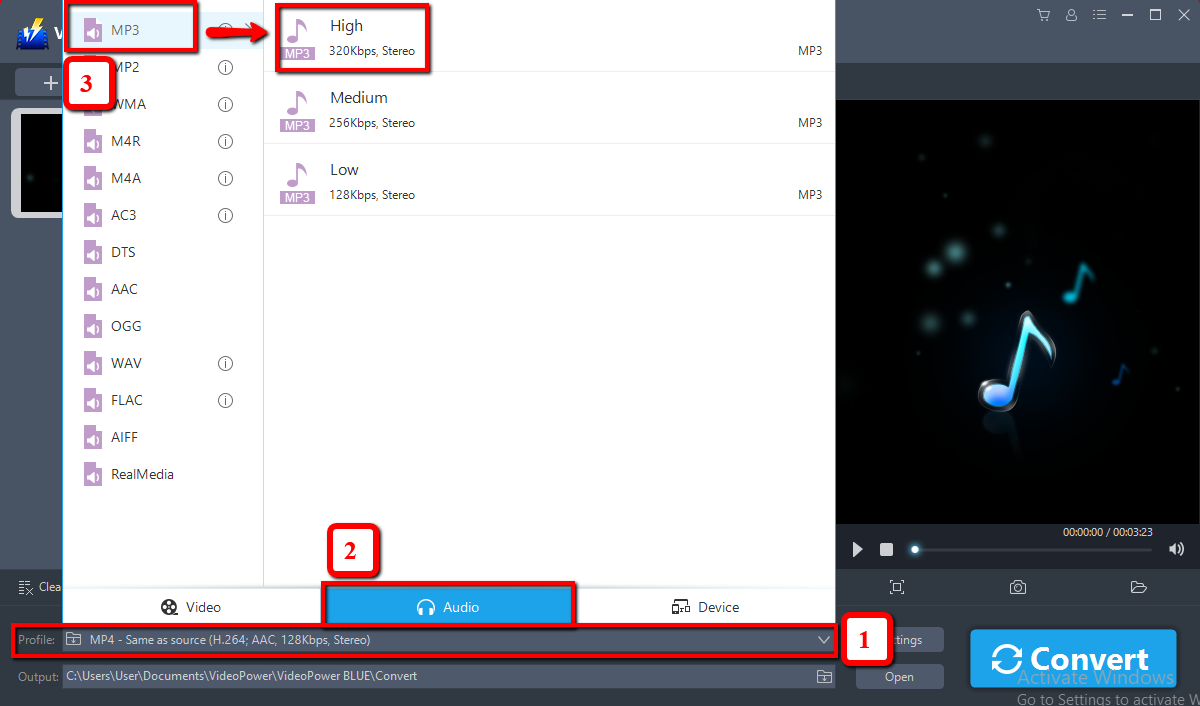
Step 3: Convert APE to MP3 format
3.1 Set the output format.
1) Click to open the “Profile” drop-down menu, then choose the format you want from the profile list.
2) Here you can click “Audio” and then “MP3”.
3) You may now choose the quality you prefer.
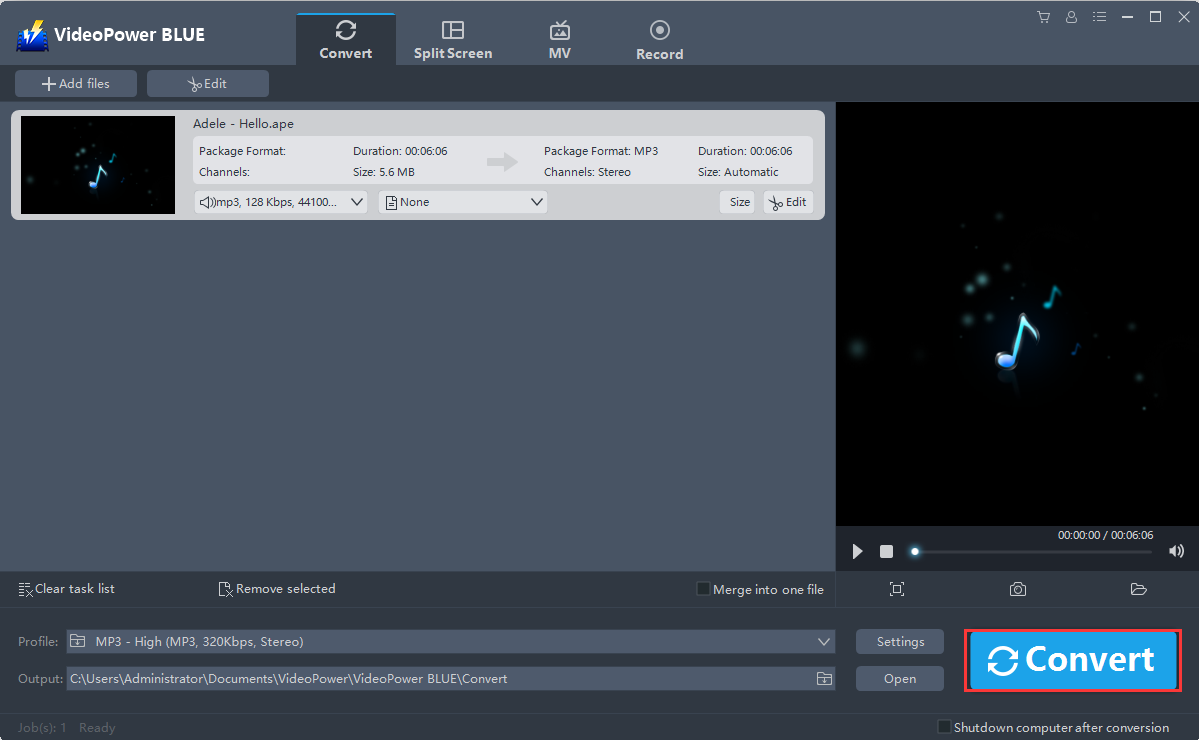
3.2 Start Conversion
Return to the file list.
Click the “Convert” button, then the converted MP3 file will be saved in the default output folder.
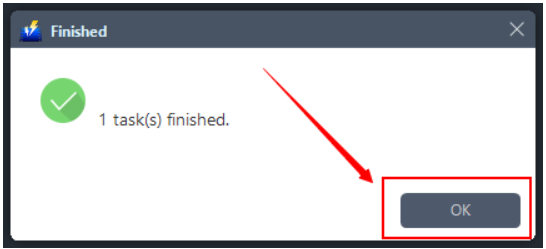
3.3 Find the Converted file
The program will pop up a window to inform you once the conversion is completed. Click “OK” to open the folder of your saved converted files.
With these steps, you can now trim and convert files from APE to MP3 format.
Conclusion:
Using other converters, you might encounter problems like the uploaded audio file that might be invalid due to the format restriction. VideoPower BLUE is trusted because of its efficiency and reliability when it comes to conversion.
This is a wonderful software that has far advanced features compared to other means of video conversion. VideoPower BLUE, a powerful converter that supports many video formats with video editing function, enables adding subtitles, apply watermarks, make MV and split-screen videos.
More importantly, it can record screen activity in many different ways, offline and online.