Tips Index
The MOV file format supports video, video effects, audio, text, images, subtitles, and other media types in a single file. It was developed by Apple and has the best playback support in QuickTime Player, so it is also a native video format for iOS devices such as iPhone/iPad.
As one of the most popular video formats, WMV format is compatible with most devices and can be played on Mac and Windows platforms. Compared with other video encoders, WMV format files are smaller and the quality loss is the least after compression.
Compared with MOV format, WMV has better device compatibility and better support. If you are shooting in MOV format, but need to play or edit on Windows Movie Maker, you have to convert MOV to WMV format before proceeding to the next step.
So how to convert MOV to WMV? You will need a format converter to help you.
VideoPower BLUE is highly recommended which is a great multifaceted MOV to WMV Converter with functions such as recording screen activity, basic video editing, and conversion.
Download and install the program on your PC with below link to start the conversion.
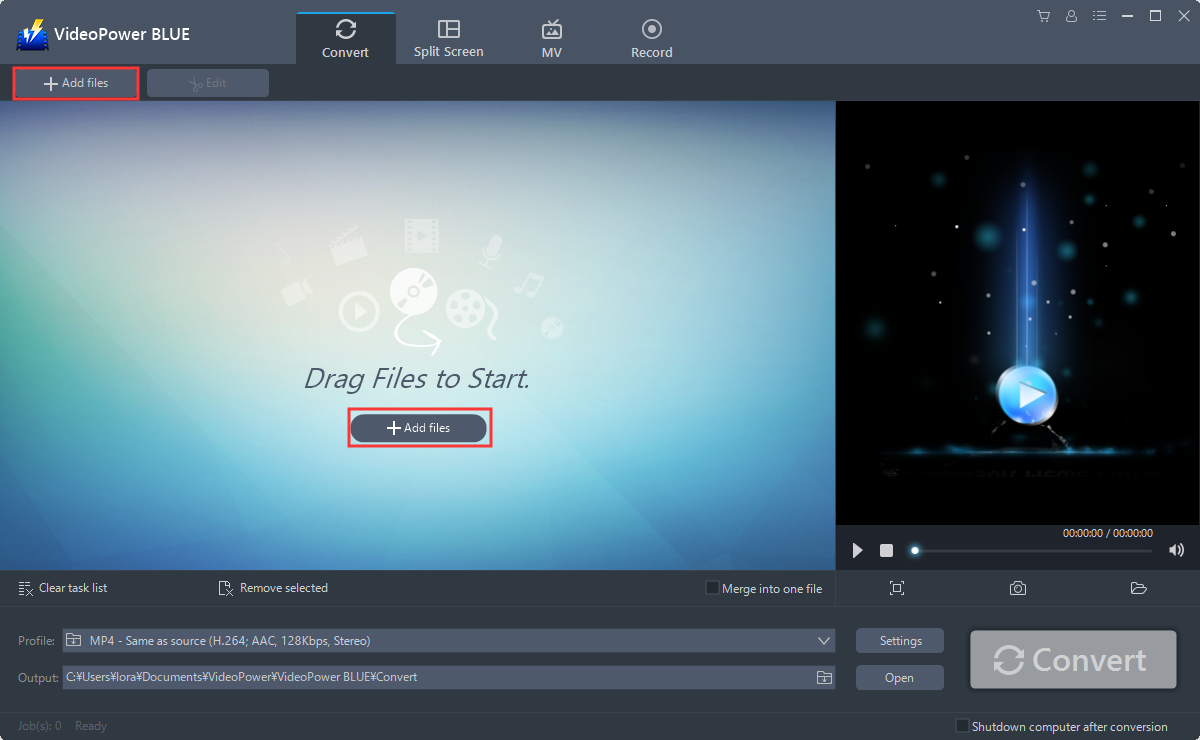
Step 1: Add the MOV file to the program.
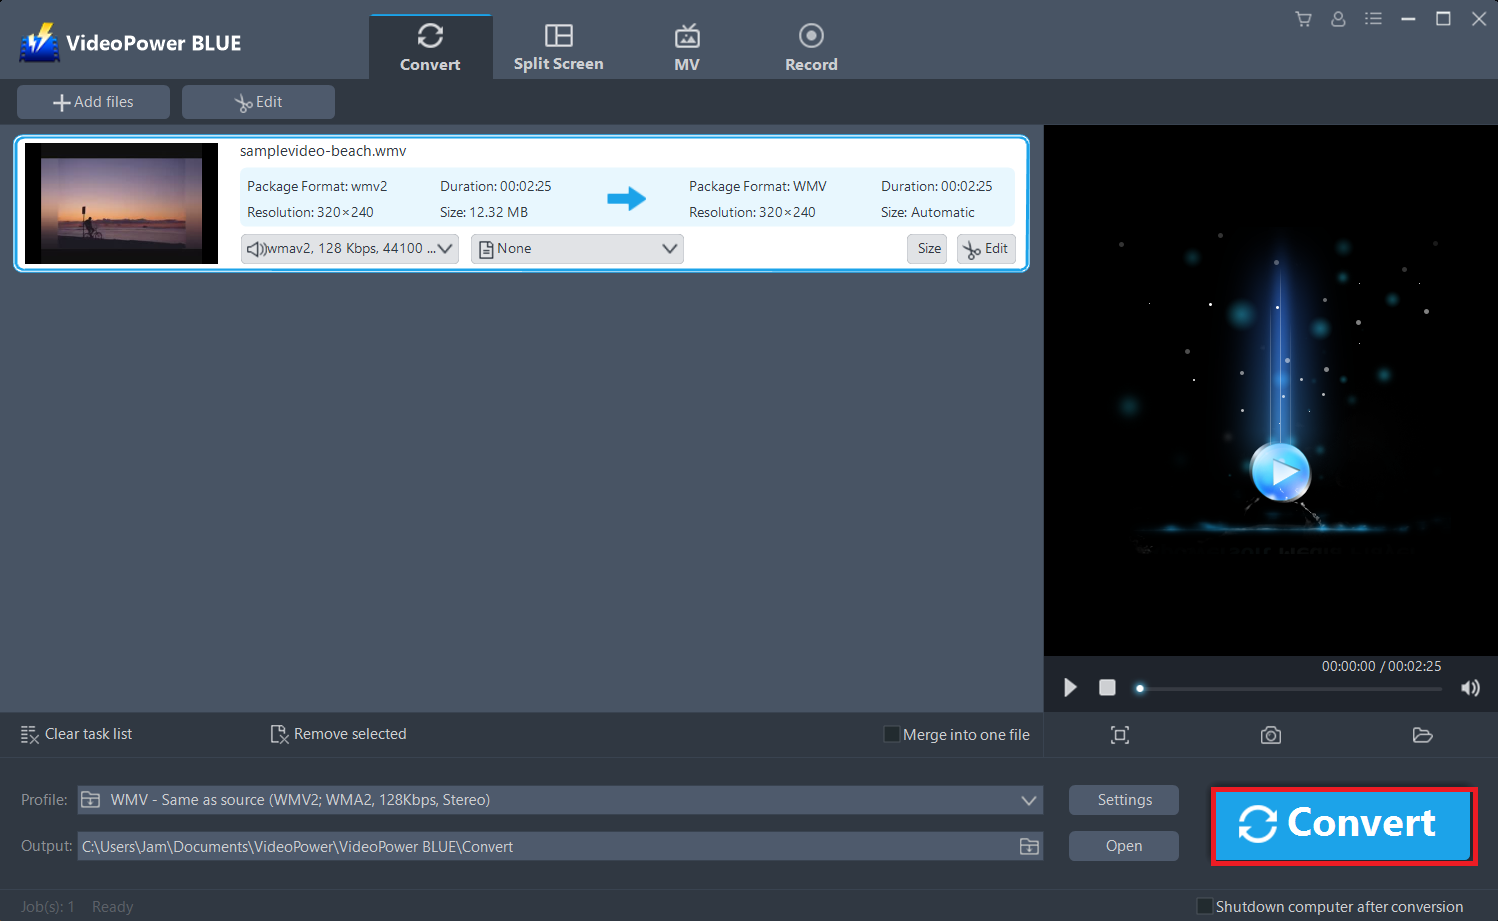
Run the program if you have installed the video converter software – VideoPower BLUE successfully on your PC. You can directly import the MOV file to the program by clicking the “Add files” button or by drag-and-drop the file to the interface.
Step 2: Edit the MOV video.
If you need to edit the file before converting, just follow the instructions below.
The imported MOV file is displayed in the list.
Click the “Edit” button on the right side of the file.
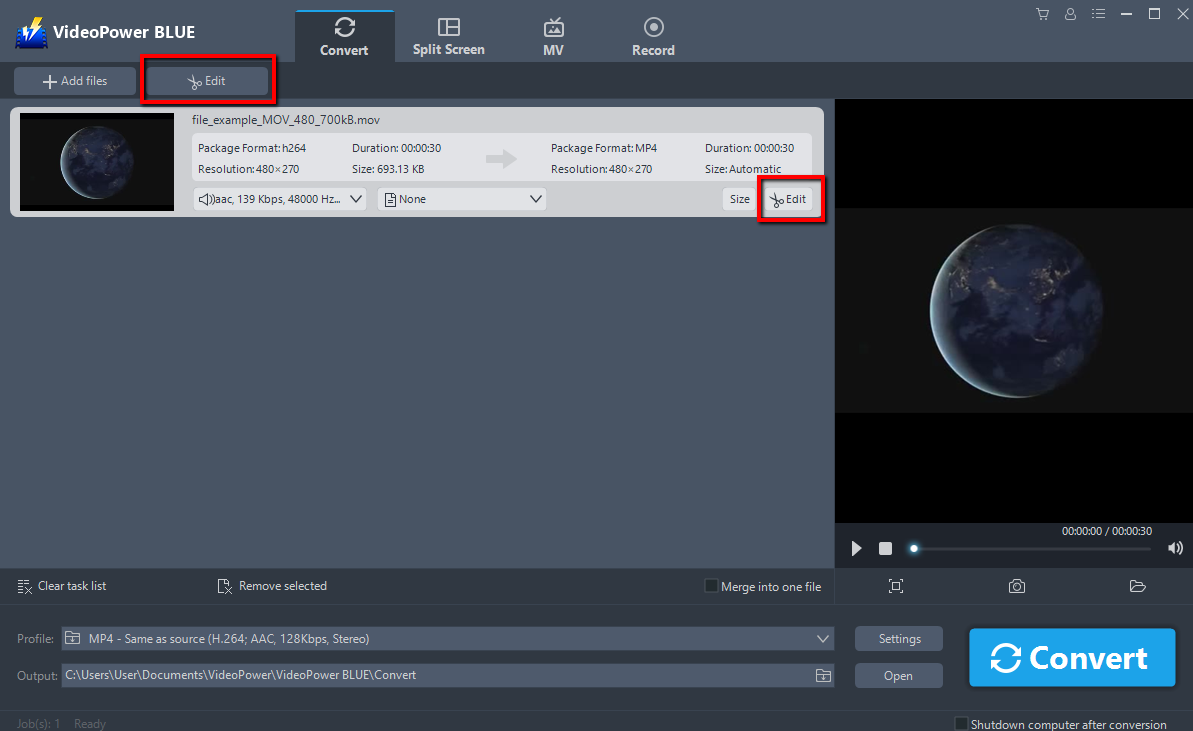
The built-in video editor will pop up, with its help, you can make the perfect movie. Adjust speed and volume, trim, cut, crop, rotate or flip videos. Add effects, subtitles, and watermark while adjusting brightness, contrast, and saturation that will make editing conveniently easier.
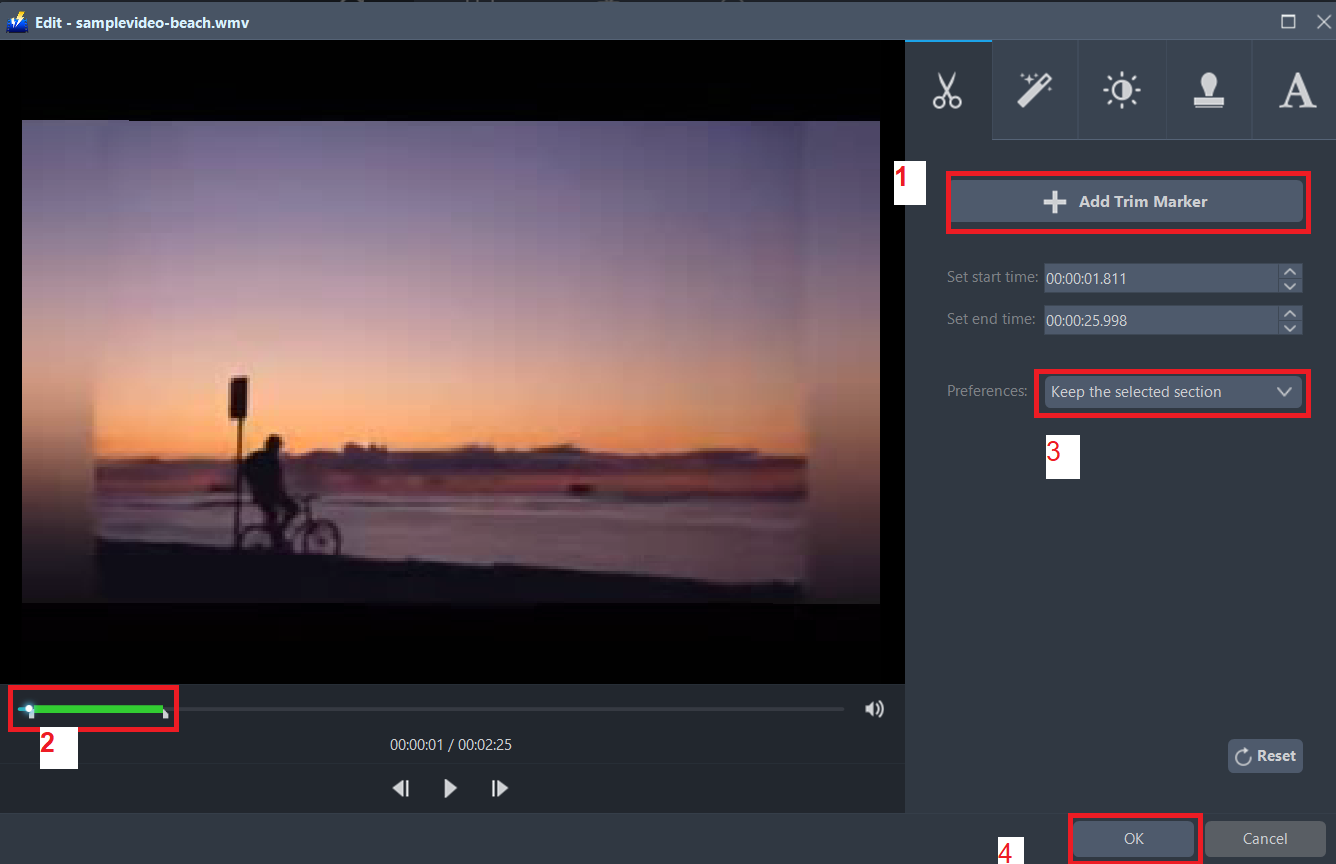
For example, you can trim your video as showing below:
1) Click “Add Trim Marker”.
2) Drag the mark as shown below to select the part you want to cut. If you want to select multi-sections, please repeat 1 and 2.
3) Choose “Keep the selected section” or “Delete the selected section” from “Preferences”.
4) Click “OK” to save the setting.
Step 3: Convert MOV to WMV format.
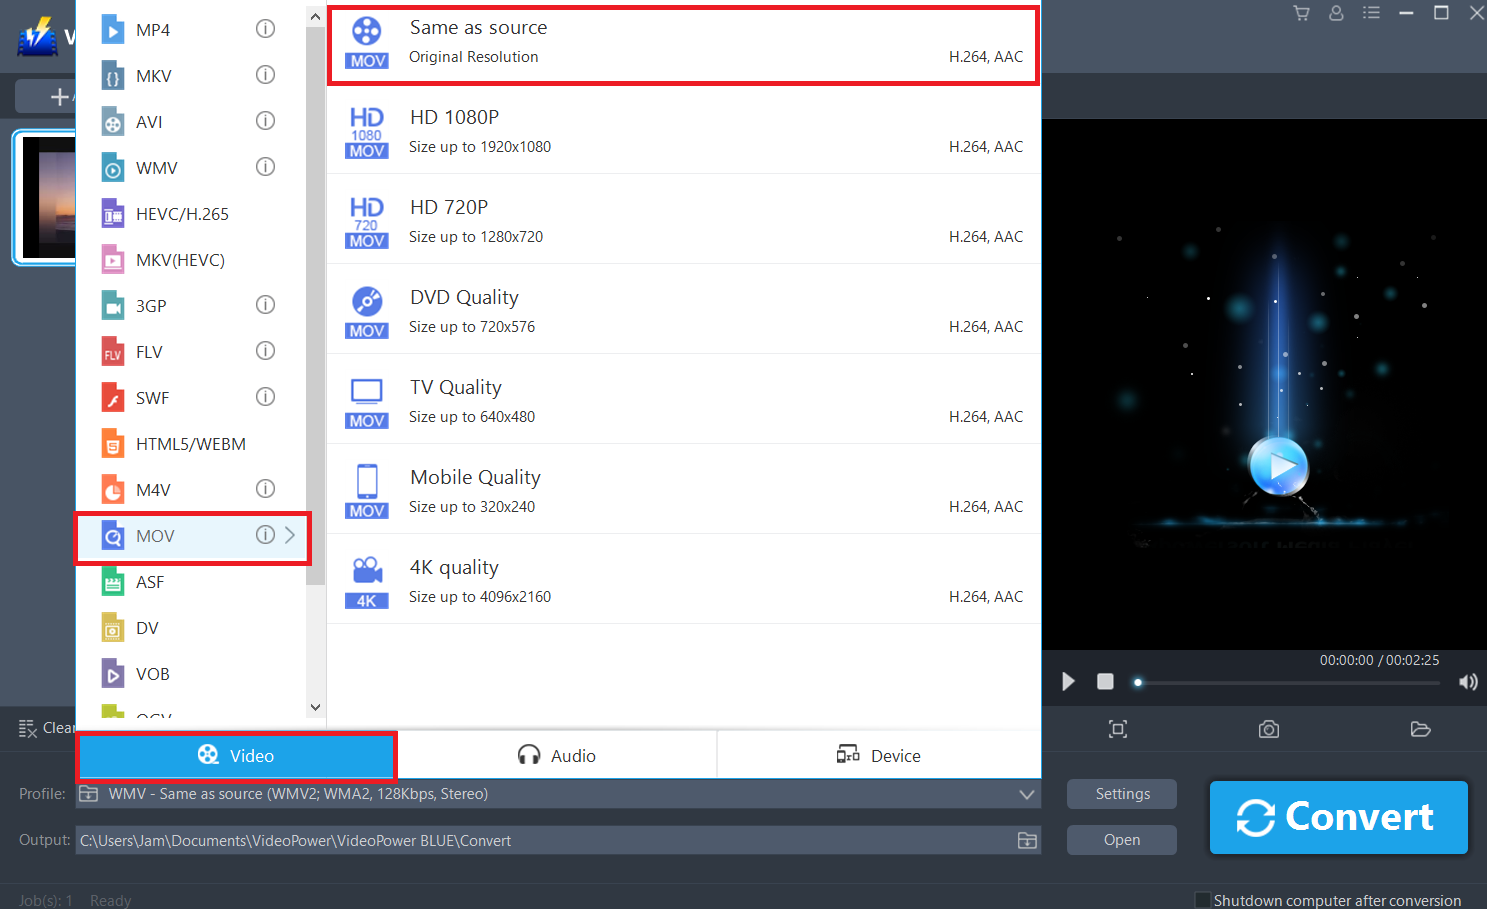
3.1 Set the output format
Click to open the “Profile” drop-down menu, then choose the format you want from the profile list. Here choose “Video”, “MOV”, and quality “Same as source” or other options like “HD”, “4K quality” as per your need.
3.2 Start Conversion
Return to the file list.
Click the “Convert” button, then the converted file will be saved in the default output folder.
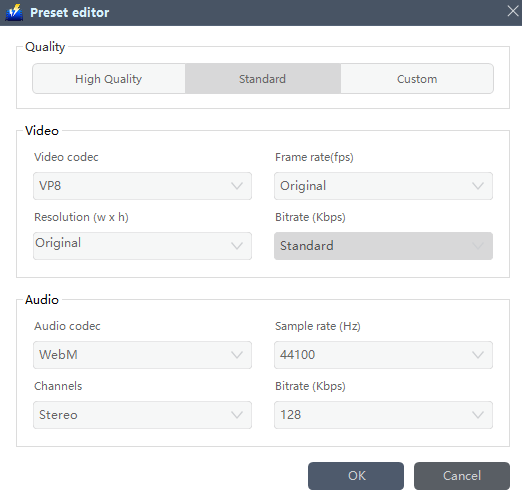
You can also customize frame rate, bitrate, codec, etc. manually. Just click the “Settings” button to enter the “Preset editor” window, then you can change the value and click “OK” to save the settings.
The program will pop up a window to inform you once the conversion is completed. Click “OK” to open the folder of your saved converted MOV files.
Conclusion:
Converting files into another file format can be complicated and exhausting but through this article and conversion software like VideoPower BLUE, then it’s easy peasy.
This is a wonderful software that has far advanced features compared to other means of video conversion. VideoPower BLUE, a powerful converter that support any video formats with video editing function, enables adding subtitles, apply watermarks, make MV and split-screen videos.