





Tips Index
FLV video format is a common format because of its small size and FLV format compression and conversion are convenient. It occupies a dominant position in the network transmission of video and other data. Many well-known video websites, such as YouTube, Tudou, and Youku use FLV as an online video playback format.
Many movies and TV dramas downloaded on the video websites are in FLV format. Here comes the problem, if you want to copy these downloaded FLV videos to your iPhone for watching, you have to transfer it to a format compatible with your iPhone.
Therefore, you need a format converter like VideoPower BLUE to help you out. In addition to converting FLV into MOV, this software also supports output: MP4, MKV, AVI, WMV, 3GP, WEBM, M4V, and so on.
VideoPower BLUE is a powerful software that has multiple functions such as screen recording, basic video editing, and conversion. You can try to use the software for free by downloading its trial version below.
Download and install the software by clicking the download button to start the conversion.
Step 1: Add the FLV file to the program
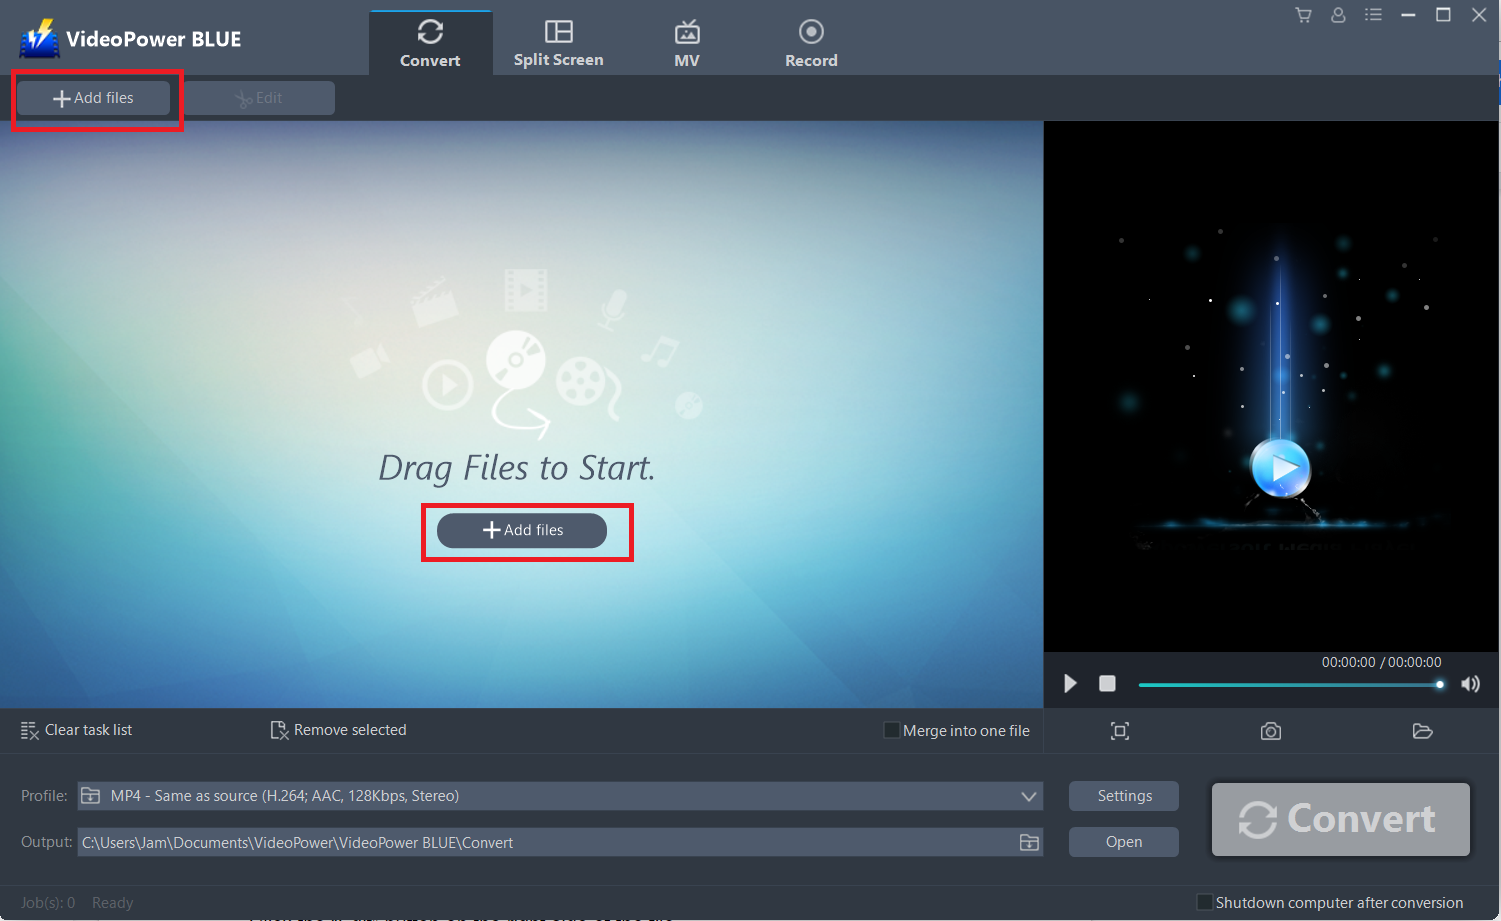
Run the program if you have installed VideoPower BLUE successfully on your PC. Click the “Add files” button to select one or more files from your PC, or directly drag-and-drop the selected files to the interface.
Step 2: Edit the FLV video
2.1 Open Editor
If you want to edit the video before converting, just follow the instructions below.
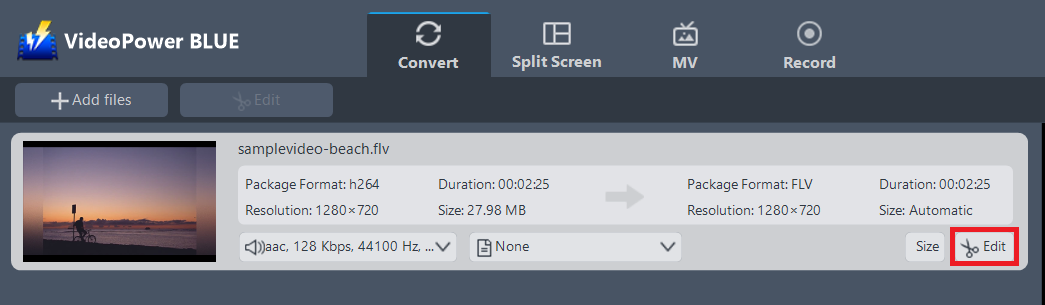
The imported FLV file is displayed in the list.
Click the “Edit” button on the right side of the file.
2.2 Edit video
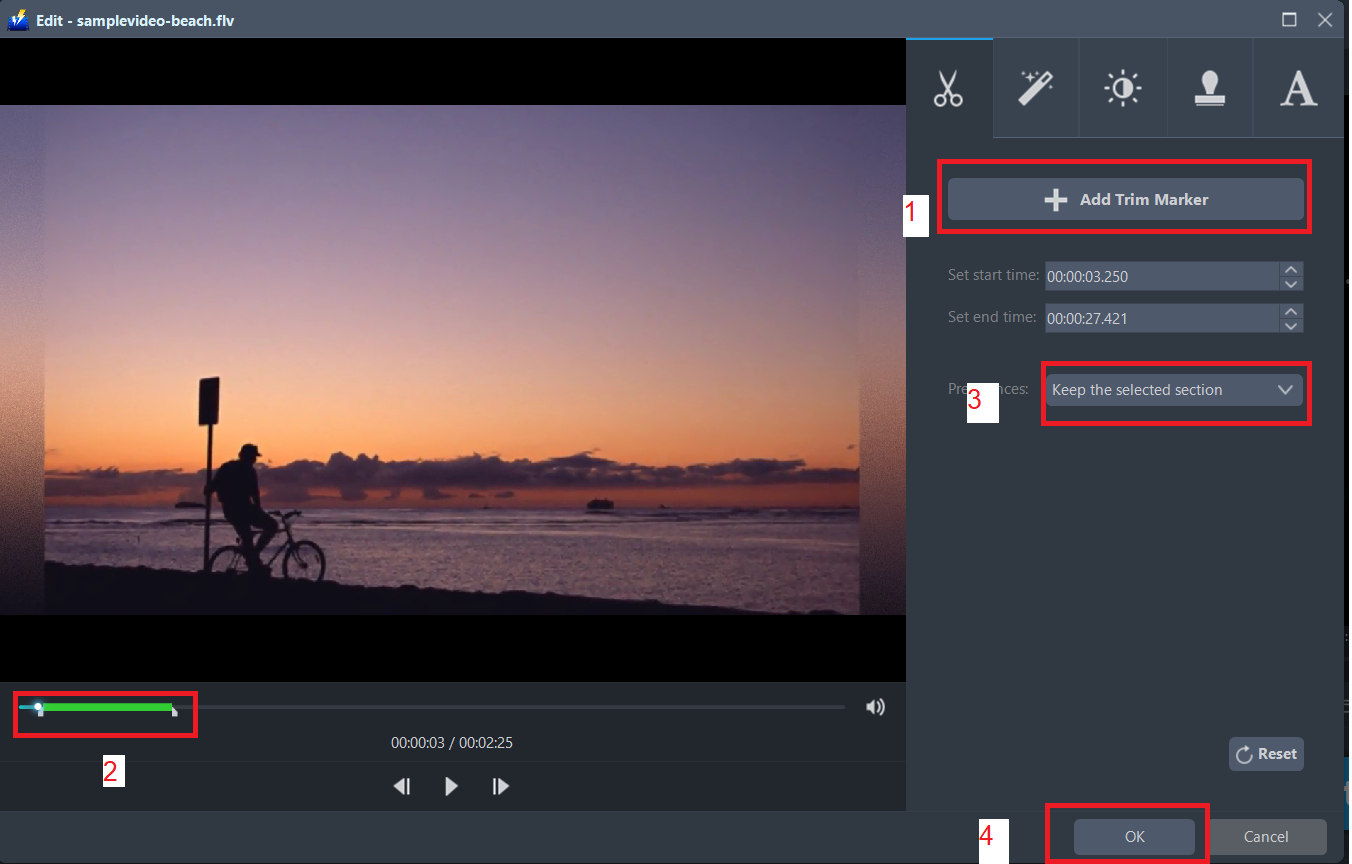
The built-in video editor will pop up, with its help, you can make the perfect movie. Adjust speed and volume, trim, cut, crop, rotate or flip videos. Add effects, subtitles, and watermark while adjusting brightness, contrast, and saturation that will make editing conveniently easier.
For example, you can trim your video as showing below:
1) Click “Add Trim Marker”.
2) Drag the mark as shown below to select the part you want to cut. If you want to select multi-sections, please repeat 1 and 2.
3) Choose “Keep the selected section” or “Delete the selected section” from “Preferences”.
4) Click “OK” to save the setting.
Step 3: Convert FLV to MOV
3.1 Set the output format
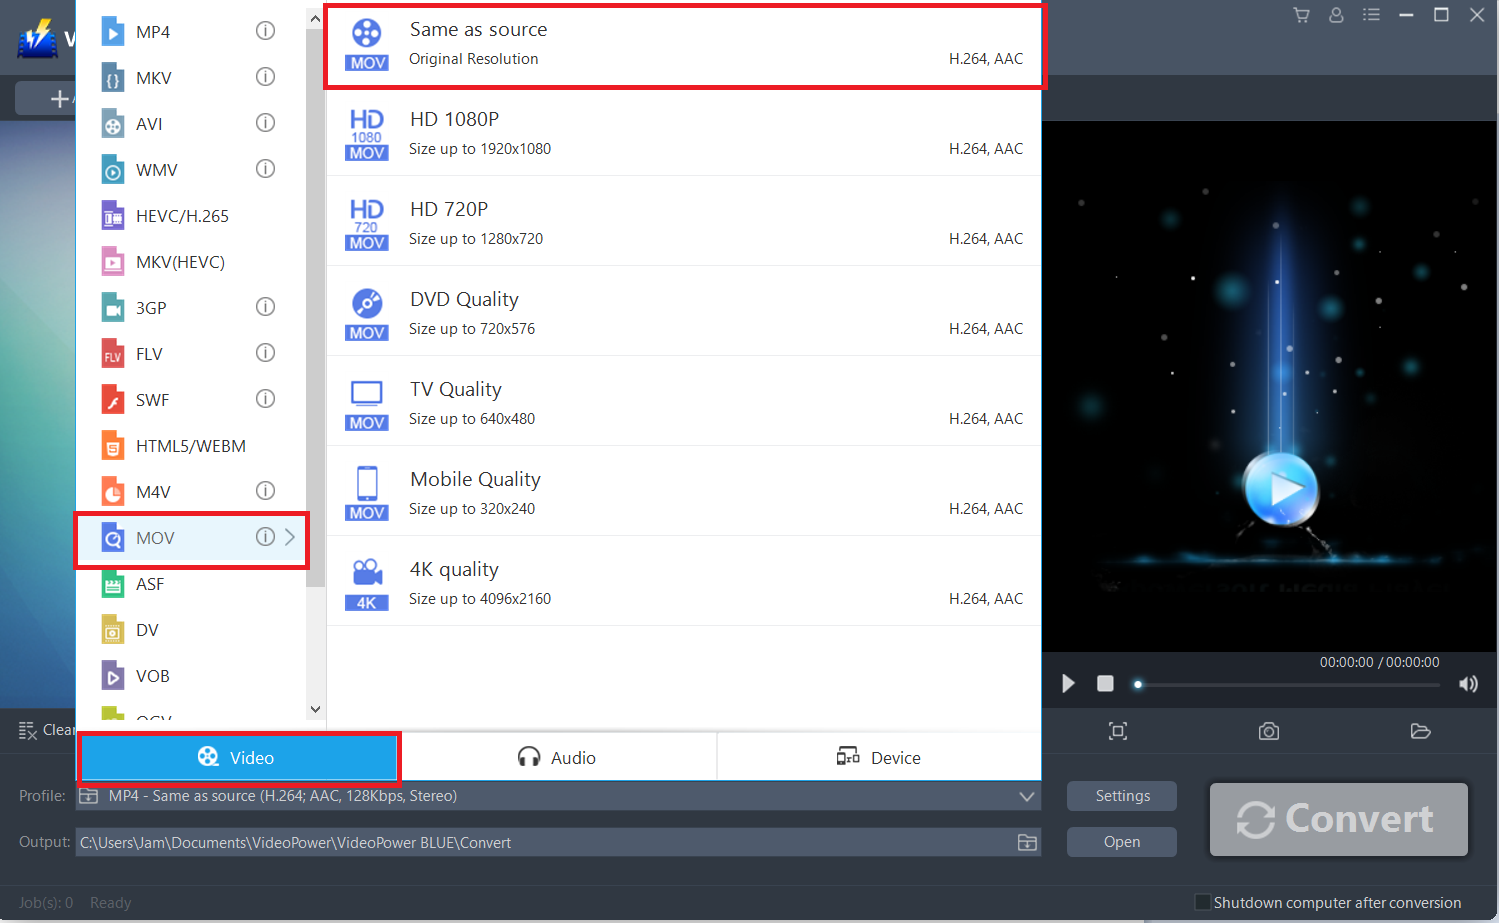
1) Click to open the “Profile” drop-down menu, then choose the format you want from the profile list.
2) Here you can click “Video” and then “MOV”.
3) Here choose quality “Same as source” or other options like “HD”, “4K quality” as per your need.
You can change the output folder by clicking the folder icon and then choose a local folder where to save your converted files.
3.2 Start Conversion
Return to the file list.
Click the “Convert” button, then the converted MOV file will be saved in the default output folder.

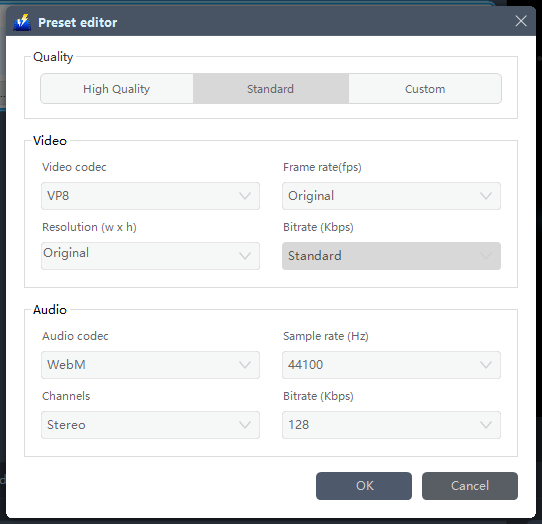
You can also customize frame rate, bitrate, codec, etc. manually. Just click the “Settings” button to enter the “Preset editor” window, then you can change the value and click “OK” to save the settings.
3.3 Complete
The program will pop up a window to inform you once the conversion is completed. Click “OK” to open the folder of your saved converted MP4 files.
Conclusion:
The good news in converting FLV to MOV is you can use the all-powerful VideoPower BLUE and watch the videos on QuickTime or other media players that support MOV.
VideoPower BLUE has a built-in video editor that will enable you to edit slideshows or videos, apply watermarks, effects, and other basic video editing options such as trimming or cropping.
Moreover, it has a split-screen tool for your photos and videos and a screen recorder which allows you to capture any on-screen activity on your computer. There’re so many advanced functions equipped in this program, which offer more options for you to convert and edit media files.


